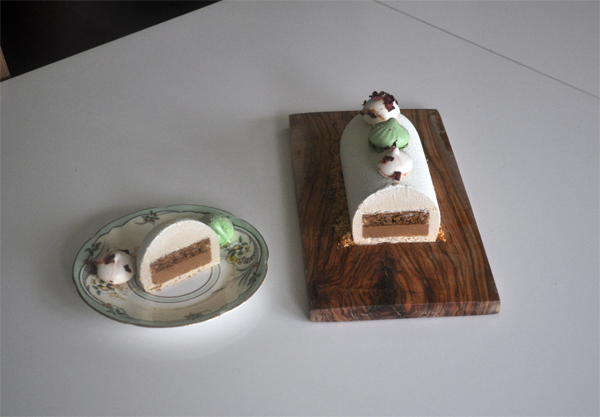
Easter Layer Cake 2017
Easter layer cake with mixed spice, almond buttercream, pistachio ganache and filled eggs


Making actual, proper cakes is something I don't do very often. You guys that do this day in day out are legendary; it's hard work!
A few weeks ago, I made a lemon version of this for Mother's day (are we really already at Easter?), so I thought I'd do it again with an Easter twist. I've provided a list of alternative ingredients at the bottom incase you want to make the lemon version instead.
Ingredients (Makes 1 individual cake, serving 8 people with lots of meringues left for the chef)
For the cakes (you'll need to make 2 and split them both)
- 350g Self-raising flour
- 350g Unsalted butter
- 350g Golden caster sugar
- 6 Whole large eggs
- 10g Baking powder (about 2 teaspoons)
- 10g Mixed spice (about 2 teaspoons)
For the white chocolate pistachio ganache
- 100g Shelled green pistachios or 2 tablespoons of pistachio butter
- 300g Whipping cream
- 300g White chocolate coverture (chips or callets if possible - this is what I'm using at the moment)
For the almond buttercream
- 120g Egg whites
- 200g Caster sugar
- 250g Unsalted butter
- 1 teaspoon of a strong almond extract
For the white chocolate drip ganache
- 150g Whipping cream
- 130g White chocolate coverture
- 20g Cocoa butter
- Paste or powder food colouring (I've used Wilton Ivory here)
For the meringues
- 75g egg whites
- 150g caster sugar
- Blue paste food colouring or any you feel like
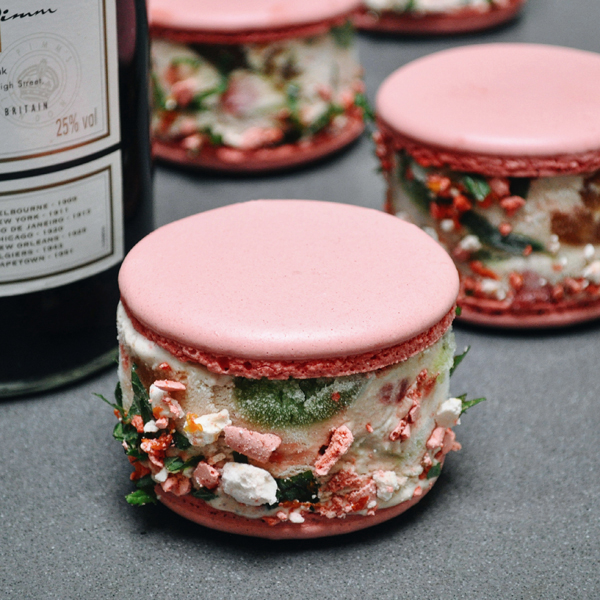
Filled Eggs
For the tempered dark chocolate
- 250g Dark chocolate (at least 55% - this is what I've used here)
For the tempered white chocolate
- 250g White chocolate coverture
White chocolate passion fruit ganache filling
- 150g White chocolate coverture
- 150g Whipping cream
- 15g to 25g Passion fruit powder to your own taste (This one from Sous Chef is especially good)
Dark chocolate Manhattan ganache filling
- 150g Dark chocolate (at least 55%)
- 100g Whipping cream
- 30g Bourbon (I've used Four Roses Small Batch)
- 20g Sweet Vermouth (I've used Antica Formula)
- A few dashes of Angostura or other bitters
Other bits
- Gold and silver edible spray
- Dark rum for soaking into the cake layers
Equipment
- 18cm diameter, 8cm tall cake tin
- Plastic or other small egg mould
- Disposable piping bags and nozzles
- Silicone mat
- Stand mixer
- Sieve
- Stick blender
Make the cakes
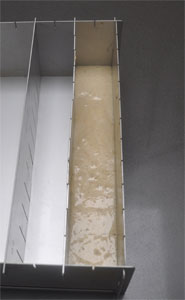
Pre-heat your oven to 170C, and line two (or one if you have to do it twice in the same tin like me) with baking parchment. Spray the insides of your tin and parchment with spray oil, cake spray or lightly butter the surfaces.
Place the butter in your stand mixer with the sugar and cream until the butter is soft. Sieve in the flour and baking powder, then add the eggs and mixed spice. Mix for a few minutes until you get a nice smooth mixture.
Pour half the mix into each cake tin, then level off with a spatula and bake for 35 to 40 minutes (until a chopstick inserted into the middle of the cake comes out clean).
Remove from the oven, and let cool for 10 minutes; then remove from the tins onto a wire rack and leave to cool completely.
Make the pistachio ganache (for both inside the cakes and one of the filled eggs)
If you're using shop-bought pistachio butter, skip this first section.
Pre-heat your oven to 200C, then spread the pistachios out on a tray and toast for 10 minutes
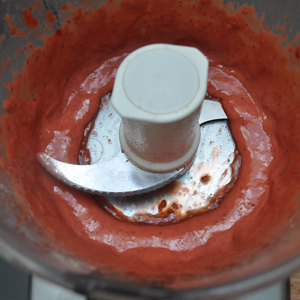
Pour the nuts into a food processor, and blend for 10 minutes until the oils are released and the nuts turn into butter
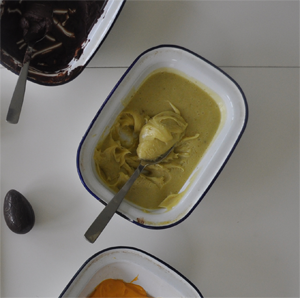
Place the double cream in a heavy bottomed pot with around two tablespoons of the pistachio butter and mix with a spatula until combined.
Put the while chocolate into a heat-proof bowl (and chop if you're not using callets).
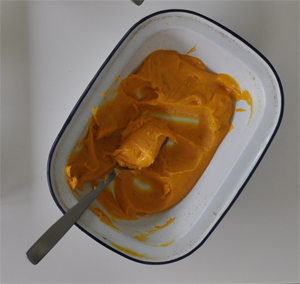
Heat the cream gently until it starts to bubble, then immediately pour over the white chocolate. Leave it for two or three minutes, then blend with your stick blender until all the white chocolate has melted. Finally, and it should still be warm at this point, add the unsalted butter and blend again.
Pour into a tray, cover with cling film and let set in the fridge for an hour.
Make the passion fruit ganache (for inside one type of filled eggs)
Place the double cream in a heavy bottomed pot and add the passion fruit powder. Stir to combine (note - you can use fresh passion fruit juice here, but it's just not as intense. If you use it, reduce the amount of cream by the weight of juice used)
Put the white chocolate into a heat-proof bowl (and chop if you're not using callets).
Heat the cream gently until it starts to bubble, then immediately pour over the white chocolate. Leave it for two or three minutes, then blend with your stick blender until all the white chocolate has melted. Finally, and it should still be warm at this point, add the unsalted butter and blend again.
Pour into a tray, cover with cling film and let set in the fridge for an hour.
Make the Manhattan ganache (for inside one type of filled eggs)

Place the double cream in a heavy bottomed pot with the vermouth, bourbon and bitters. Stir to combine.
Put the dark chocolate into a heat-proof bowl (and chop if you're not using callets).
Heat the cream gently until it starts to bubble, then immediately pour over the dark chocolate. Leave it for two or three minutes, then blend with your stick blender until all the chocolate has melted. Finally, and it should still be warm at this point, add the unsalted butter and blend again.
Pour into a tray, cover with cling film and let set in the fridge for an hour.
Temper and make the dark chocolate shells
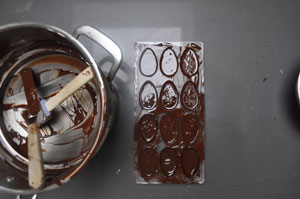
Prepare a pot of water and place a heatproof bowl over the top. Weigh out your chocolate, then place two thirds into the heatproof bowl and reserve the rest.
Using a thermometer, heat and stir the chocolate until it reads between 45C and 50C.
Immediately remove from the heat, and mix in the remaining third of chocolate (chopped or callets) and stir vigorously until mixed. As you're doing this, take occasional temperature readings - when it hits 31 to 32C it's ready to use. If you dip below, very gently heat again over the bain marie - but don't exceed this temperature. If you're struggling to make the last third of the chocolate melt, use a stick blender to help.
When the chocolate is ready, pour it into the shell mould so that it fills them entirely - the amount given in this recipe is for the type of mould I'm using - you may need more or less.
This part all proper chocolatiers will want to collectively punch me in the face for - place your mould into the freezer for 60 seconds. This will help firm the outside of the chocolate shell.
When time is up, remove and pour the excess chocolate out, leaving a layer of around 5 or 6mm around the outside. Place back into the freezer for 5 minutes.
This time your chocolate should be completely solid - so scrape the edges of the mould with a sharp knife to release the shells (keep any shavings for decoration at the end of the cake), then flip the mould and tap hard on your work surface. If you've got a good temper (the chocolate, not your own demeanour) they should fall straight out. You may need to tap or drop the mould a few times to release them all. Reserve the shells for the next stage.
Temper and make the white chocolate shells
Follow exactly the same process above, except that you should wait until the temperature is 28 to 29C until pouring it into the mould.
Fill the shells
Remove the ganaches from the fridge, and spoon the Manhattan one into the dark shells. Smoothen with a spatula, but leave a little extra over the shell's edge. Press two halves together until some of the ganache leaks out, then take a paper towel and rub the excess off around the edge so that the shells stick together.
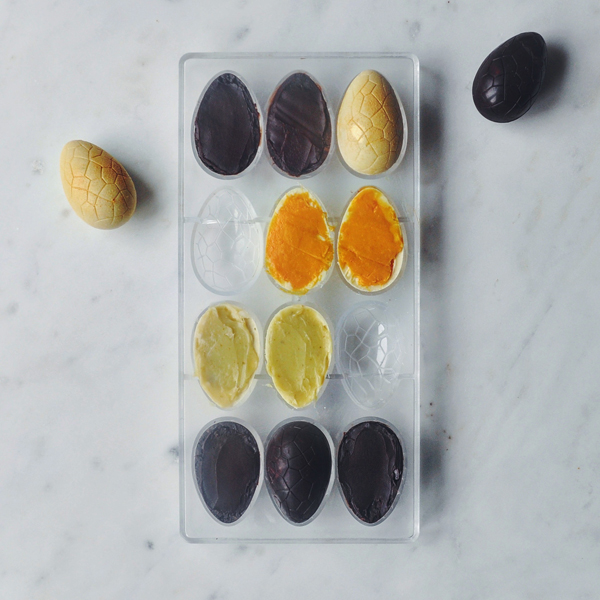
Repeat with the pistachio and passion fruit ganaches - you can mix and match these two between dark and white chocolate if you like; the Manhattan one only works well in the dark shells though!
Reserve the eggs in the fridge
Split and layer up the cake
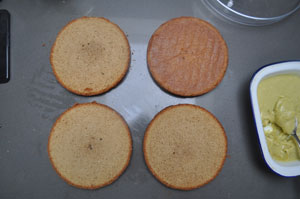
Take each of the two cakes, then cut the top off so that you have an even top and bottom. Split each of these in two, so you end up with 4 pieces of equal height.
Use the bottom of one cooked cake as the base, and the bottom of the other cooked cake as the top so you can really ensure a decent flat surface.
Place your first layer on a board or cake stand, then pour 3 tablespoons of dark rum over the surface as evenly as you can.
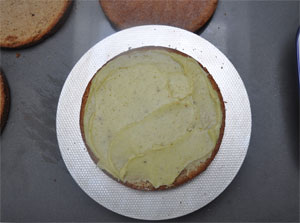
Spread around two tablespoons of the pistachio ganache over the cake, then level it up. Repeat with another two layers, then finally place the last layer over the top so you have a 4 layer cake with 3 layers of ganache sandwiched between. Place sin the fridge to firm up.
Make the meringues
This is the brilliant Meringue Girls technique, which gives a chewy and delicious result.
Heat your oven to 200C, then place the caster sugar into a try lined with baking paper for 7 minutes.
When time's up, reduce your oven 100C.
Place the egg whites in the bowl of your stand mixer and whisk until firm peaks form. Gradually shower in the heated sugar, then keep whisking until the meringue is glossy.
Prepare a tray with a silicone mat, and piping bag with the food colouring - you want to take your piping bag, then turn it inside out, except for a tiny bit where you'll put the piping nozzle. Place this over a tall bottle, then grab your food colouring paste and paint 4 evenly spaced vertical lines from the top to the bottom of the bag. Remove from the bottle, place your piping nozzle in, and invert back the other way.
Fill the piping bag with your meringue, then pat it down with your hands to both remove the excess air and also get the colouring going. Tie, fold or clip the top then cut open the end and push out the nozzle.
Pipe evenly spaced meringues onto the silicone mat, pulling upwards to get a taller meringue. Leave a centimetre or two between each one.
Place in the oven for around 40 minutes
Make the drip ganache
Do this first, as it needs to thicken to exactly the correct consistency, and that can take some time.
Place the cream in a heavy bottomed pot. Weigh the chocolate and cocoa butter into a heat-proof bowl.
Heat the cream until it's bubbling, then pour onto the chocolate. Leave to stand for 2 or 3 minutes, then mix with a spatula or blend with a stick blender. Drop in the paste - I've used Wilton's Ivory colour here. Once completely combined, place in the freezer to firm up.
This is the trickiest part of the recipe; if you've not left it long enough, the ganache will be too runny and simply drip off the cake leaving a mess. If it's too thick it won't drip at all. You want it to be relatively heavy, and closer to fully setting than being liquid. It can take a couple of hours in the freezer - so wait it out, but check regularly. Get on with the buttercream while you're waiting.
Make the buttercream and ice the base cake
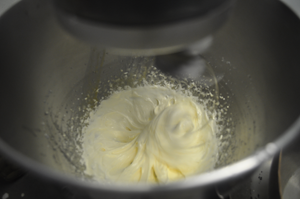
Place a pot of water on your hob, and heat until simmering. Weigh the egg whites and sugar into a bowl, then place this over the simmering water. Immediately start to whisk - and I'd recommend a hand-held electric whisk at this point. Keep going until it whips to a stiff peak.
Transfer to your stand mixer bowl, and whisk again. While it's still hot, start dropping the butter in piece by piece until it's all gone. The heat will melt the butter, so it won't cream straight away - but give it 5 or 10 minutes at high speed and you'll end up with a smooth buttercream. Before you stop whisking, add the almond essence.
Finally, ice the cake by plastering the outside and top with buttercream, then placing back in the fridge for 20 minutes. When time's up, remove the cake from the fridge and you'll find the buttercream has firmed up slightly. Begin to smoothen the sides and top with a long spatula. If you've got one of those rotating cake stands, use that by placing the spatula up against the cake and spinning the base instead. You can keep dipping your spatula into warm water if you want to make it really smooth. The top is less important to get totally perfect, as the ganache will cover any minor imperfections.
Place back in the fridge until the drip ganache is ready.
Drip the ganache
When the ganache is just about moving when you spoon it, it's ready. Start to spoon small amounts near the edge; if it starts to drip down the cake all the way to the bottom, it's still not firm enough - so return to the freezer. If it starts to drip and stops somewhere down the buttercream, you're good.
Continue doing this all around the cake using more or less each time so the drips are different lengths.
When you've gone all the way around, use the remaining ganache to fill the top of the cake, then place in the fridge to solidify one last time
To serve
Place a toothpick into the bottom of each egg you're adding to the cake. If you've got / are using gold and silver edible spray, spray them at this stage. Stick 6 or 7 eggs on top at different heights.
Place some meringues around randomly, then finally throw over some hundreds and thousands.
If you kept any of the chocolate scrapings, place these around the bottom of the cake.
Hope you enjoy this one and Happy Easter!
Lemon variation
- Substitute the mixed spice for the zest of two lemons and the juice of half in the cake mix
- When layering, substitute the rum for gin mixed with lemon juice
- When making the buttercream, substitute the almond essence for more lemon zest and a 1/2 teaspoon of vanilla powder or extract
- Instead of the pistachio ganache between the cakes, make or buy lemon curd and spread between each layer. Here's my recipe from way back in post #2
- Instead of the filled eggs, make some lemon macarons filled with curd and whipped cream. Here's one receipe for the shells from post #19
- Substitute out the random colours for yellow!

Coffee with Hazelnut Parkin
Italian meets Middle East on a trip to Yorkshire
I got pretty excited this Christmas ... a new drum machine, some comfy socks. Don't tell me you don't love a good sock, we all do.
One of the non-sock related items I received this year was a Silikomart Jr. Pillow. Now that January's finally up (phew) I've had a chance to road test it.
This recipe will seem like a bit of an odd ball, but stick with me - the flavours work really well together.
Putting ginger in coffee is common in Yemen and other parts of the Middle East, but was also done in 17th century England. Since I have a tiny amount of Yorkshire blood in my veins, I thought mixing up some Espresso mousse with Parkin would make a great combo. It's also served with those other classic babylonian coffee pairings - rose and cardamom.
As noted, this recipe is based on a Jr. Pillow mould - but any cake or loaf tin about 20 cm long, 7cm wide and at least 5cm deep would work too.
Ingredients (Makes 1 individual cake, serving 6 people with lots of meringues and some parkin for the chef)
For the Hazelnut Parkin
- 50g blanched hazelnuts
- 100g unsalted butter
- 125g self-raising flower
- 20g caster sugar
- 20g muscovado sugar
- 40g treacle
- 100g golden syrup
- 1 tsp ground ginger
- 35g whole egg (approximately half a large egg)
- 5g whole milk
- Pinch of salt
For the white chocolate espresso bavaroise
- 60g freshly brewed espresso
- 65g full fat milk
- 125g white chocolate couverture
- 30g egg yolks
- 15g caster sugar
- 190g whipping cream
- 3g gelatine (about 1 1/2 sheets)
For the coffee Crème au Beurre
- 50g caster sugar
- 15g water
- 30g egg yolks
- 30g egg yolks
- 110g unsalted butter
- 10g espresso powder or instant coffee
For the white chocolate flocking
- 200g white chocolate couverture
- 140g cocoa butter
- 4 teaspoons of superwhite food whitener (optional)
For the cardamom and rose meringues (optional)
- 4 large egg whites
- 130g caster sugar
- 130g icing sugar
- 5 cardamom pods
- 1tsp rose flavouring
- Dried rose petals
- Red and green food colouring
Equipment required
- Jr. Pillow mould or similar
- Thermometer
- Piping bags and nozzles for plating
- Silicone mat
- Stand mixer
- Sieve
- Stick blender
- Spray gun
Make the parkin
This is the best bit, as your kitchen will smell unreal.
Roast the hazelnuts at 200C for around 10 minutes, then crush roughly with your rolling pin or whizz quickly in a food processor.
Pre-heat the oven to 140C, then line a small brownie tin with greaseproof paper and some baking spray (or butter if you don't have any).
Place the butter, treacle, sugars, golden syrup and salt in a pot and, over a medium heat, stir until it's a thick liquid. Remove from the heat and leave to cool slightly.
Sieve the flour into a bowl, then add the ginger and roasted hazelnuts. Pour the sugar liquid over and beat with a spatula until it's all combined. Finally, beat in the egg and milk, then pour the lot into the tray.
Bake for 50 minutes, then remove from the oven and leave to cool completely.
Make the coffee Crème au Beurre
Place the egg yolks in the bowl of your stand mixer and whisk until pale. While this is happening, put the caster sugar and water in a pot, and heat to 121C
As soon as you're up to temp, carefully pour the syrup over the yolks and leave to whisk until it gains volume and is reasonably cool
Start adding the butter, piece by piece, with the whisk still running.
When all the butter has combined, take your espresso powder or instant coffee and blend it with a small amount of water to form a paste. Pour this into the mixture, and continue to whip until everything is combined.
Take your butter out of the mixer, and place into a tray of some sort - I used another brownie tin. Using a spatula or palette knife, form the butter into a block the same size as your mould. It should be around 1cm tall. Place in the fridge to firm up while you continue.
Make the espresso bavaroise
Soak the gelatine in cold water and set aside. Weigh your milk and espresso out into a heavy bottomed pan.Weigh out the white chocolate into another bowl with a fine sieve on top, and again set aside.
In a 3rd bowl, place the egg yolks and whisk them with the caster sugar until they become pale. Finally, get your thermometer ready.
Put the espresso milk over a medium heat until boiling. Carefully temper the egg yolks by pouring a little milk over them while whisking. Continue to add more until all the milk has been combined with the yolks.
Pour this back into the pan and keep stirring with a wooden spoon. Read the temperature - raise it until the thermometer reads 82 degrees C then immediately squeeze the liquid off the gelatine and whisk in. Pour the mixture through a sieve onto the chocolate. Let this sit for a few minutes, then use a stick blender to blend everything to ensure it's totally smooth.
When you're happy it's all blended, set aside in the freezer for 10 minutes to firm up.
Remove from the freezer, and whip the cream until quite thick - enough to hold its shape for a few seconds if you drop some from a spoon. Fold the cream into the custard.
If you're using the Jr. Pillow, pour the bavaroise up to the half way point of the mould. If you're using anything else, fill your loaf tin or other mould up to around 1.5 cm. Place in the freezer for at least an hour and reserve the rest of the bavaroise at room temperature. You might need to beat it now and again to stop it from setting during the hour.
Forming the rest of the cake
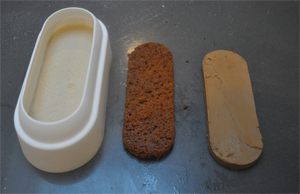
Remove the mould from the freezer. Again if you're using the Jr. Pillow it has a cutter in the top of it which allows you to chop out layers that fit inside it (yes, it's massively cool). Take this cutter and chop out identical pieces of parkin and the Crème au Beurre.
If you're not using the mould, measure and cut pieces of both layers which are around 1cm less wide than your original bavaroise layer.
Either way, place the Crème au Beurre on the parkin and line them up, then put them in the centre of the frozen bavaroise. Pour over the remaining bavaroise, making sure it drips down the sides and into any un-filled spaces. Put this back in the freezer for another hour or two to set.
Make the meringues (optional)
This bit's optional, but the meringues are delicious so I'd recommend it if you have time
Pre-heat your oven to 110C.
Place the egg whites in the bowl of your stand mixer and whisk until soft peaks form. Shower in the caster sugar at this point, then keep whisking until the meringue is glossy.
Stop the mixer, then sieve in the icing sugar. On the lowest speed, whisk again for 15 seconds (so the sugar doesn't fly up in the air) then push the speed up to max for another 30 seconds until the sugar is fully combined
Split this mix between two bowls then add red colouring to one, green to the other. Pour your rose flavour into the red mix. For the cardamom, split the pods by bashing them in a pestle and mortar. Remove the shells, then bash again until a reasonably fine powder is formed. Place half the powder into the green bowl and mix thoroughly.
Put each mix in a piping bag with whatever nozzle you prefer, then pipe small meringues onto silicone trays. Cover the rose ones with dried rose petals if you have some, and dust the cardamom ones with the remaining cardamom powder.
Place in the oven for an hour, then remove and leave to cool
Spray
Put the chocolate, cocoa butter and superwhite (if using) in a heatproof bowl and place over a simmering pot of water.When everything looks completely melted, blend with your stick blender just in case then pour into your spray gun.
Take out a big box - a 12-hole wine box is a good size - and cut off top flap. Lay it down so you have flaps on the left, bottom and right. Place a chopping board in the box, then put a layer of greaseproof paper on top.
Remove the cake from the freezer, and release it from the mould.
If you're ready to spray, put your cake in the box and turn on the gun. When flocking, I normally rotate the cake 3 times to make sure it has built up enough.
Return to the freezer to harden.
Reserve any unused spray for another time (it keeps quite well for a month or so in an airtight box).
To serve
Remove the cake from the freezer around an hour before you want to eat. If you want to cut slices, I'd recommend not doing that any later than 30 mins after it has come out of the freezer or it will start to melt.
Serve slices with the meringues on the side (if using) and enjoy this act of randomness.
Vanilla
Inspired by the Philippe Conticini classic from LPDR
Grand Cru Vanille. Grand. Cru. Vanille.
If you've ever been to La Pâtisserie des Rêves in London or Paris you'll know what I mean. It's a completely unassuming cake, which you'd perhaps not look twice at given the treats under the cloches ... then you try it and you realise (as long as you actually like vanilla) that it's one of the greatest pieces of pâtisserie ever made. The real recipe, however, is notably absent from the LPDR book - probably because it's a closely guarded secret.
I've wanted to recreate it for years, and have commented many times to my Instagram buddy and pâtisserie genius Alvin about attempting it.
While re-creating it would be cool, I thought - you know, since LPDR's version is actually perfect - that wouldn't be wise as it would only cause disappointment. So, instead, I've re-imagined it. A bit.
I made this one for my mum's 72nd Birthday this week. The whole cake was polished off; good job the recipe makes two.
You can reduce the complexity by omitting the decorations if you prefer. My preference was to use a Silverwood adjustable cake tin for this (link in the ingredients section below) but you can easily adapt it if you have two 30cm tins that fit inside each other.
Ingredients (Makes 2 individual cakes, each serving 4 people. You'll also have left over salted tuilles and Feuilletine chocolate pieces to enjoy later)
For the Joconde layer
- 62g icing sugar
- 63g ground almonds
- 20g strong flour
- 80g whole eggs
- 14g unsalted butter
- 50g egg whites
- 15g caster sugar
- Optional - 100% proof vodka with a vanilla pod soaked inside for 2 weeks
For the Feuilletine layer
- 95g ground almonds
- 15g icing sugar
- 7g unsalted butter
- 60g white chocolate couverture
- 1/2 tsp fleur de sel
- 1 Vanilla pod
- 1/2 tsp Vanilla powder
- 35g feuilletine
For the black vanilla bavaroise
- 125g white chocolate couverture
- 125g full fat milk
- 30g egg yolks
- 15g caster sugar
- 190g whipping cream
- 3g gelatine (about 1 1/2 sheets)
- 1 tsp Vanilla powder
- 2 vanilla pods
- 1tsp black food colouring or activated charcoal
For the white vanilla bavaroise
- 250g white chocolate couverture
- 250g full fat milk
- 60g egg yolks
- 30g caster sugar
- 380g whipping cream
- 6g gelatine (about 1 1/2 sheets)
- 2 vanilla pods
For the white chocolate flocking
- 200g white chocolate couverture
- 140g cocoa butter
- 4 teaspoons of superwhite food whitener (optional)
For the fleur de sel tuiles (optional)
- 25g unsalted butter
- 40g egg white
- 55g caster sugar
- 25g double zero flour
- Pinch of vanilla powder
- Several pinches of fleur de sel
For the vanilla vodka fluid gel (optional)
- 110g soda water
- 25g caster sugar
- 15g vanilla vodka (I used 100% proof Stoli with a vanilla pod soaked inside for 2 weeks)
- 1/4 tsp vanilla powder
- 2g agar agar
To serve
- Vanilla powder
- Fleur de sel
- Feuilletine
Equipment required
- Cake frame with adjustable panels (Silverwood does a good one)
- Thermometer
- Piping bags and nozzles for plating
- Silicone mat
- Stand mixer
- Food processor
- Sieve
- Stick blender
- Spray gun
Make the Feuilletine layer
Put the ground almonds and icing sugar in your food processor and leave running until the oils of the nuts begin to be released and you get an almond paste. This will take around 10 minutes.Split and scrape out the seeds from the vanilla pod and put these, the split pod, vanilla powder, salt, butter and white chocolate into a heatproof bowl and melt over a simmering pot of water.
When completely melted, remove the pod and combine with the ground almond paste.
Fold in the feuilletine, then pour out onto some cling film. Cover with a second layer of cling, then push down with a rolling pin - it should be thick enough to roll out, but leave to cool a little if it's too soft.
Roll out to about 1/4 cm thick - it should be at least 30cm long, and 5 to 6 cm wide (see next section). Place in the fridge while you continue.
Make the Joconde
 Pre-heat your oven to 200°C.
Prepare your tin - if you've got a silverwood, you want to set it so you have it set at 2 notches wide, as shown here to the right. If not, a tray tha'ts 5 to 6 cm wide by 30 cm long will do. Spray it with bake spray, and line the bottom with greaseproof paper.
Put the eggs, icing sugar, flour and ground almonds in the bowl of your stand mixer, and whip up with the whisk attachment for about 10 minutes.
While this is running, melt the butter then let it cool. After 10 minutes are up, slowly pour the butter into the running mixer.
Put the egg whites into a clean bowl, and whip until medium firm. Shower in the caster sugar, then whip to stiff peaks.
Gently fold the egg whites into the flour mix, then pour this into your tin.
Bake for 15 minutes until golden and a skewer / chopstick comes out clean.
Leave to cool, then trim off the top so you end up with an exposed sponge. It should be 3 to 4cm in height after being cut. Flip it upside down, so the exposed sponge is on the bottom.
Remove the feuilletine layer from the fridge (still in the cling film), then put the joconde on top. Cut the feuilletine so that it matches the sponge as closely as possible - we'll be chopping the ends off later, so it's the sides that matter the most.
 Peel off the top layer of cling then place this back in your 5cm x 30cm baking tin with the cling film layer at the bottom so it's easier to remove later (get that right or you'll end up with cling inside your cake!).
Place the joconde on top, cut side down onto the feuilletine. If using the vanilla vodka, brush some on top of the sponge. Put this in your freezer.
Make the black vanilla bavaroise
Weigh your milk out into a heavy bottomed pan, then split and scrape the vanilla pods to get the seeds. Add both the seeds and pods to the milk along with the extra vanilla powder.Heat until it hits boiling point, then turn off your cooker hob ring and leave to infuse for 30 minutes.
When time's nearly up, start preparing the other ingredients. Soak your gelatine in cold water and set aside.
Weigh out the white chocolate into another bowl with a fine sieve on top, and again set aside.
In a 3rd bowl, place the egg yolks and whisk them with the caster sugar until they become pale. Finally, get your thermometer ready.
Remove the pods from the milk, then put over a medium heat until boiling again. Carefully temper the egg yolks by pouring a little milk over them while whisking. Continue to add more until all the milk has been combined with the yolks.
Pour this back into the pan and keep stirring with a wooden spoon. Read the temperature - raise it until the thermometer reads 82 degrees C then immediately pour through the sieve onto the chocolate. Let this sit for a few minutes, then squeeze out the gelatine and add to the mix. Use a stick blender to blend everything to ensure it's totally smooth.
 Start adding the black food colouring - my one turned out purple-ish (using Americolor powder) but that's probably because I didn't want to overdo it. Go as hard as you like.
When you're happy it's all blended, pass through a sieve once more into a clean bowl and set aside in the freezer for 10 minutes to firm up.
Remove from the freezer, and whip the cream until quite thick - enough to hold its shape for a few seconds if you drop some from a spoon. Fold the cream into the custard, and return to the freezer for another 10 minutes.
After time's up, the bavaroise should be quite thick - dropping consistency as shown to the right. If it's not thick enough, freeze for a bit longer.
If you're happy, pour it over the joconde to about 1cm in height (you'll have some left over for the top) and tap the frame to level it out. Place back in the freezer to completely firm up (at least an hour). Put the remaining bavaroise in a piping bag with a 1cm nozzle and reserve in the fridge.
Make the white vanilla bavaroise
This is the same method as above, but wait until the black layer has set before you start. While it may seem like a lot, you'll need it to cover everything.Weigh your milk out into a heavy bottomed pan, then split and scrape the vanilla pods to get the seeds. Add both the seeds and pods to the milk. No extra powder in this one.
Heat until it hits boiling point, then turn off your cooker hob ring and leave to infuse for 30 minutes.
When time's nearly up, start preparing the other ingredients. Soak your gelatine in cold water and set aside.
Weigh out the white chocolate into another bowl with a fine sieve on top, and again set aside.
In a 3rd bowl, place the egg yolks and whisk them with the caster sugar until they become pale. Finally, get your thermometer ready.
Remove the pods from the milk, then put over a medium heat until boiling again. Carefully temper the egg yolks by pouring a little milk over them while whisking. Continue to add more until all the milk has been combined with the yolks.
 Pour this back into the pan and keep stirring with a wooden spoon. Read the temperature - raise it until the thermometer reads 82 degrees C then immediately pour through the sieve onto the chocolate. Let this sit for a few minutes, then squeeze out the gelatine and add to the mix. Use a stick blender to blend everything to ensure it's totally smooth.
When you're happy it's all blended, pass through a sieve once more into a clean bowl and set aside in the freezer for 10 minutes to firm up.
Remove from the freezer, and whip the cream until quite thick - enough to hold its shape for a few seconds if you drop some from a spoon. Fold the cream into the custard, and return to the freezer for another 10 minutes.
After time's up, the bavaroise should be quite thick - dropping consistency as shown in the image of the black bavaroise above. If it's not thick enough, freeze for a bit longer.
Next, if using the Silverwood cake tin, change the notches so you have 3 showing (i.e. 4 lanes wide). Move the frozen 3-layer cake to the centre as best you can (we'll trim it later anyway). Otherwise, put your frozen cake in the larger of your two tins. Line the sides of the tin with greaseproof paper, cling or acetate.
Pour the mix over the frozen cake, making sure it goes down each side, and tap the frame to level it out. Place back in the freezer to completely firm up (at least 2 hours this time).
Spray
Put the chocolate, cocoa butter and superwhite (if using) in a heatproof bowl and place over a simmering pot of water.When everything looks completely melted, blend with your stick blender just in case then pour into your spray gun.
Take out a big box - a 12-hole wine box is a good size, or one for 12" vinyl records (a sentence which sums up our household quite neatly) - and cut off top flap. Lay it down so you have flaps on the left, bottom and right. Place a chopping board in the box, then put a layer of greaseproof paper on top.
Remove the cake from the freezer. At this point, we need to cut the cake in half. You're welcome to keep it whole, but I found this to be much easier to spray.
If the sides are a bit wonky (mine were, as I'd used cling film and didn't get the cake dead-centre) use a very sharp knife to cut thin slides from each side to level things up.
If necessary, you can also use a blowtorch to slightly melt (heat for no more than 1/2 second) any side that isn't perfectly smooth. Once heated, use a right-angled spatula to smoothen. It should re-freeze within a couple of seconds.
If you're ready to spray, put your first cake in the box and turn on the gun. When flocking, I normally rotate the cake 3 times to make sure it has built up enough.
Repeat with the other cake, then return to the freezer to harden.
If you like, any remaining chocolate can be spread on a silicone mat to harden up. You can then use shards of it to decorate the cake later.
Make the tuiles (optional)
 Pre-heat your oven to 170°C.
Heat the butter in a pot, then remove from the hob and let it cool a little.
Place the egg whites and caster sugar in a bowl and whisk until combined. Add the vanilla powder and whisk again. Finally, sieve in the flour, and whisk until you get a paste. Pour in the cooled butter and make one final whisk to combine.
Place a silicone baking mat on a heavy tray.
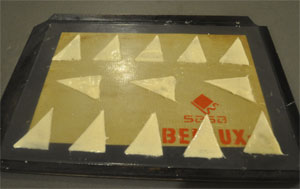
If you've got a tuile pattern mould, put it over the silicone mat. I don't - so I've made a triangle one by cutting one out of a piece of acetate.
Spoon a small amount of batter onto the mould or template, then use a pallete knife to smothen. They should be around 2mm thick. If you don't have a mould or template, just spoon some onto the mat and make a circle with the back of the spoon. Sprinkle each one with a small amount of fleur de sel.
Place in the oven for 7 minutes.
Get a rolling pin ready to bend the tuiles - or in my case, I had one of those U-shaped moulds. These produce a really good bend. In either case, remove the tray from the oven, and use a palette knife to release the tuiles. Place them carefully over the pin or in the U-shaped mould - the first ones will be quite pliable, but as you reach the end of the tray you might find them becoming brittle. Try to work as quickly as you can.
Leave to cool.
Make the fluid gel (optional)
Weigh the soda, sugar, vanilla powder and agar agar into a heavy bottomed pot. Heat until it boils, while whisking constantly.When it hits boiling point, remove from the heat and pour into a bowl. Leave it to cool slightly, then add the vodka.
It will set after around 30 minutes at room temperature. To make the gel, simply remove the set jelly, chop it and throw it in your blender for 5 minutes. The agar structure will break down, but remain viscous.
Slide into a piping bag with a 1/4cm nozzle.
Plating up
Take the sprayed cakes out of the freezer. On the first cake, using a sharp knife, slice off each end so that it exposes the layers within again.Pipe dots of the black custard in random sizes on top, followed by dots of fluid gel. Add one of the salted tuiles, sticking it into the cake gently. Crumble over some feuilletine, dust a tiny bit of vanilla powder over the top and add a few crystals of fleur de sel. Finally add your chocolate shards, if using.
Repeat with the second cake.
At this point you'll want to let it defrost a bit more at room temperature - due to everything being really soft, it won't take long. If your house is reasonably warm, it'll be done in 30 mins to an hour.
When you slice it, blowtorch or otherwise heat your knife firsts. Cut quite thin slices - about 1cm thick.
Enjoy all your hard work. Or, if it has all gone wrong, pop down to LPDR and buy a Grand Cru Vanille. It might just change your life.
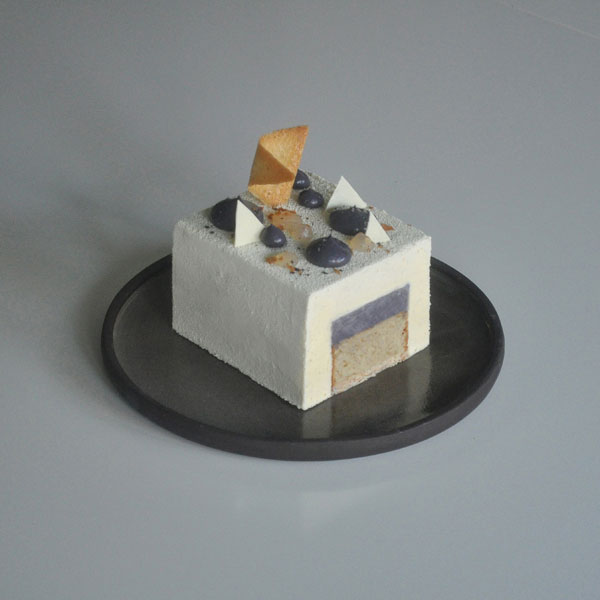
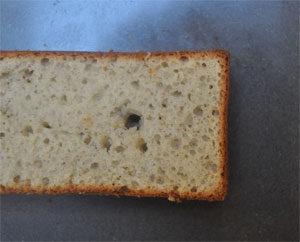
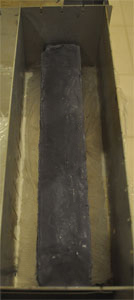
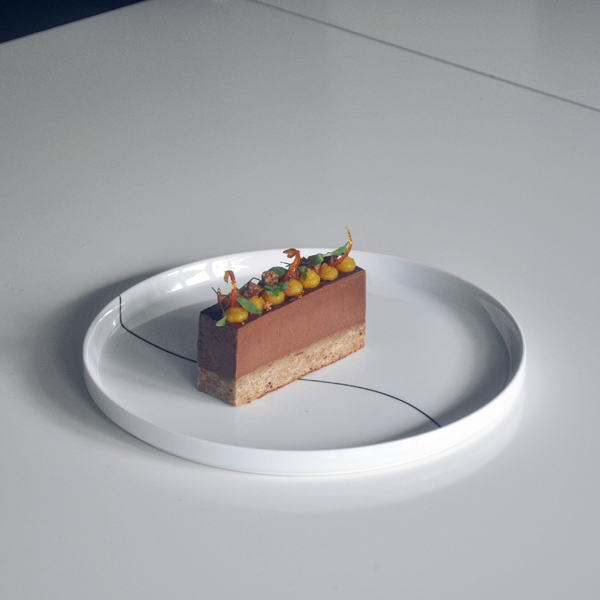
Chocolate, Date, Coriander & Tangerine delice
Chocolatey goodness with a dash of the unusual
We eat in restaurants quite a lot at the weekend, but with all the hype these days it's not often a place lives up to what people say.
The wife has been gushing about Le Bab for months now, normally telling me how good it is around 2 hours after eating a low carb, 300 calorie week day meal. Thanks.
Last week we went for dinner and I've got to say; their lamb kebab was the best I've ever eaten. That's coming from a half Armenian (national dish: kebab) and a mother who has been making amazing barbecues all my life (favourite: lamb kebab) - so I really mean this thing is spectacular.
Anyway, I digress. I've since tried to re-create it for burger night, but its heady mix of dried coriander and delicious date chutney gave me an idea for this ... dessert.
It might seem odd, but it really does work - obviously we've got the chocolate-orange thing going on with the tangerine, but the dates give the base cake a great texture and coriander acts as a kind of gingery lift.
Most of the stages are simple, but I've got my chemistry set out for the fluid gel. You can just use gelatine if you have it, but agar agar is quite widely available these days - so get some if you can and try this out.
Ingredients (Makes 1 block which you can slice as you wish - between 8 and 10 portions)
For the cake
- 170g Medjool dates
- 250g water
- 5g bicarbonate of soda
- 75g lightly salted butter
- 175g golden caster sugar
- 3 large eggs
- 220g self raising flour
- 10g ground coriander
For the delice
- 340g dark chocolate (at least 50%) [I used Callebaut in this]
- 2 large eggs
- 325g whipping cream
- 150g whole milk
For the candied tangerine peel
- Peel and juice from 2 tangerines
- 100g caster sugar
- 100g water
For the tangerine fluid gel
- The juice of the 2 tangerines
- 2g agar agar
To serve
- Micro coriander [I get mine from Growing Underground via FarmDrop]
- Reserved date cake
Equipment required
- 24cm x 14cm cake frame or similar sized tart case with a removable bottom
- Large brownie tray, 35cm x 24cm, to make the cake in
- Piping bag or squeezy bottle sfor the fluid gel
Make the cake
 Pre-heat your oven to 150°C.
Stone and chop your dates really roughly into small pieces.
Place the butter in your stand mixer bowl with the beater attached. Pour in the golden caster sugar and leave them to cream for about 5 minutes. Crack and drop in the three eggs, one at a time, with the beater still running on low speed. Sieve in the flour and mix again until everything is combined.
Next, add the ground coriander, and finally the chopped dates and water. Keep mixing; this lot will look ridiculously wet, but stay with me.
Prepare your brownie tin with some greaseproof paper (as you can see from the image, much care was taken here) - use some baking or 1cal spray to bind it to the tray, and some more to make sure the cake doesn't stick.
Pour the batter into this, then place in the oven for 50 minutes.
You'll end up with a very delicious, moist cake. You'll also have some spare bits to eat, and some more to make into crisp pieces for the top. Set this aside for a few minutes, then turn out onto a cooling rack and leave to cool completely.
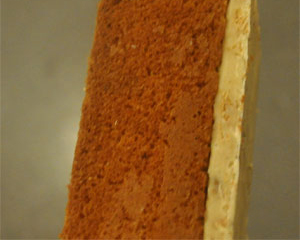
Next, take your cake frame and prepare it with two overlapping sheets of cling film (i.e. one going horizontally, then another on top going vertically). Carefully cut the cake to fit the frame, and place it in - shiny / browned side at the bottom.
Make the delice
Place your eggs in a heatproof metal bowl and whisk until pale. Weigh out the chocolate - if you're not using callets, then chop it roughly. Set aside.Pour the milk and cream into a heavy based saucepan and heat until it's boiling. When it reaches temperature, carefully pour a small amount over the eggs to temper them and keep on whisking. Slowly pour more, whisking continuously, until you combine all of the heated milk/cream with the eggs.
Finally, drop in the chocolate and stir with a heatproof spatula until it's completely combined - this might take several minutes.
The delice is complete, but needs to cool to a more viscous consistency so you can pour it into the frame without it soaking too much into the cake beneath. Place it into your freezer for about 20 minutes.
When it's ready, pour over the cake in the frame, then place the lot in the freezer again for about 2 hours to firm up completely.
Make the fluid gel
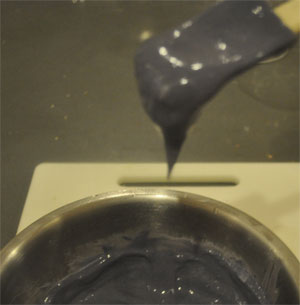
Juice your tangerines and put the liquid into a heavy-based pot. Weigh the agar agar on a light-weight scale. Heat the juice until it's boiling, then drop in the agar powder and whisk really well.Let it boil for a minute or so, then remove from the heat and pour into a bowl to set.
This doesn't take long - really just as long as the boiling liquid takes to cool. You need it to be completely set though.
When it's ready, spoon the solidified juice out and chop it roughly. Place in a food processor and blend until it's like a really thick liquid.
Pour into a piping bag with a small tip, or a squeezy bottle and reserve in the fridge.
Make the candied tangerine peel
Place the sugar, juice and water in a heatproof pot. Slice the tangerine peel so it's very thin, then add to the pot too.Bring to the boil and heat vigorously until the sugar and juice becomes a syrup - take care not to burn it though. When done, remove from the heat, then spoon out the peel and lay it on some greaseproof paper to dry.
Plating up
Take some of the reserved date cake (if you've not eaten it all) and chop it into tiny pieces. Toast it in the oven on a very high heat for about 5 minutes.Get a really sharp knife ready and heat the blade with a blowtorch or gas hob if you can. If not, just run it under hot water (but dry it before using). Remove the delice from the freezer and unwrap it from the cling film. Place on a chopping board, then carefully trim all four sides.
Make slices along the delice until you get your desired portions - Mine were approximately 2.5cm wide.
Work quickly here, as this delice only stays upright while at fridge temperature - if you find it melting too quickly while chopping, put it back in the freezer. As you chop each slice you can always place them in the fridge while you continue cutting and plating.
Pipe 7 small dots of fluid gel on the top of the cake along one edge, then 6 dots on the other, alternating with the dots on the first row. Place one cube of toasted date cake between each pair of dots. Take three slices of peel and place one on each end, and a final in the middle. Lastly, carefully add a few micro coriander leaves on top. Crumble a few more of the toasted cake cubes up and sprinkle on top.
You can either serve immediately, or it will stay solid as long as it's in the fridge.
Okay, I'm hungry now. Le Bab anyone? ...
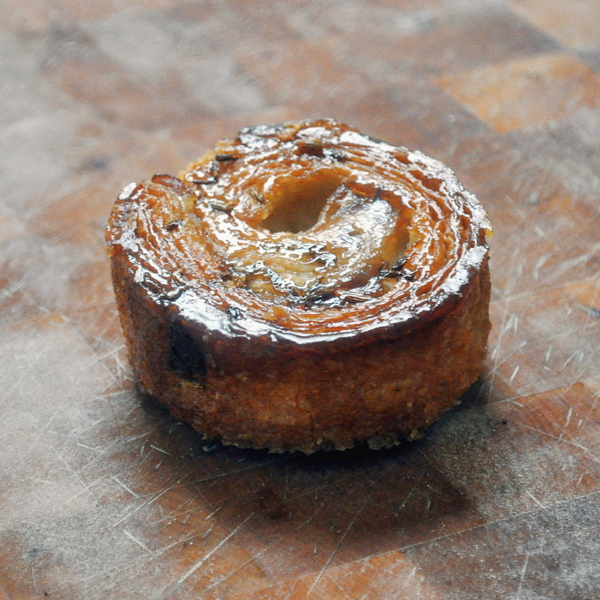
Apple, Fennel & Rose Kouign Amann
Classic French viennoiserie with a toffee apple twist
It was the hottest day of the year here in the UK yesterday - and I was out having meetings, fully suited up, sweating like a pig being eyed up by Mr. Koffman.
Strangely, we're supposed to be on our way to the Autumn equinox ... tell that to my apple trees, who's fruit should be ready for picking, but so many have spoiled in the heat.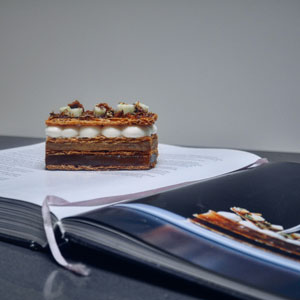
I made Heston Blumenthal's delicious "Taffety Tart" last weekend, and it gave me an idea - why not add the same apple, rose and fennel combination to something else.
Kouign Amann is a yeasted, butterry viennoiserie from Brittany made popular by GBBO a few years ago. The addition of thin apple slices and rose petals to the inside, with fennel seeds on the base gives the pastry an autumnal twist, caramelising the apples with a toffee-like flavour. I've used Bramley apples as I've got a ton of them - but also because they serve to cut through the sugar a little. I'm also resting the dough in the fridge overnight as is often the case with Croissants, which helps make them taste even better.
You're supposed to let them come to room temperature before eating - I challenge you that this is impossible after the smell fills your house.
Ingredients (makes 8 to 10 Kouign Amanns)
For the pastry
- 500g strong white flour
- 50g golden caster sugar
- 14g fast action yeast
- 200g room temperature water (~25°C)
- 50g room temperature milk (~25°C)
- 10g salt
- 100g unsalted butter - for the mix
- 250g unsalted butter - for the butter layer
For the apple puree
- 3 Bramley apples
- 50g golden caster sugar
- 100g water
For the roll in
- 100g golden caster sugar
- 3 Bramley apples
- 60g caster sugar
- 5g rose petals
For baking
- 100g golden caster sugar
- 25g unsalted butter
- 10g fennel seeds
Equipment required
- 10cm, 4cm tall tart rings
- Stand mixer
- Silicone mat
Make the dough
Mix the water, milk and sugar together then dissolve the yeast into this. Leave to stand for about 10 minutes until bubbly.Place your 500g of flour in the bowl of a stand mixer, and attach your dough hook. Pour in the yeast mix, and let it start running on a low speed until combined.
 Slowly add the chopped butter, piece by piece followed by the salt. Keep it kneading for 8 minutes.
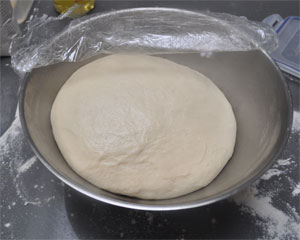
When it's ready, place into a clean, buttered bowl and cover with cling film. Let this stand until doubled in size - which will probably take 1 to 2 hours depending on your temperature or whether you put it into your proofing box.
Once it's ready, deflate the dough and flatten it into a rough rectangle. Cover it in cling film again, then place in the freezer for 30 minutes.
In the meantime, make your block of butter. Place a sheet of cling film on your work surface, then put your remaining 250g of butter (i.e. a pack!) in the middle. Cover with a second piece of cling film.
Begin to tap the butter with your rolling pin so that it softens. Eventually it will become pliable enough to roll into as perfect a square as you can. Use your hands on the upper piece of cling to straighten the edges if you need to. When you're happy with the block, place it into the freezer too.
Roll in the butter
 This next stage requires you to be reasonably precise with your rolling. What we're trying to do is keep the edges as straight as possible, and also to make the butter come up right to the edge - which means there won't be any part of our pastry without butter. These butterless points can create pockets which don't rise as well, so it's worth taking a time over this bit.
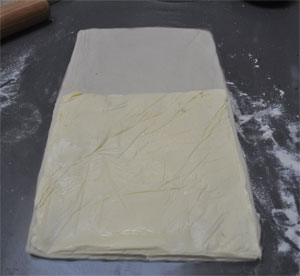
Roll out the now cold dough to as close as double the size of your butter block as you can get. If the edges aren't straight, try to re-form them with your hand or if you don't mind losing a bit of dough you can cut them off.
Remove the block of butter from the freezer, and take off the cling. Position it at the bottom half of your dough rectangle, then fold the top half over the top so that it's sandwiched in-between.
At this point, it should still be cold enough that the butter doesn't start squeezing out. Press down on the end of it do seal, then make a quarter turn with the dough (i.e. if the two ends of the pastry were facing you, turn it 90° so they move to being at a right angle to you).
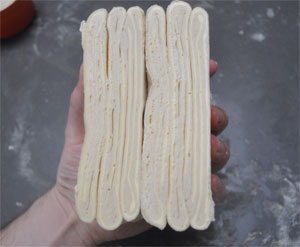
Carefully roll the dough, in your body's direction, into a large rectangle about the length you made it when you were first inserting the butter block. Fold the dough, taking the furthest part away from you, and fold that 2/3 of the way back past the centre, then fold the remaining 1/3 back over the top of that (meaning you'll have 3 1/3 layers). This is turn one.
Wrap it back up in cling film, then return to the freezer for 30 minutes.
When time's up, repeat the fold process by placing the dough in front of you, with the seam you made in the last fold at a quarter turn away from you. Roll it out into a rectangle again, then perform the same 2/3 and 1/3 roll you made before. You've now made turn two.
Wrap it in cling - but this time place in the fridge and leave overnight to develop the flavours.
Make the apple puree
Peel and core the apples, then roughly chop. Place the water and sugar in a heavy based saucepan and add the apples.Let the apples simmer until they're really soft, then use a hand blender or food processor to blend them into a puree. Leave to cool then set aside.
Build the roll in
 Core and peel your remaining 3 apples. Cut in half, then Slice as thinly as you can (and I mean really thin!) - or use a mandolin if you have one.
 Take the dough out of the fridge and now we'll make one last turn. Repeat the fold process by placing the dough in front of you, with the seam you made in the last fold at a quarter turn away from you. Roll it out into a rectangle again, then perform the same 2/3 and 1/3 roll you made before.
At this point it's worth cutting the dough in half, as it's much easier to handle two rolls of Kouign Amann pastry - it also means you can keep half the mix for another time if you want to freeze it. Wrap the half you're not using and place back in the fridge.
Take the other half and place on the work surface with the seam at 90° to you. Scatter 1/4 of the roll in sugar on top of this.
 Roll the dough into a rectangle one final time, which will push the sugar into the dough.
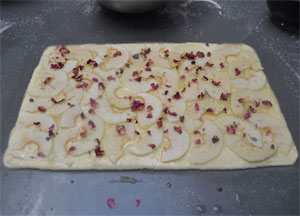
Place a sheet of cling on your work surface, and flip the dough onto it so that the sugar is now underneath. Brush over a thin layer of your apple puree, then scatter another 1/4 of the sugar all over this. Place slices of apple over the top, and finally scatter over the rose petals.
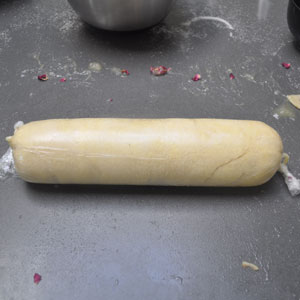
Now, from the longest side, start to roll the pastry, keeping it as tight as you can. When you've rolled it up entirely, bring the cling film up and over, then twist and hold the ends. Keep rolling it towards you in short strokes so that the pastry gets tighter in the middle.
Place in the freezer for 30 minutes. If you're making the other half of the dough now, repeat the process with the other half of the sugar, apples and rose petals.
Slice and proof
 Toast your fennel seeds in a pan until they start to smoke, then remove from the heat and reserve.
Heat 25g of butter, then place a silicon mat onto a heavy baking tray. Brush the butter over the entire tray, then scatter over your sugar. Shake so that it covers the entire mat. Pour any excess sugar back into a bowl.
 Take each pastry ring and brush it with butter too, then dip and roll each one in the bowl of sugar so that the insides are coated entirely. Place them on the mat, spread evenly, then scatter some fennel seeds inside each one and finally scatter over some more sugar (Note: Jamie Oliver would not approve).
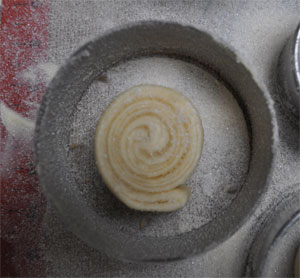
Remove a roll of pastry from the freezer and cut off the end. Now make slices around 2 1/2 to 3cm tall, trying to keep them as round as possible. Place each slice into one of the pastry rings.
Now leave to proof - it will take about 2 hours. Some time before they're done, pre-heat your oven to 180°C.
Bake
This is the fun bit that will have people running for your kitchen.When the pastries wobble a bit if you shake the try, they're ready. Place into your pre-heated oven and bake for 35 minutes.
After time's up, let them cool a little so that the caramelised sugar hardens.
Carefully pull each one up, breaking them out of the sugar. Trim the sides with a knife then gently push them down from the top so they fall out of the rings.
Leave to cool to room temp so they go really crispy. If you can stand to.
Seventy Five
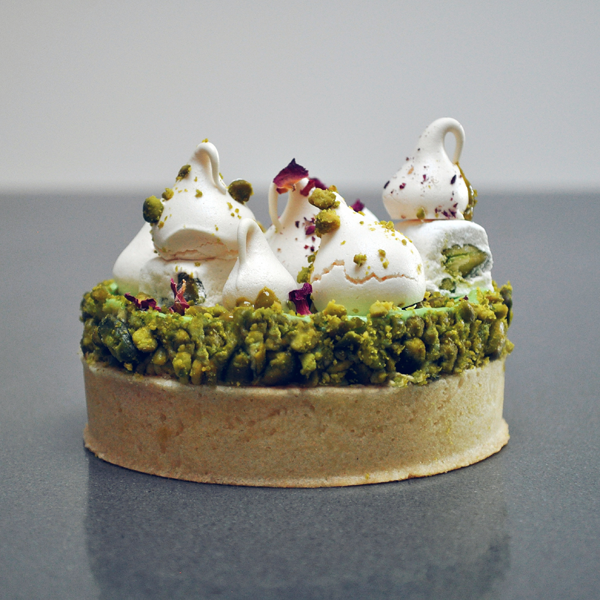
A roasted pistachio and rose tartlet to celebrate my Dad's 75th
It was Dad's 75th Birthday this weekend; he's more than double my age, but still insists on balancing ladders on the top of ironing boards, just so he can pick an apple off a tree or destroy a wasps nest. I can only hope to be that able (though perhaps a little less insane) when I get there myself.
When I was young, some of my earliest memories are of my Mum roasting pistachio nuts in the oven, and Dad sitting down eating entire bags of them in one sitting - while somehow managing to stay under 10 stone in weight.
This recipe is a dedication to that memory; a roasted pistachio butter used to flavour sweetened cream, rose crème pâtissière, topped with meringues and another of his favourites - pistachio nougat.
You'll also get some bonus left over pistachio butter for your toast (just add salt or sugar), some meringues and some nougat to have later on.
Ingredients (makes 4 individual tartlets)
For the roasted pistachio butter
- 150g green pistachios (the proper Iranian ones if you can; I get mine from Sous Chef)
For the roasted pistachio cream
- 400g Whipping Cream
- 50g Icing sugar
For the rose crème pâtissière
- 3 large egg yolks
- 250ml whole milk
- 60g caster sugar
- 25g plain or type 45 flour
- 1 to 2 teaspoons of rose flavouring
- Powdered red food colouring (optional - you won't see it until you cut the tart open)
For the tart cases
- 250g type 45 flour [Buy] (or just plain if you don't have any)
- 140g unsalted butter (softened)
- 1 large egg
- 1 large egg yolk
- 40g ground almonds
- 90g icing sugar
- 1/2tsp almond essence
For the rose meringues
- 2 Large Egg Whites
- 65g Icing Sugar
- 65g Caster Sugar
- 1 teaspoon of rose flavouring
- Some crushed pistachio nuts and rose petals for decoration
For the pistachio nougat
- 210g Caster Sugar
- 50g Liquid Glucose
- 60g Honey
- 35g Egg Whites
- 50g Green Pistachio nuts
To finish
- Crushed green pistachios
- Reserved pistachio butter
- Rose petals
Equipment required
- 10cm tart rings
- 9cm circular cutter
- Stand mixer
- Thermometer
- Food processor
- Silicone mat
- Baking beans
- 30cm metal baking tray
- Plastic piping bag and large piping head
Make the roasted pistachio butter
 Turn your oven on to 170°C.
Weigh out the pistachio nuts onto a baking tray and, when up to temperature, place in the oven for 8 minutes.
When time's up, remove from the oven and pour into a food processor. Leave to blend for 10 minutes while still hot. You'll see the nuts crush, then get oily, solidify and finally blend into liquid. Stop and scrape down the bowl of your machine when it's liquid to make sure everything has been turned into a delicious pistachio paste.
Decant from the bowl and reserve. Once it's cool, place in the fridge. You can taste it if you like - but I promise it'll be so claggy you won't be able to speak; so maybe don't do that. Protip: If you're having the leftovers on toast, mix in some sugar or salt and that will reduce the sticky mouthfeel.
Make the pistachio cream discs
 When the pistachio butter has cooled, line a high-sided (at least 1/2 inch) baking tray with some greaseproof paper and give it a quick spritz of baking or 1 cal spray.
Take the cream and whip with an electric whisk until soft peaks have formed. Shower in the icing sugar and whip again until almost firm.
Next, pour in about 2/3 of the pistachio butter. Whip for a couple of seconds more to blend - just don't overdo it and whip the cream too much; it should hold a shape and not be pourable. If you're nervous about over whipping, fold the pistachio in with a spatula instead.
Spoon the lot into a baking tray, then level off with an angled spatula. Try to get it as level as possible, then place in the freezer to solidify for about an hour.
The rose crème pâtissière
While the cream is freezing, make the creme pat.Place the eggs and caster sugar in a bowl and whisk until pale. Whisk in the flour until a smooth paste is formed. Add the colour at this stage if you're using it.
Pour the milk into a heavy bottomed pan, and heat until it nearly boils. Temper the eggs by pouring a small amount of the hot milk over them while whisking constantly to remove any possible lumps. Keep pouring more and more until all the milk and eggs are combined - then, return the mixture to the pan the lower the heat.
You can use a wooden spoon to continually mix until it's thick - but when making a heavy custard like this I prefer to whisk so that the flour has no chance of getting lumpy. When it looks thick enough to spoon, remove from the heat and pour through a sieve into a clean bowl. You'll need to push the custard through the sieve with the back of a spoon. Add the rose flavouring, and mix thoroughly.
Place cling film directly on top of the custard and leave to cool to room temp - then transfer to the fridge.
Make, bake and fill the tart cases
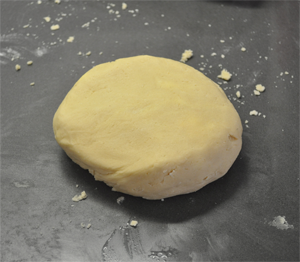
This recipe uses pâte sucrée.Attach a whisk to your stand mixer, and add the butter. Whip until the butter has been creamed, then add the almond extract, icing sugar, ground almond and eggs. When completely combined (i.e. no butter lumps), tip about 1/3 of the flour in. It should be combined in a few seconds, so repeat with the next 1/3 and then the final amount of flour. Stop the mixer when the mixture looks combined and a bit like wet sand, making sure you don't overwork it.
Turn this out onto your work surface and press it all into a smooth ball. Place the ball on some cling film, then flatten slightly with the palm of your hand. Wrap it in the cling and place in the fridge for at least 2 hours.

When the pastry has rested, take your baking mat and place it on a tray. Give the mat and rings a quick spritz with baking, 1 cal spray or just grease with butter.
Remove the pastry from the fridge, and unwrap from the cling. Stretch the cling film out, dust the pastry with icing sugar, then place back in the middle. Working really quickly while it's cold, roll the pastry on the cling film to a thickness of about 3mm. Check the width by putting the 4 flan rings on top - you'll need some excess around the edges of each. Cut the pastry into 4 equal pieces.
Remove all but one of the 4 pieces, then use the cling film under the pastry to pick it up, invert and place over one flan ring. Push the pastry into the corners - again, now that the cling is on top, you should be able to do this all by hand without further dusting. When you're happy, carefully peel the cling film off. Make sure any excess pastry is bent and folded over the edges of the case, and that no metal is visible on the upper rim. If it is, cut off some excess dough and push it into place. Sugar pastry is more forgiving than many other types, mainly because you can quite neatly blend any holes with extra pastry.
Repeat with the other four pieces, placing each one back onto the cling, inverting, then pressing in.
Turn your oven on to 170°C.
To help stop shrinkage, freeze the tart cases instead of just putting them in the fridge. Leave it in there for about 30 minutes (not much more - you don't want it to completely solidify) until nice and cold. When you're ready to blind bake, remove the cases from the freezer and place some silver foil (matte side down) into each one. Scrunch it down over the top edges so they are completely covered in foil, then gently pour in your baking beans into each one.
You need to add a bit of extra cooking time due to how cold they are; so bake for about 20 minutes. After this time they should look anaemic but be solid - so carefully remove the foil and beans, then brush with a beaten egg and return to the oven for a further 5 to 10 minutes until golden inside.
Remove and leave to cool to near room temperature, then use a sharp paring knife to trim the outer edge of each one. Carefully remove the rings, then brush out any pastry crumbs.
Make the meringues
 Turn your oven on to 110°C.
Beat the egg whites in your stand mixer until soft peaks form - normally less than a minute on a Kitchen Aid up at full whack. Slowly shower in the caster sugar, then leave it running on high for about 5 minutes until you have stiff peaks.
Turn the mixer down to low. Shower in the icing sugar and add the rose flavouring. Give it a quick 30 seconds on high, then turn off and transfer to a piping bag.
Take a baking tray, and place a silicone mat on top. Pipe tall-ish meringues by applying pressure to the bag and pulling upwards. Sprinkle half with crushed pistachio, and half with rose petals.
Place in the pre-heated oven, then cook for 60 minutes.
Make the nougat
Weigh the egg whites into the bowl of a stand mixer and attach the whisk. Line your high sided baking tray with cling film and sprinkle with icing sugar.Place the sugar and liquid glucose in a heavy bottomed pan with a thermometer, and heat to 135°C. At this point, spin up the stand mixer to full and whip the egg whites.
Carefully pour the honey in and heat to 145°C on your thermometer.
When reached, and with the mixer still running, pour the sugar mix onto the egg whites and whip until the mixer bowl feels just warm to the touch. Pour in the pistachios and mix for a moment.
Working quickly before it sets too much, scoop or pour the mix into your tray, sprinkle over some more icing sugar then let set. It will probably only take another 15 minutes.
When set, remove from the cling film and chop into small squares.
Put it all together
Take a tart case, and fill it with rose crème pâtissière right to the edge. Flatten with a spatula.Remove the pistachio cream from the freezer and cut a piece out with your circular cutter. Roll in the crushed nuts, then place on top of the tart case.
Take two pieces of nougat and place those on top of the pistachio disk. Dot over some pistachio butter, then add two or three of each type of meringue. Finally, sprinkle over a few more crushed nuts and some rose petals.
Serve when the cream has thawed - during the summer it will only take about 20 mins at room temp.
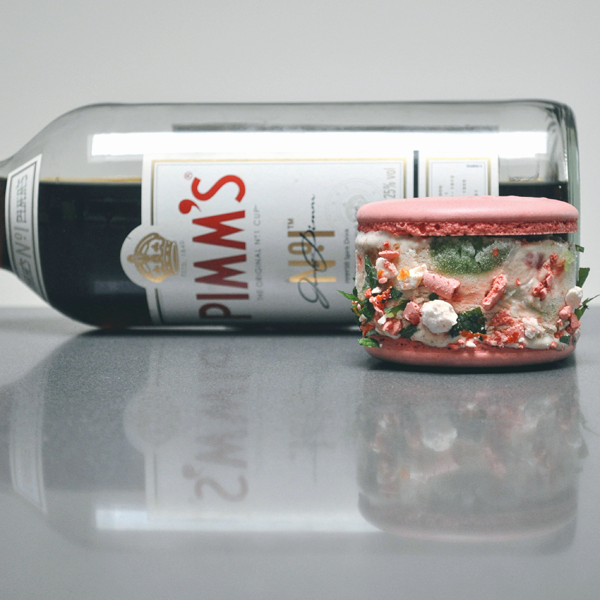
Pimms Sandwich
The weather is as British as ever; so have some ice cream.
Ah, British Summer. Rain, wind, stifling heat, mixed with the odd day of glorious sunshine. As my Father (who still professes to have just stepped off a plane despite having lived here for 50 years) succinctly puts it - Britain has four seasons; Winter, Winter, Winter and Winter.
One thing's for sure; I wasn't risking a barbeque this weekend. Instead, it was Beef Wellington & bone marrow gravy for main, and these ice cream macaron for dessert.
They are a combination of a cucumber & gin sorbet, soft Pimms and mint jellies, roasted strawberry ice cream and crunchy meringue pieces. Roasting the strawberries not only intensifies the flavour, it also reduces the liquid content so that the ice cream can still set but give off a good strawberry kick.
There are quite a few processes, so I've tried to lay them out in an order that will allow some overlap during wait periods. It's a lot of effort - but if you're into your ice cream macs, and rainy days, you'll love these.
Ingredients (makes 8 individual macs with a couple of shells left over for the chef)
For the Pimms & mint jellies
- 3 Gelatine leaves
- 100g Caster Sugar
- 125g No. 1 Cup
- 25g fresh Mint leaves
- 10g Liquid Glucose
- 200g Water
- 100g Soda Water
For the roasted strawberries
- 250g strawberries (weighed as hulled)
- 1tbsp Balsamic Vinegar (sweet aged if you have)
- 1tbsp Golden Syrup
- 2 twists of black pepper
For the macerated strawberries
- 100g chopped strawberries
- 10g caster sugar
- 20g Pimms No. 1
For the cucumber & gin sorbet
- 2 large cucumbers, skin on
- 2 lemons
- 120g Icing Sugar
- 30g London Dry Gin
For the macaron shells
- 150g Ground almonds
- 150g Icing sugar
- 110g Egg whites
- 150g Caster sugar
- 37ml Water
- 3g Red powdered food colouring (Americolor)
For the roasted strawberry ice cream
- 100g puree (from the roasted strawberries)
- 150ml Whole Milk
- 150g Caster Sugar
- 5 egg yolks
- 1tsp Vanilla Powder
- 500g Double Cream
- 20g Pimms No. 1 Cup
For the meringues
- 2 Large Egg Whites
- 65g Icing Sugar
- 65g Caster Sugar
- 2g Red powdered food colouring (Americolor) - optional; you can just leave them white!
For the roll coating
- Freshly grated peel of two large oranges
- 10g Mint leaves
- Reserved meringues
Equipment required
- 8cm circular cutter
- Ice Cream machine
- Stand mixer
- Thermometer
- Plastic piping bag and large piping head
Turn your Ice Cream maker on to start chilling, and pre-heat your oven to 190 degrees C.
If you have a double oven, pre-heat the other one on to 140 degrees C.
Make the jellies
Put the gelatine sheets into some cold water to soften.
Weigh out your 200g of normal water into a heavy bottomed pot, pour in the sugar and liquid glucose. Bring this to the boil over a medium-high heat, and hold it there for 5 minutes.
Take the pot off the heat, and let it cool to around 60 degrees C. Take the mint, finely chop, then add to the heated liquid. Don't be tempted to add the mint while it's too hot, or you'll end up with mint tea. Nobody wants that.
While the liquid is still warm, squeeze off the excess water from the gelatine then add that to the pot and mix thoroughly. Finally, pour in the Pimms No. 1, the soda water and mix well.
Take a tin - something like a square brownie tin - and line it with two sheets of cling film so it covers all sides. Pour in the liquid, then leave to set in the fridge for an hour or so.
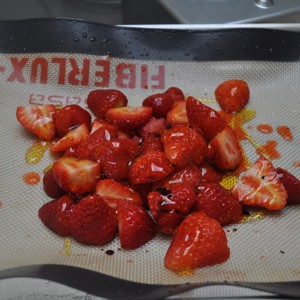
Roast the strawberries
Put the hulled strawberries on a silicone mat. Twist over the black pepper, then pour on the balsamic vinegar and golden syrup.
Put the mat into a tall-sided tray then put it in your oven, pre-heated to 190 degrees C, and roast for 40 minutes. Give them a turn at 20 minutes just to make sure all the sides are roasting evenly.
When time's up, remove from the oven and let cool slightly - don't leave them for long or you might end up with a solid block. Put them in your food processor or blender, and whizz until you have a puree. Reserve 100g for the ice cream.
Make the macerated strawberries
This is the easy bit; place the chopped strawberries in a bowl, cover with sugar, pour in the Pimms and mix with a spoon to combine. Leave at room temperature for the rest of the time it takes you to complete the recipe.
Make the cucumber and gin sorbet
Split the two cucumbers down the middle, then use a teaspoon to scrape out the seeds from the middle. Roughly chop, leaving the skin on, and put into a food processor or blender.
Weigh in the Icing Sugar, and finally squeeze the juice of two lemons into the food processor's bowl.
Blend this for 10 minutes, to try and extract as much flavour as possible.
When time's up, use a fine sieve and pour the puree through so that you're left with only the liquid. Mix in the gin.
Pour the mix into the Ice Cream maker bowl, and churn until you have a sorbet. When it's ready, transfer to a disposable piping bag and reserve in the freezer.
Make the macaron shells
I'm going to be lazy here - please follow my instructions for making macaron shells here, here or here.
Once you get to the piping stage, remember that these need to be bigger than your standard macaron shells. We want the end size to be around 8cm - so I'd say pipe to about 4cm and then tap to spread.
Once the shells have baked, set aside to cool and turn the oven down from 140 degrees C to 110 degrees C.
Make the meringues
Beat the egg whites in your stand mixer until soft peaks form - normally less than a minute on a Kitchen Aid up at full whack. Slowly shower in the caster sugar, then leave it running on high for about 10 minutes until you have stiff peaks.
Turn the mixer down to low. If using, sprinkle in the powdered colouring, followed by the icing sugar. Give it a quick 30 seconds on high, then turn off and transfer to a piping bag.
Take a baking tray, and place a silicone mat on top. Pipe any shapes you like - we're just going to crush them - but make sure they are reasonably small so we get a good amount of crunchy shell rather than sticky innards.
Place in the pre-heated 110 degrees C oven, then cook for 60 minutes.
When done, remove and allow to cool before crushing roughly.
Make the roasted strawberry ice cream
Place the 150g of milk in a heavy bottomed saucepan, add the caster sugar and vanilla powder. Measure out 500g of double cream (fridge-cold) into a bowl, and put a sieve on top. Place the egg yolks into another bowl and whisk for 30 seconds. Pour the 100g of puree into a second saucepan (so that it's warm too and doesn't split the mix).
Gently heat both the milk and the puree. When the milk comes to the boil, temper the eggs by pouring a little over them while constantly whisking. Pour a little more, then whisk again. Repeat until all the milk has been combined with the egg yolks, then pour the lot back into the saucepan.
Keep heating over a low heat, stiring with a wooden spoon. Eventually, it will slightly thicken - just so that when you run your finger down the spoon, it will leave a trace. When it reaches this point, turn off the heat and pour in the warmed puree. Stir again to combine, then pour through the sieve into the cold cream.
Mix again, much more vigorously this time. When everything looks mixed nicely, pour directly into the pre-chilled ice cream maker and churn. There's no need for any of this "put the mix in the freezer for 24 hours before churning" nonsense; there never is.
Sieve the liquid off the macerated strawberries - which is now a nice sugary Pimms flavour - and drop this into the ice cream bowl too. Finally, weigh out your final 35g of Pimms and pour it in.
After 30 minutes to an hour, just before it completely churns, drop in the macerated strawberries, and about half of your crushed meringues.
At this point remove your cucumber sorbet from the freezer to warm up a little.
Setting the components
Nearly there!
Now that your ice cream has churned, line a tin or try tray that's around an inch or so tall with cling film. Use a spatula to transfer the ice cream in.
Next, pipe 3 even lines of cucumber sorbet into the ice cream so that they run the length of the tray.
Take your set jellies out of the fridge and roughly chop about half. Press the pieces into the soft ice cream, around the cucumber.
Cover with another layer of cling film, then put back in the freezer.
Putting it together
Chop the mint into ribbons, and grate the oranges into a bowl. Crush up some of the meringues.
Remove the tray of set ice cream from the freezer, and cut 8 circles out, trying to get a line of cucumber sorbet inside each one.
Working quickly (it's a soft ice cream!) put a toothpick or fork in the top of each cut circle, then roll the edges in the mint-orange-meringue mix to coat. Place onto a macaron shell, then cover with a second shell. Place back in the freezer immediately and repeat with the remaining 7 ice creams.
When you're ready to serve, remove from the fridge for 10 minutes then scoff. Perhaps with a glass of Pimms. Or even better, straight gin; you might need it after all that work.
Give Me Some More
Chocolate, peanut, marshmallow. Who ate all the pies? Me, probably.
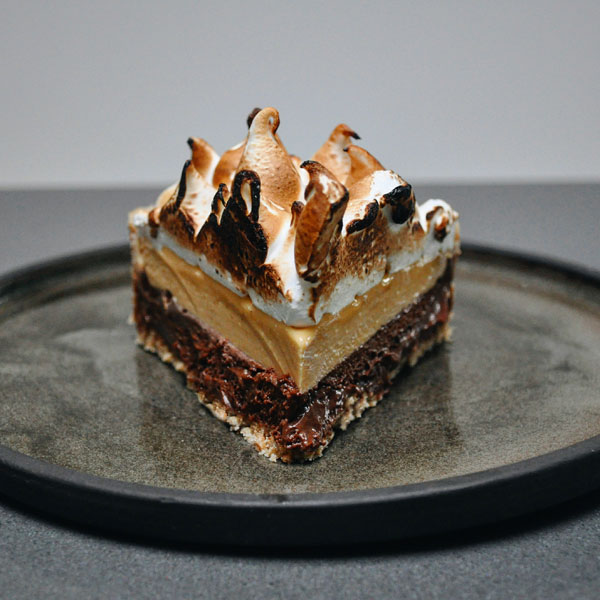
A month or so back, Chris aka All Things Meaty posted up an off-menu S'more cake he had in New York ... and it was the stuff of dreams.
I've been tweaking my double-butter peanut mousse recipe recently for an Opera cake, but thought I'd divert attention over to recreating the S'more cake this weekend. This recipe is the result. Since we don't have things like Graham Crackers or pudding cups over here, it's digestives and sabayon mousse instead.
Don't give too much of this to your kids, as this thing has sugar for days.
Ingredients (makes one pie)
For the crust
- 200g Digestive biscuits (1 small pack)
- 130g unsalted butter
- 100g caster sugar
For the chocolate sabayon
- 70g egg yolks
- 40g caster sugar
- 20g water
- 150g bittersweet chocolate (63%)
- 190g whipping cream
For the double-butter peanut sabayon
- 40g egg yolks (around 2 large egg yolks)
- 100g caster sugar
- 75g caster sugar
- 200g unsalted butter
- 65g smooth peanut butter
For the marshmallow topping
- 110g egg whites
- 300g caster sugar
- 75g water
- 4 leaves of gelatine
Equipment required
- 20 cm fluted flan case
- Stand mixer
- Thermometer
- Plastic piping bag and large piping head
- A serious sugar craving
Make the case
Melt your butter in a pan until liquid, then set aside. Take your flan tin and spray it with baking spray or 1cal oil spray.Weigh out your 200g of Digestive biscuits, then put them in a blender and whizz until powder-like. Pour the digestive crumbs into a bowl with the caster sugar, then pour over the melted butter. Use a spatula to blend the ingredients until fully combined and like wet sand.
Drop around half of the mix into your flan tin, then shake to level out. Now pour the rest around or near the edges so they can be built up. Press down on the base with the bottom of a mug or, if you have one, a small copper pot. Keep pushing the crust into the base and up the fluted sides of the tin to form a 1/2 cm thick layer by pressing down and rolling the mug or pot around the edges. If the mix starts to come over the top, put your finger level with the top of the tin as you press in order to keep it compact.
When you're happy things are looking solid, place on a tray and into your freezer while you carry on.
Make the chocolate sabayon layer
Attach a whisk to your stand mixer, and add the egg yolks to the bowl. Weigh out the caster sugar into a heavy bottomed pot, and place the water in there too.Heat the sugar over a high heat, and turn the mixer up to its highest setting. Regularly measure the sugar's temperature with your thermometer; as soon as it hits 121 degrees C, remove from the heat and carefully pour the hot liquid over the yolks that are being whipped in the mixer. Leave this running until it gets to room temperature.
While it's cooling, take another pan and fill it with hot water. Put this over a low heat, and place a bowl over the top to create a bain marie. Add the chocolate into the bowl and gently melt it, then set aside.
Finally, when your sabayon is almost cool, whip up the whipping cream to a ribbon stage - not stiff enough to hold a peak, but firm enough to show a trail when you lift the beaters up.
Fold the cooled sabayon into the whipped cream, then mix in a third of the chocolate until well combined. Fold in the last 2/3 of melted chocolate more gently.
Take the case out of the freezer, and pour the mousse in - you want it to come up about half way so you leave room for the peanut layer. If you have too much, just pour it into a bowl to scoff later.
Shake the case (don't tap it or you might break the base) to level out the mix, then put it back in the freezer.
Make the peanut sabayon layer
Re-run the fun.Attach a whisk to your stand mixer, and add the egg yolks to the bowl. Weigh out the caster sugar into a heavy bottomed pot, and place the water in there too.
Heat the sugar over a high heat, and turn the mixer up to its highest setting. Regularly measure the sugar's temperature with your thermometer; as soon as it hits 121 degrees C, remove from the heat and carefully pour the hot liquid over the yolks that are being whipped in the mixer. Leave this running until it gets to room temperature.
This is where it branches off from the chocolate layer. Pour out and reserve the sabayon. Clean the stand mixer bowl, attach a beater instead of a whisk, and whip up the unsalted butter on a high speed.
When the butter looks soft, reduce the speed and slowly (and over several additions), spoon the sabayon into the butter while still mixing.
Once combined, spoon in the peanut butter and whisk on high again until you have a really soft, thick mixture.
Remove the case from the freezer again - your chocolate layer should be set by now (around 30 minutes). Spoon over the peanut mousse and level out with a spatula. Put the case back in the freezer again.
Marshmallow topping and putting it all together
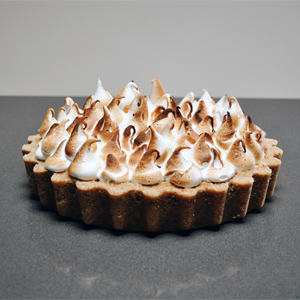
Soak the gelatine in some cold water and set aside.
Place the 100g of egg whites into your stand mixer with the whisk attachment fitted. Pour 75g of water into a heavy bottomed pot, add the 300g of sugar, and place over a high heat.
Use a thermometer to measure the temperature of the sugar - when it hits 115C, start to whip your egg whites. When it hits 118C, remove from the heat, squeeze the excess water out of the gelatine then (carefully, as it will bubble up) drop it into the syrup and mix with a wooden spoon or chopstick. Quickly trickle the hot syrup over the beaten egg whites. Leave this to whisk until completely cool.
While this is happening, prepare the piping bag - place the nozzle inside, then put it over a jug so it's easier to drop the marshmallow into - it'll be a sticky job!
Once the meringue has cooled, stop whisking and fill the piping bag. Try and remove any air bubbles from the bag by pressing the meringue down from the outside, then tie off or clip the bag.
Remove the pie from the freezer and snip the top off the piping bag to reveal the nozzle.
Start piping the mallows around the edge of the pie. Pull upwards to make them tall as you pipe each one. Once you've finished the complete circle, carry on with the next inner layer, and so on until the entire pie is covered. If you have any left, start piping a second layer over any gaps.
When you're happy, fire up your blow torch and burn the lot.
Let it defrost before eating - an hour or two at room temperature. The crust is quite delicate, and the mousse layers really light and soft - so you might want to cut slices before it comes up near room temperature. Torch the sliced sides before serving and enjoy responsibly.
It will keep for a number of days in the fridge. Unless you eat it.
Maraschino Cherry Meringue Tart
A cherry curd-filled tart using Luxardo's amazing Maraschino cherries and syrup

It was our 3rd wedding anniversary this week - and as usual, if there's any reason to celebrate something, that means there's a reason to fill our faces.
This recipe, which I did briefly think of calling "toothpaste tart", uses Luxardo's Maraschino cherries. If you've never tried them, you really need to; they aren't the normal bright pink Maraschino cherries that companies like Opies make (a baileys and cherryade please Mike) - instead they're prepared in their natural juice with lots of sugar. The result is a massive cherry flavour. You can grab some from The Whisky Exchange.
While they're great in cocktails, I'm using a whole jar to make curd. Stay with me here, I know they cost about 7 quid - but the curd they make is unbelievable, especially as a treat. Use the recipe below to just make that - or go the whole way and turn it into a tasty dessert to share. Or not.
Ingredients (makes one pie, serves one pie to 8 standard people)
For the filling
- 1 jar of Luxardo Maraschino cherries
- 3 large eggs
- 100g unsalted butter
- 210g caster sugar
For the tart case
- 250g type 45 flour [Buy] (or just plain if you don't have any)
- 140g unsalted butter (softened)
- 1 large egg
- 1 large egg yolk
- 40g ground almonds
- 90g icing sugar
- 1/2tsp almond essence
For the Italian meringue
- 165g egg whites
- 450g caster sugar
- 113g water
- Red paste food colouring (Wilton make a good one)
- 1/2tsp almond essence
Equipment required
- 24 cm flan ring
- Stand mixer
- Thermometer
- 1 baking mat (Fibrelux, Silpat etc)
- 1 heavy tray
- Baking beans or equivalent
- Plastic piping bag and large piping head
Make the curd
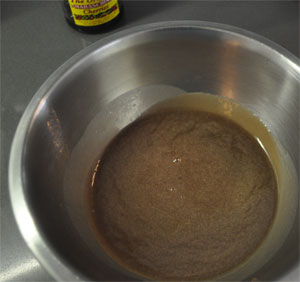
Now prepare your bain marie - bring water to a simmer in a pot, and place a clean bowl over the top. Pour in the syrup, sugar, butter and let them melt together, stirring occasionally. Beat the three eggs until they are homogeneous, then pour that into the juice. Make sure the water stays at a simmer or you'll get scrambled eggs.
Stir slowly until combined, then keep it on the low heat and stir every few minutes. Eventually - and that might be 15 or more minutes in this case - the eggs will start to thicken up as they cook. When you reach a texture that coats the back of your spatula, remove from the heat and strain again into a clean bowl. Note that as it's hot, it will look more "liquid" than curd normally does. If you want to test the thickness, take a teaspoon out and leave it on the side for a few minutes; if it's thick enough you're done. Leave to cool to room temperature, then cover with cling film and place in the fridge for a few hours to firm up.
Make, bake and fill the tart case
This tart uses pâte sucrée.Attach a whisk to your stand mixer, and add the butter. Whip until the butter has been creamed, then add the almond extract, icing sugar, ground almond and eggs. When completely combined (i.e. no butter lumps), tip about 1/3 of the flour in. It should be combined in a few seconds, so repeat with the next 1/3 and then the final amount of flour. Stop the mixer when the mixture looks combined and a bit like wet sand, making sure you don't overwork it.
Turn this out onto your work surface and press it all into a smooth ball. Place the ball on some cling film, then flatten slightly with the palm of your hand. Wrap it in the cling and place in the fridge for at least 2 hours.
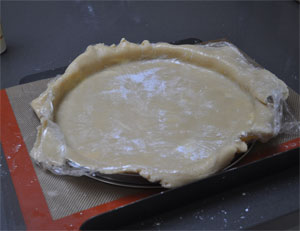
When the pastry has rested, take your baking mat and place it on a tray, then the flan ring on top of this. Give the mat and ring a quick spritz with baking, 1cal spray or just grease with butter.
Remove the pastry from the fridge, and unwrap from the cling. Stretch the cling film out, dust the pastry with icing sugar, then place back in the middle. Working really quickly while it's cold, roll the pastry on the cling film to a thickness of about 3mm. Check the width by putting the flan ring on top - you'll need some excess around the edges.
Since the cling is underneath, you should easily be able to pick up the pastry, invert it and place over the flan ring. Push the pastry into the corners - again, now that the cling is on top, you should be able to do this all by hand without further dusting. When you're happy, carefully peel the cling film off. Make sure any excess pastry is bent and folded over the edges of the case, and that no metal is visible on the upper rim. If it is, cut off some excess dough and push it into place. Sugar pastry is more forgiving than many other types, mainly because you can quite neatly blend any holes with extra pastry.
Turn your oven on to 170C.
To help stop shrinkage, freeze the tart case instead of just putting it in the fridge. Leave it in there for about 30 minutes (not much more - you don't want it to completely solidify) until nice and cold. When you're ready to blind bake, remove the case from the freezer and place some silver foil (matte side down) into it. You will probably need two pieces going in alternate directions to cover the whole ring. Scrunch it down over the top edges of the case so it's completely covered in foil, then gently pour in your baking beans.
You need to add a bit of extra cooking time due to the frozen case, so bake for about 20 minutes. After this time it should look anaemic but be solid - so remove the foil and beans, then brush with a beaten egg and return to the oven for a further 5 to 10 minutes until golden.
Remove and leave to cool to near room temperature, then use a sharp paring knife to trim the outer edge. Carefully remove the ring, then brush out any pastry crumbs. Take your curd and spoon it into the case. Use a palette knife to even the filling out, then scatter the reserved cherries evenly over the top. Cover with cling film, then place in the fridge to firm up again.
Italian meringue and putting it all together
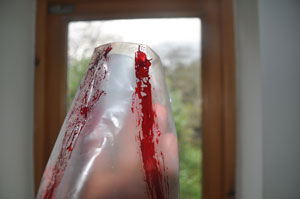
Use a thermometer to measure the temperature of the sugar - when it hits 115C, start to whip your egg whites. When it hits 118C, remove from the heat, and trickle the syrup over the beaten egg whites. Once it has picked up a bit of volume, add the almond essence. Leave this to whisk until completely cool.
While this is happening, prepare the piping bag with the food colouring. This kind of thing has become really popular recently, probably due to the Meringue Girls - I'll describe what to do, but they've got a great video showing you the technique if you get stuck.
You want to take your piping bag, then turn it inside out, except for a tiny bit where you'll put the piping nozzle. Place this over any tall bottle, then grab your food colouring paste and paint 4 evenly spaced vertical slines from the top to the bottom of the bag. Remove from the bottle, place your piping nozzle in, and invert back the other way.
Now the meringue should have cooled down to near room temperature, so stop whisking and fill the piping bag. If you've used a thick enough food colouring paste, the lines will stay as they are. Try to remove any air bubbles from the bag by pressing the meringue from the outside.
Remove the tart from the fridge and snip the top off the piping bag to reveal the nozzle.
Pipe a few test meringues to get the food colouring into place. When they look good, start piping the meringue around the edge of the tart. Pull upwards on the meringues to make them tall as you pipe each one. Once you've finished the complete circle, carry on with the next inner layer, and so on until the entire tart is covered.
When you're happy, fire up your blow torch. Normally I'm up for hardcore meringue toasting - but since you've gone to the trouble of making them look good, a gentle browning will do.
Serve immediately.
Montagne Rouge
Strawberry & black pepper mousse, on a prosecco sabyon, with a basil jelly
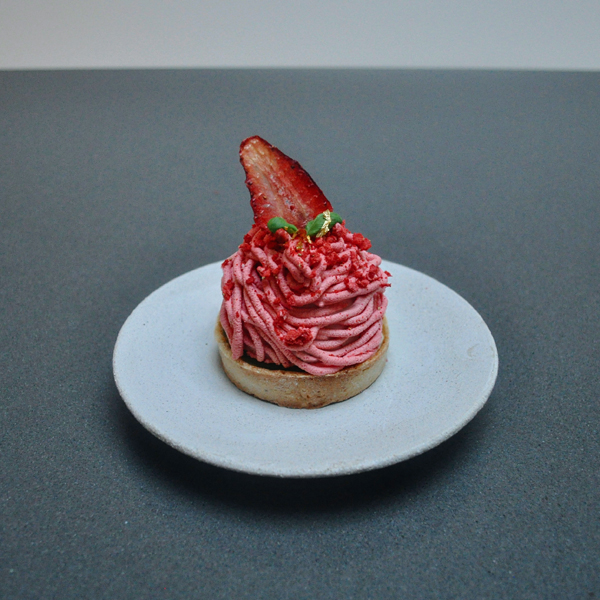
Laura and I don't celebrate valentines day, because we met for the first time a week before the 14th (16 years ago as I write this) - so we get to go out on the cheaper weekend to celebrate. We are hopeless romantics.
I'm still training for this idiotic off-road marathon, so thought I'd take a couple of hours out to make something this year - and here we are; the red mountain.
Based on the idea of a Mont Blanc pâtisserie (one of my favourites), this valentines-ish dessert combines the classic flavours of strawberry, Prosecco or Champagne, basil and black pepper.
Makes 4 individual portions (with some spare cases, mousse & jelly)
Ingredients
For sweet pastry
- 250g type 45 flour [Buy] (or just plain if you don't have any)
- 140g unsalted butter (softened)
- 1 large egg
- 1 large egg yolk
- 40g ground almonds
- 90g icing sugar
- 1tsp vanilla extract
For the strawberry & black pepper mousse dome
- 165 grams fresh strawberries
- 165g double cream
- 40g sugar
- 5g leaf gelatine
For the set Prosecco sabayon
- 2g gelatine
- 1 large egg yolk
- 40g caster sugar
- 80g Prosecco
- 60g double cream
For the basil jelly
- 25g fresh basil leaves (or leaves and stalks)
- 20g vermouth - I used The Collector
- 160g water
- 40g sugar
- 3g leaf gelatine
For the strawberry mousse topping
- 2g gelatine
- 200g double cream
- 20g simple syrup (or just use Gomme if you have some in the cocktail cabinet)
- 8g freeze dried strawberries
To decorate
- Some extra freeze dried strawberries
- Mini basil leaves
- Gold leaf (optional)
- Dehydrated strawberries (optional - if you have a dehydrator, just thinly slice some strawberries and dehydrate at 60 degrees C for around 8 hours)
Equipment
- Handheld whisk
- Food processor or blender
- 2.5 inch diameter semi-sphere silicone mould (with 6 holes)
- 2.5 inch tart rings
- Large-holed Mont Blanc piping tip
Strawberry and black pepper mousse
Hull and chop the strawberries, then place in a blender with 40g of caster sugar. Blend until the strawberries are a (quite liquid) puree. Weigh out 165g of this.
Soak the gelatine in cold water until soft. In the meantime, heat the puree until warm and add 5 twists of pepper from your grinder.
When ready, squeeze the water from the gelatine, and combine with the warm puree.
Whip the double cream until it reaches the soft peak stage, then fold in the puree. Pour this into the semi-circular moulds, then use a flat-sided spatula to make the tops perfectly level.
Place in the freezer until set (about 2 or 3 hours).
Basil & vermouth jelly
Soak the gelatine in cold water.
Heat a pot of water to the boil. Drop in the basil, and cook for about 20 seconds until softened. Remove from the pan with a spoon, then drain in a collander - squeezing out as much water as you can.
Place the cooked basil in a blender, then add the sugar, vermouth and water. Blitz the mix for 3 to 5 minutes, until the basil is as chopped as possible. When you've reached that stage, place a sieve over a jug, and a muslin cloth over the sieve. Pour the blended mixture through, and squeeze out as much juice as possible.
The mix should still be warm (if it isn't, add to a pot and warm it gently) - so remove the gelatine from the cold water, squeeze the excess off and combine with the basil juice.
Prepare a high-sided tray by lining with cling film. Pour the jelly mix in so that it is about a 1/4 centimetre thick (I used a 30cm x 20cm tray for this). Cling film tightly over the top of the tray so that none of the upper film is touching the jelly, then leave to set in the fridge for at least 2 hours.
Make & bake the pastry cases
 Attach a whisk to your stand mixer, and add the butter. Whip until the butter has been creamed, then add the vanilla extract, icing sugar, ground almond and eggs. When combined, tip about 1/3 of the flour in. It should be combined in a few seconds, so repeat with the next 1/3 and then the final amount of flour. Stop the mixer when the mixture looks combined and a bit like wet sand.
Turn this out onto your work surface and press it all into a smooth ball. Place the ball on some cling film, then flatten slightly with the palm of your hand. Wrap it in the cling and place in the fridge for at least 2 hours.
When the pastry has rested, take your baking mat, place it on a tray, then the individual flan rings on top of that. Remove the pastry from the fridge and, working quickly, dust with icing sugar roll to a thickness of about 3mm. Try and make it as square as possible.
Cut the rolled pastry into 6 even pieces, then carefully - using an offset spatula, the rolling pin or carefully with your hands - lift, and unroll each piece over the rings. This is the part where disaster can strike, so try and start the unrolling with enough "edge" to cover the closest part to where you're standing. If it has worked, start pushing the dough into the edges of each ring, leaving any excess folded over the top. Don't trim it yet. If you find any cracks, just patch them with spare pieces of pastry or some of the edge overhang.
Turn your oven on to 170C.
To help stop shrinkage, freeze the tart cases instead of just putting them in the fridge. Leave the tray in there for about 30 minutes until nice and cold. When you're ready to blind bake, quickly remove the cases from the freezer and place some silver foil (matte side down) into each one. Scrunch the foil down over the top edges of the cases so each one is completely covered in foil, then gently some baking beans into each one.
You need to add a bit of extra cooking time due to the frozen case, so bake for about 20 minutes. After this time it should look anaemic but be solid - so remove the foil and beans, then brush with a beaten egg and return to the oven for a further 5 minutes.
Remove and leave to cool for about 10 minutes, then use a sharp paring knife to trim the outer edge of each case. Carefully remove the rings, then brush out any pastry crumbs.
Make the set prosseco sabayon
Soak the gelatine in a bowl of cold water for a few minutes.
Place a pot of hot water on your cooker and bring to a simmer. Take a heatproof bowl, add the egg yolk and sugar then whisk until pale yellow. Pour in the Prosecco, then put the bowl over the simmering water and begin whisking. Keep going until the mixture stops bubbling and begins to get thicker.
Remove from the heat, squeeze the excess water from the gelatine, then mix with the hot sabayon. Whip the double cream to soft peaks, then fold the sabayon into it.
Let the mixture cool down, then pour into the pastry cases and place in your fridge to set.
Wait!
Before getting to the next stage, make sure everything that you've made so far has set.
Strawberry mousse topping
 Place the gelatine in a bowl of cold water for a few minutes. Take the freeze dried strawberries, and grind in a spice grinder until they are as close to a powder as possible - this is important, as if you have lumps they'll clog up the Mont Blanc piping tip.
Heat the sugar syrup in a small saucepan over a gentle heat until warm. Pour the heated syrup into a bowl, then squeeze the excess water out of the gelatine and mix with the syrup until combined. Add in the strawberry powder and mix again.
Working quickly (so that the gelatine doesn't set), place the double cream in a bowl, and drop in the food colouring. Whisk until you have soft peaks, then gently fold in the strawberry syrup. When everything is mixed, spoon the cream into a piping bag fitted with a Mont Blanc / grass nozzle. Use immediately.
Assembly
By now you should have pastry cases with set sabayon, a set and frozen mousse dome, a set jelly and your freshly made mousse topping.
Make sure your dehydrated strawberries, blitzed freeze dried strawberries, mini basil leaves and gold leaf (if using) are nearby.
De-mould the strawberry domes onto a tray or chopping board. Pipe the strawberry topping mousse over the top, starting with the lowest part of the dome, moving round in a circle, then moving upwards when you come back on yourself. When you reach the top, just nick the bag slightly so it pinches away. Repeat with the other domes.
Take a circular cutter slightly smaller than the size of the pastry cases, and cut 4 circles of basil jelly. Use a flat spatula to move one jelly disk onto each of the Prosecco sabayons, then move each of the strawberry domes over on top of that.
Working quickly, sprinkle some of the freeze dried strawberries over each one, then slot in a dehydrated strawberry. Use some tweezers to add a couple of mini basil leaves, and finally some gold leaf (if using).
Place these in the fridge for a couple of hours, so that the mousse defrosts. When ready to eat, bring them out for 10 minutes then serve.
Matchnberg
Matcha, vanilla and cashew Battenberg
I'm training for an off-road marathon at the moment (yes, more fool me) - so naturally tea & cake are on my mind after a long run.
I had a lot of love for Mr. Kipling's mini Battengerg cakes; the kind of thing I'd demolish when coming in from DJ'ing at 3am as a teenager. I'd still do a whole pack now to be honest, even if they are sickly sweet.
I've tried to create a different version of the classic Battenberg, bringing in a more savoury flavour with matcha and some cashew to give the cake a more interesting flavour.
You'll have some cashew butter left over at the end - stick some in your morning porridge while it cooks.
Makes 1 cake (and some extra cashew butter)
Ingredients
For cocoa marzipan
- 250g ground almond
- 175g caster sugar
- 150g icing sugar
- 15g cocoa powder
- 1 whole large egg
- 1 large egg yolk
- Splash of water if needed
For the matcha sponge
- 140g self-raising flour
- 15g matcha tea
- 40g ground almonds
- 175g caster sugar
- 175g unsalted butter
- 3 large eggs
- 2g fine salt
- 2g baking powder
For the vanilla sponge
- 140g self-raising flour
- 50g ground almonds
- 175g caster sugar
- 175g unsalted butter
- 3 large eggs
- 2g vanilla powder or strong vanilla essence
- 2g baking powder
For the cashew butter
- 200g salted and roasted cashew nuts
- 20g maple syrup
- 15g coconut oil (solid or liquid state)
For the cashew buttercream
- 125g of the cashew butter
- 55g unsalted butter
- 125 icing sugar
- Splash of milk
Equipment
- Stand mixer
- Cake tin - ideally a multi-size tin with moveable walls (Alan Silverwood make a good one) or if not, two 20 x 20 cm tins
- Food processor or blender
Marzipan
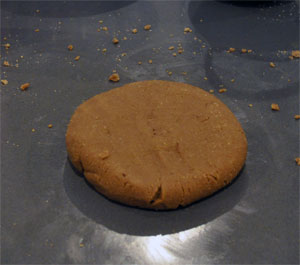 Combine all the dry ingredients together in a large bowl, starting with the icing sugar (so it sits at the bottom and doesn't fly everywhere during the mixing). Briefly whisk the whole egg and egg yolk, then make a well in the sugars and pour it in. Bring the whole lot together with your hands; it will take some time, and you'll get messy, but the marzipan will come together in the end. Keep pressing or kneading it down so that the moisture is all absorbed and you get a smooth sweet pastry-like texture. If it looks too dry, just add a splash of water.
Matcha cake
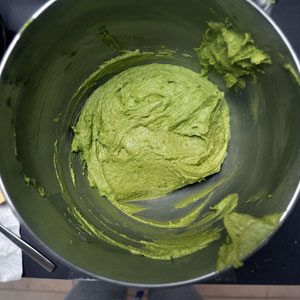 If you're using an Alan Silverwood tin, Move the walls to give you two 3 x notch section widths. Line your cake tin with baking paper sprayed with a little bake easy or coconut oil spray, then pre-heat the oven to 160 degrees C.
Place the butter, sugar, flour, matcha, almond, salt and baking powder in the bowl of a stand mixer with the beater attachment in place. Beat on a low speed initially, then speed it up as the butter starts to combine. Crack in your 3 eggs then let the whole lot mix on a medium speed for a few minutes until everything is smooth.
Spoon this into one of your lined tins or one section of a multi-size tin. Smooth the top so that it looks as even as possible - the mix is thick, so you can't really tap it down; try to do it by eye with a flat spatula.
Immediately clean & dry your stand mixer bowl, then move to the next stage
Vanilla cake
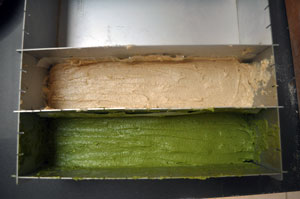 The process is identical, swapping out the slightly different measurements and vanilla for matcha.
Place the butter, sugar, flour, vanilla powder, almond and baking powder in the bowl of a stand mixer with the beater attachment in place. Beat on a low speed initially, then speed it up as the butter starts to combine. Crack in your 3 eggs then let the whole lot mix on a medium speed for a few minutes until everything is smooth.
Spoon this into the other of your lined tins or the second section of a multi-size tin. Again, smooth the top by eye.
Place both tins or the single tin in your oven, and bake for 35 minutes. When a chopstick inserted in into the very centre comes out clean remove the cakes from the oven - then leave to cool completely while you make the butter.
Cashew butter
Put the cashews in your food processor or blender, and leave to blend for around 5 minutes. You might need to give it the occasional shake or open the lid and scrape down the sides. After becoming a powder, the cashews will eventually begin to release their oil and become a kind of paste. When this starts to happen, add the maple syrup, coconut oil and continue to blend until it has a smooth but solid structure.
If there is any excess oil in the bowl, try to drain it away - or, if there's a lot, put the butter in a muslin cloth and squeeze any extra oil out. Reserve the butter for the next step.
Cashew buttercream
Weigh out 125g of the cashew butter, then and that and the unsalted butter to the bowl of your stand mixer. Beat on high with the beater attachment for a number of minutes until the butters are combined and fluffy. Add the icing sugar in several stages, beating slowly first, then on high again until each portion of sugar is combined. If the buttercream looks too solid, splash in some milk and beat again.
Once you have a light, spreadable buttercream, move to the next stage.
Assembly
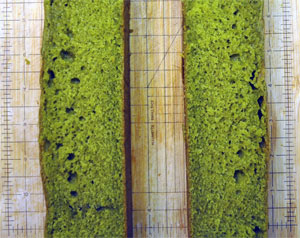 Peel the baking paper from your cooled cakes.
Take the matcha cake first. Measure and mark the centre point on both ends, then cut down the centre as evenly as you can. Next, turn the cake so that the freshly cut face is on top. On one cake, closely slice off the cooked top and bottom, then measure what's left. Mark and measure the second half of the cake, and make the same two cuts.
Finally, measure the distance between the two sides you've just cut. Turn the cake once more so that it reveals the final cooked section. Mark out the distance you've just measured and trim the cooked side away. Repeat with the other half of the cake, and this should leave you with two perfectly cut pieces of the same size. If there are any imperfections, place the cakes side by side and gradually shave a sharp kitchen knife over the top so that they match.
Repeat this process with the vanilla cake.
Take a large sheet of cling film and place it on your biggest work surface, then take the marzipan and drop that in the centre. Place a second sheet of cling film over the first, sandwiching the marzipan in the middle. Begin to roll it out, trying to make a large rectangle with its edges as wide as the edge of the cling sheet - trim off any excess so you get a clean line, but keep spare marzipan for filling any holes on the underside. The thickness should be no more than about 2mm at all points. When you're happy, peel off the top layer of cling film.
With a large angled spatula, spread a thin layer of cashew buttercream over the rolled out marzipan, then another on one side of one of the matcha cakes. Use the spatula to move one of the matcha cake over, then one of the vanilla cakes so that they are side by side in the very centre of the marzipan rectangle with the buttercream between them.
Next, spread another thin layer of buttercream over the top of the two cakes that are on the marzipan, and then again on one side of the next matcha cake that's yet to be brought over.
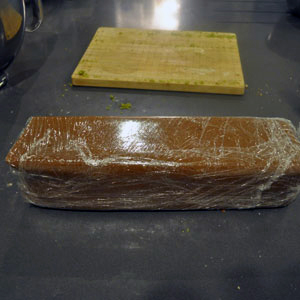 Move the vanilla cake over first this time, then the final matcha cake so that they alternate.
Almost there - carefully pull one side of the marzipan up and over so that it covers the side furthest away from you and then comes up to around half the cake. Repeat with the other side - with any luck, you'll have a perfect join. If you've got too much marzipan then trim some away and try again. If there's not enough, pull them as closely as you can and use any trimmed pieces to fill the gap
Smoothen the marzipan around the cake with your hands, taking care not to dent it. Finally, wrap the whole thing in another sheet of cling so it's all tight, then invert so the seam is on the bottom. Place in your fridge for at least 30 minutes.
After it has cooled down, use a kitchen knife to slice both ends off so that you get a clean finish. The cake can now sit outside the fridge and come to room temperature, ready for eating.
Meshgengouz-ish
A kind of Armenian Nutmeg cake
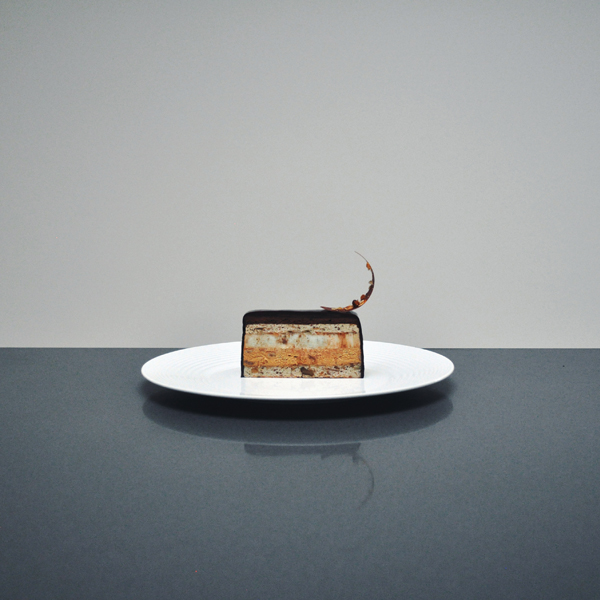
Armenia is famous for a few things - invention of the spinning concrete truck, Cher, Andre Agassi, Gary Kasparov, and that lady with the massive arse (all of us Armenians have one).
Desserts, however, are not something our cuisine is famous for. One of the most well known is the Armenian Nutmeg Cake - Meshgengouz Gargantag. It's a cake rich in nutmeg, sugar and walnuts that's great with a coffee.
I wanted to make something along these lines - so here it is; layers of walnut dacquoise, salted caramel walnut mousse, a set nutmeg custard and a dark espresso ganache.
Makes 1 cake
Ingredients
For the two layers of walnut dacquoise
- 70g walnuts, roughly chopped
- 130g ground almonds
- 60g flaked almonds
- 120g icing sugar
- 25g cornflour
- 40g caster sugar
- 140g egg whites
For the salted caramel & walnut mousse
- 30g walnuts, roughly chopped
- 85g caster sugar
- 30g water
- 2.5 sheets of gelatine
- 360g whipping cream
- 1/4 teaspoon of sea salt
For the set nutmeg custard
- 1 whole nutmeg
- 240g whole milk
- 40g caster sugar
- 20g cornflour
- 2 large egg yolks
- 2.5 sheets of gelatine
- 100g whipping cream
For the espresso ganache
- 100g dark chocolate, at least 70% cocoa solids
- 90g whipping cream
- 10g freshly brewed espresso
- 15g butter
For the chocolate glacage (recipe from William Curley's book)
- 18g of sheet gelatine
- 235ml water
- 300g caster sugar
- 100g cocoa powder
- 170g whipping cream
For the chocolate tuiles
- 150g bittersweet chocolate, at least 70% cocoa solids
- Any remaining nuts from the processes above
Assembly
- Coffee liquor (e.g. Illy)
Equipment
- Stand mixer
- Thermometer
- Some form of tall mould - a straight sided loaf tin would work, or cake frames if you're being flash
- Silicone mat
- Acetate cut into small triangles about 4 cm long and 2cm wide
- A U-shaped metal bouche mould (for the decorations)
This recipe takes a bit of patience. Okay, a lot - so start making it at least a day before. You'll be freezing the cake several times, so you can work on and off over several days.
Make the dacquoise
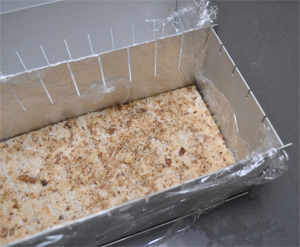
Heat your oven to 230 degrees C (fan), and take out two baking trays. Spread the whole nuts on one, then spread out the ground almonds on the other. Bake for 5 minutes until they get a bit of colour. Turn the oven down to 180 degrees C. Remove the whole nuts and crush them with a rolling pin, or a very brief whizz in a food processor - you want them to remain partially whole.
Take another tray, and lay a silicone mat on top - one that is about twice the size of your end cake. Pour the crushed nuts onto here and spread them out evenly.
Put the ground nuts in a bowl, then gently combine with the icing sugar and corn flour.
Place your egg whites in a stand mixer, and whip on high speed to a soft peak. Keep it running, and gradually pour in the caster sugar until you get a stiff meringue. Fold this meringue into the dry ground nuts until it has completely combined, then spread this out over the top of the roasted nuts in the tray. You want to end up with a thickness of around 1/2 a centimetre. Use a flat spatula to make the top as smooth as you can.
Bake for around 20 minutes, then remove and leave to cool.
Assembly step 1: Line your cake tin with a double or triple layer of cling film - this will stop leaks later on. Measure your tin or cake frame with a ruler or measuring tape. Cut two pieces of cooled dacquoise the same size as this, then put one in the bottom of the frame, and the other in an air-tight container for later.
Make the salted caramel & walnut mousse
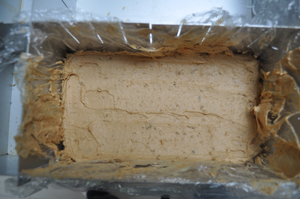 Take the gelatine sheets and place in a bowl of cold water to soften. Weigh out the whipping cream and salt.
Put the caster sugar and water in a heavy bottomed saucepan - preferably a stainless steel one so you can see the sugar changing colour. Heat this until it boils, then watch it turn to an amber colour - don't let it go too far. When it reaches the smoke point, carefully throw in the salt, and slowly pour in the cream with one hand while mixing with a wooden spoon. It will bubble considerably, so just do it bit by bit.
Once these have all been mixed, take off the heat and pour into a tray or bowl. Let it cool slightly, then mix in the gelatine. It should dissolve after a few stirs, but if not use a hand blender to make the magic happen. Pour through a sieve into another container, then put in the fridge for about an hour (or freezer for 15 minutes)
When the caramel is cold, Whip the cream to soft peaks - just enough to hold its shape; don't bring it to that "churned" consistency. Take the caramel, and place it in your stand mixer (fitted with the whisk attachment). Whip it up until it's the consistency of butter.
Fold the cream into the caramel, then fold the walnuts in.
Assembly step 2: Take a some of your coffee liquor and pour into a small bowl. Dip a pastry brush into this, then lightly brush the dacquoise. Pour the caramel over the dacquoise layer, and make smooth with a flat spatula. Place the tin or frame in the freezer to make it completely hard.
Make the nutmeg custard
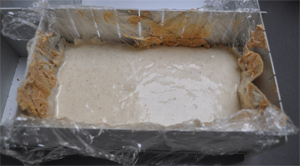 This is a more liquid layer, so make sure your mousse has completely frozen before making it.
Take the gelatine sheets and place in a bowl of cold water to soften. Place the milk and caster sugar in a saucepan, then put the egg yolks and cornflour in a metal bowl. Whisk the yolks until they start to turn yellow and the cornflour has completely combined.
Heat the milk and sugar until they just hit the boil, then pour a little over the eggs to temper them, mixing with a wooden spoon or whisk as you go. Pour more and more of the hot milk into the bowl until everything has combined. Pour this back into the saucepan and immediately begin to stir or whisk - the cornflour will start to work within about 20 seconds.
Once the custard has thickened, take off the heat and pass it through a sieve into another bowl. Grate one whole nutmeg (I know, but trust me!) into the custard, then stir to combine.
Take the gelatine out of the water and add to the custard while it's still warm. Once combined, leave the custard to cool to nearly room temperature (5 - 10 minutes) then again whisk the cream to soft peaks. Fold the cooled custard into the cream.
Assembly step 3: Pour the custard over the mousse layer, and tap to distribute evenly. Place the tin or frame back in the freezer to make it completely hard.
Make the espresso ganache
Again, wait until the custard layer is completely hard before starting this step
Place the chocolate and butter in a heat-proof bowl, and the cream in a saucepan. Heat the cream until it just hits the boil, then pour over the chocolate & butter and leave to settle for 30 seconds. Use a wooden spoon to stir the mixture together or, my preferred method, use a hand blender to do it so you can make sure everything is well combined.
Let the ganache cool slightly so that it's less liquid, but still pliable
Assembly step 4: Take your reserved dacquoise layer and place this on top of the frozen custard. Again brush with some of your coffee liquor. Pour or spoon over the ganache and smoothen with a flat spatula. This is your final layer, so try to make it as smooth as you can. Place the tin or frame back in the freezer to make it completely hard.
Make the glacageNote: This is William Curley's recipe from his Couture Chocolate book. It's probably my favourite patisserie-related book, and has taught me a hell of a lot - so please go and buy it if you've not got a copy yet!
Put the gelatine sheets in a bowl of cold water. It's a lot of gelatine, but you need it.
Place the water and caster sugar in a saucepan, and heat until it boils - keep it rolling for 3 minutes.
Next, pour in both the cocoa powder and cream, then continue to boil for another 5 mintues. Don't keep the heat up to the max or it will bubble over the pan - keep an eye on it and reduce the heat if it gets too active.
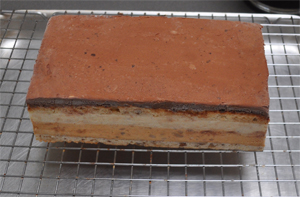 When time's up, take it off the heat. If the cocoa looks a bit claggy, use the hand blender again to make it smooth. Squeeze the water off the gelatine, then add it to the chocolate cream and stir.
Pour through a sieve into a jug, and place a thermometer in it. Let it cool to about 25 degrees C or as close as you can get - this can take up to an hour. If it sets completely, you can melt it again over a very gentle heat - but if you watch it and your cake is frozen you should be able to use it as soon as it's down to that temperature.
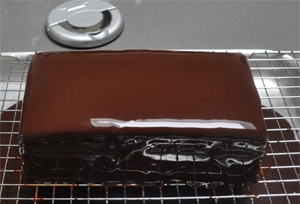 Assembly step 5: Take the cake out of the freezer and unmould it from the tin or frame.
Pull off the cling film and then trim the edges so that you get as close to a clean rectangle as possible. Put the cake on a cooling rack that you've set over a clean tray. Pour the cooled glacage over the frozen cake - do it relatively slowly, but not too slowly as it will start to set over the frozen cake. Keep pouring all over, ensuring you have covered every part. I use a ladle to help with that - just scoop some up from the jug and pour over the naked bits. Place the whole thing, tray and all, in the fridge (note: not freezer) for one hour to set.
Make the chocolate tuilesPlace a metal bowl over a simmering pan of water. Put 100g of the chocolate into the bowl, and keep stirring with your thermometer.
When it reaches 47 degrees C, add the remaining 50g and remove from the heat.
Stir vigorously until it's all combined. Stop when you reach 31 to 32 degrees C. Take out the trusty hand blender if it has trouble melting.
If you need to raise it back to 31 degrees C, put it back on the bain marie briefly.
Place your acetate triangles on a silicone mat, then spoon over a small amount of the tempered chocolate. Smoothen with a spatula until it's covered and you can't see through onto the mat any longer
When you're done, clean the spatula then carefully remove each triangle onto a second clean mat and sprinkle with any of the nuts you have left
Leave this to set slightly - it needs to still be pliable, but not liquid. Carefully lift them again, and this time place into the bottom of a U-shaped bouche mould so that they curl up at the bottom. Let them dry completely before peeling off the acetate.
Assembly step 6: When the glacage has set, slice the cake with a hot knife. It's quite soft, even straight out of the fridge - so a blast in the freezer will help you not squash it as you cut. A piece 1.5 to 2cm thick would be a good portion. Top with a chocolate tuile and serve immediately.
Supermalt Ice Cream Macaron
Supermalt flavoured ice cream covered in malt & oat caramel

Supermalt always divides people. It's a non-alcoholic, naturally brewed malt drink; if you've ever had "Start" (a favourite cereal from my childhood) it's basically a liquid version of that.
I think the depth of malt flavour is really off-putting to some, but this recipe is the perfect carrier to get them to try it.
I've rolled the ice cream in a caramel made with more of the Supermalt & some toasted oats to give it a bit of texture. Try it - I guarantee you won't make this face.
Makes 8 macaron
Ingredients
For the ice cream
- 1 x 330ml bottle of Supermalt (you'll use 250g in this part of the recipe)
- 500ml double cream
- 150g caster sugar
- 5 large egg yolks
- A pinch of salt
For the macaron shells
- 150g Ground almonds
- 150g Icing sugar
- 110g Egg whites
- 150g Caster sugar
- 37ml Water
- 3g Brown powdered food colouring (Americolor)
For the caramel
- Remaining Supermalt
- 100g caster sugar
- 20g porridge oats
Equipment
- Stand mixer
- Ice cream maker
- Silicone mats
- 8cm circular cutter
Make the ice cream
Weigh 250g of Supermalt out into a large saucepan. Pour 500ml of double cream - straight from the fridge so it's cold - into a metal bowl. Place a fine sieve over that.
In another bowl (ideally one with a non-slip base, or put it on a kitchen towel) place the 5 yolks and 150g of sugar and a pinch of salt. Whisk these until the yolks become pale.
Heat the Supermalt until it nearly boils, then temper the yolks with a quick pour of the liquid. Keep whisking the yolks, then add a bit more Supermalt. Keep going until all the liquid is in the yolk mix, then pour the lot back into your saucepan and put over a low heat.
Keep stirring with a wooden spoon, and make sure it doesn't catch or scramble. When it's thick enough to coat the back of the spoon (just run your finger down the middle of it - if it leaves a trail, it's done). Immediately pour this through the sieve into the cream and stir with a clean spoon.
Leave this to cool, then put it in your freezer to chill for 15 minutes. Loads of people say "freeze overnight" - I find that a bit weird if you're using an ice cream machine. Instead, while the mix is cooling, I put my machine on freeze mode to get it cold. When 15 minutes are up, start the paddle and pour your mix in.
Once churned, you'll want to scoop out the ice cream into a container that is reasonably high-sided so that you can get a good tall circle out of it with the cutter. This mix makes about 1 litre of ice cream, and I normally use a 20cm cake tin with a removable bottom. Scoop it in, smoothen the top then put back in the freezer until you're ready to serve
Make the macaron shells
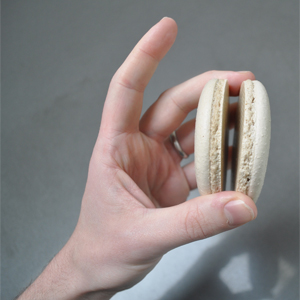
I use the Italian meringue technique by Pierre Hermé to make the shells - but everyone has their own tweaks to get consistent results at home.
Start by preparing everything - have your baking mats on some heavy trays, get out the piping bag and place the nozzle inside. Measure out the 150g of caster sugar and 37ml of water into a small pot and place on your stove top with a thermometer inside. Measure out 55g of your egg whites into the bowl of a stand mixer, and connect the whisk attachment
Now put the 150g of icing sugar in the bowl of a food processor, followed by the 150g of ground almonds (putting the sugar in first helps to stop it leaving the processor in a cloud of dust). Blend for a few minutes to make sure everything is as fine as possible. At this point, tip the mix into a new bowl (one big enough to fix this mix and the meringue later) and re-weigh to make sure you have exactly 300g of dry ingredients. Top up if necessary. Take the remaining 55g of egg white and place in a small bowl, then add the brown food colouring and mix. If you can't find the powder colour, paste is the next best thing. Avoid liquid food colouring if you can, as they tend to dilute the mix too much. Pour this mix on top of your dry ingredients and set aside.
Start to heat your sugar / water mix in the pot over a high heat. Keep going until you hit around 112 deg C. Turn on your stand mixer to a medium high speed to get the whites whipping - remember not to go too mad with the speed at this point; you don't want stiff peaks nor soft ... somewhere in between is perfect. As the temperature of the sugar / water mix hits 118 deg C exactly, quickly remove from the heat, push up the mixer to high and slowly trickle the hot syrup onto the whipping egg whites in one smooth motion. Now leave the whites whipping until much cooler. If you raise the whisk and the meringue drips off quickly, don't despair - you've probably not left it mixing long enough, so just keep going until it comes away on the whisk and pretty much stays there.
Take a spatula and transfer all of the Italian meringue you've just made into the bowl with the dry ingredients you prepared earlier. Fold with the spatula until you get the desired consistency - to me, this is the crucial point where things can go wrong, and it's really hard to actually explain or even take a photo of the correct consistency. All I can say is that if you drop the mix from a spatula, and it doesn't re-absorb into the mix without trace in about 15-20 seconds, it needs more mixing. If it's more liquid than that, and just flies off the spatula, it's game over for you. Pierre describes it as "slightly runny cake dough". Make sure you get right to the bottom of the bowl though, or you may leave unmixed colour or ground almond at the bottom.
When ready, hold the piping bag and fold the top of it over your hand. Use the spatula to transfer the mix inside, then twist the top (put a kitchen clip on it if you like - I've lost mix many times by wandering aimlessly around the kitchen, not realising batter is dripping out behind me) cut off the end and get ready to pipe. I always have a bit if kitchen roll ready to clean the nozzle if too much mix clogs around it. This helps you pipe more perfect circles.
On the baking mats (and I would advise the Silpat-style ones over silicone, and both of those over just using greaseproof/baking paper - much easier to get them off later) pipe larger than normal rounds to hold the ice cream - about the size of the cutter (8cm), keeping your nozzle as straight as possible. Keep about an inch between each round; you don't want to overcrowd the shells. Carry on until you've filled the mat, then rap the baking tray on your work surface with relative force a couple of times. This helps to settle the batter, and is important not to forget. The French pros always do a little "whip" at the end of each pipe to stop the nipple effect (when a bit of the batter sticks up in the air), but in general I find these subside when you rap the trays. If not, you can use a wet finger to gently smoothen out any stray batter.
Repeat with the other mat so you have two full sheets. Turn your oven on to 140 degrees C, set the sheets aside in the kitchen for 30 minutes to form a skin while you make the filling.
Make the caramel
 This is a two stage process, just to make sure we don't burn the malt flavour right out.
Now, take the other 50g and place it in another saucepan - preferably a silver / light colour one that you can watch sugar changing colour in. Heat the sugar, shaking occasionally. You want to bring it to an amber colour - normally that's right at the moment you start to see smoke coming from it. When you hit the point, remove from the heat and immediately pour over the top of the Supermalt syrup you've just made. Leave aside to harden.
Place a pan over a high heat, and add your porridge oats. Toast them until they're brown, then set aside.
When both the caramel has set and the oats have cooled, hit the caramel with the back of a knife to smash it (be careful, those shards can kill!) then place both the oats and caramel in a blender and whiz it to a slightly chunky powder.
When you're ready to assemble, pour the powder into a shallow bowl
Assembly
If you've used a cake tin with removable bottom, remove the ice cream completely from it. If you've just used a plastic box or similar, you might need to cut around the circles to release them.
Cut 8 circles from the ice cream, and set them aside on a tray.
At this point the ice cream will have slightly softened - if not, give the edges a quick blow-torch to melt them. Pick each one up by its flat top & bottom and roll it in the powdered caramel mix, then place back on the tray.
I'd not recommend putting them back in the freezer after rolling - the caramel will probably start to deteriorate
Place each cut ice cream on a macaron base, and match with the lid. Serve and enjoy!
Arabic Coffee & Cardamom Brioche
Simple recipe for a great breakfast loaf
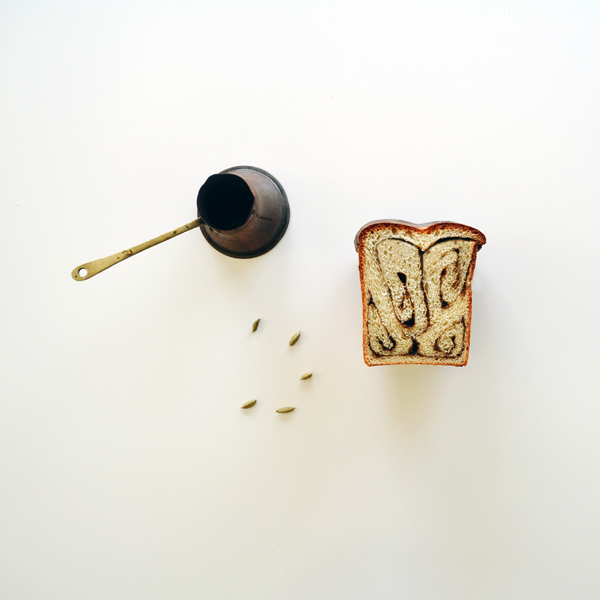
I'll always prefer espresso to any other type or method of coffee preparation, but Arabic coffee always brings back childhood memories of Sunday mornings.
All the Middle Eastern countries have their own claim to the way this type of coffee is prepared - in my house it was always the Armenian way; coffee, water, cardamom and sugar in the pot stirred then heated and risen twice.
This recipe combines the sweet coffee flavour with a rich brioche - best served lightly toasted to bring out the smell at breakfast time.
Makes 1 loaf
Ingredients
For the dough
- 400g strong white flour
- 7g dried yeast
- 10g salt
- 90g whole milk
- 100g unsalted butter
- 3 large eggs
- 30g caster sugar
For the filling
- 6 heaped teaspoons of finely ground Arabic-style coffee
- 30g caster sugar
- 10 cardamom pods
- 25g unsalted butter
For the glaze
- 1 large egg yolk
- 10g whole milk
Equipment
- Arabic coffee pot
- Muslin cloth
- Large loaf tin (3lb)
Start both the dough and filling the day before you want to make the bread.
Make the dough
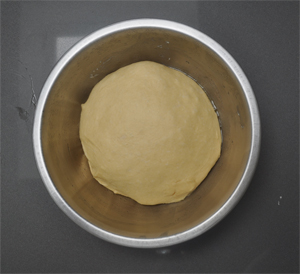 While I generally like to do things the traditional hand-made way, brioche is not the world's most fun thing to work with - so, place your dough hook on your stand mixer, and combine everything except the butter. Heat the butter very gently in a pot so that it melts almost completely, then let it cool slightly. Combine this with the rest of the ingredients, and turn your stand mixer to its lowest speed setting. Leave to knead for 10 minutes, then remove to a bowl, cover with cling film and put in your fridge for at least 7 or up to 24 hours.
Make the filling
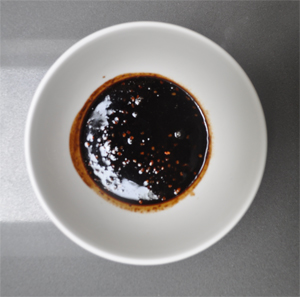
You'll need to prepare 3 servings of coffee. Gently crush your cardamom pods to release the seeds within, then discard the dry outer shell.
Place a bowl large enough to hold 3 coffees next to your stovetop. Place two heaped teaspoons of coffee into your pot, followed by 10g of sugar. Fill the pot approximately 1/3 up with water and place on a medium-high heat. Don't take your eye off it or you'll get a volcano of coffee all over your kitchen.
As the coffee rises up the pot, pour half into the bowl then return to the heat for a moment. This will then bubble up again; so then pour the rest into the bowl.
Repeat this process twice more with the rest of the coffee and sugar. When you're done, take a sieve and place it over a jug. Put your muslin cloth over that, and carefully pour the coffee through in order to take out the grounds. Don't squeeze too hard as Arabic coffee is very finely ground, and some might make it through.
Next, place the cardamom seeds into the filtered coffee and whisk in the butter while it's still reasonably hot. Leave it out to cool and infuse, then cover in cling film and place in the fridge.
The rise
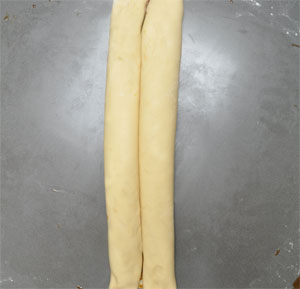 After your dough and filling are suitably cooled, take them out of the fridge and lightly dust a work surface with flour. Roll out the dough into a reasonably square shape approximately twice the length of your loaf tin, making sure you add a bit more flour underneath if it starts to stick.
Spoon over the cooled filling, then use a flat spatula to try and spread it over the dough evenly. Next, start to roll one side in on itself, and keep rolling until you reach half way across your dough. Repeat with the other side so you end up with the two rolls meeting in the middle.
Butter your loaf tin, then gently cut the whole double-roll in half length ways so that you end up with two pairs of rolls. Place one set with the seam upwards in the bottom of the loaf tin, then invert the other so the smoother side is on top.
Leave this to rise for 3 or 4 hours, pre-heating your oven to 200 degrees C after about an hour.
After it has proved, make your egg wash by whisking the yolk and milk, then paint the top of your loaf and place it in the oven for 10 minutes. After 10 minutes are up, reduce the temperature to 180 degrees C and bake for a further 30 minutes. If your top looks too brown, cover in silver foil to stop it burning.
Once done, remove from the tin and let it cool for at least 15 minutes. Cut it, toast it, butter it and generally be happy.
Naffa Cakes
Negroni inspired version of a classic treat
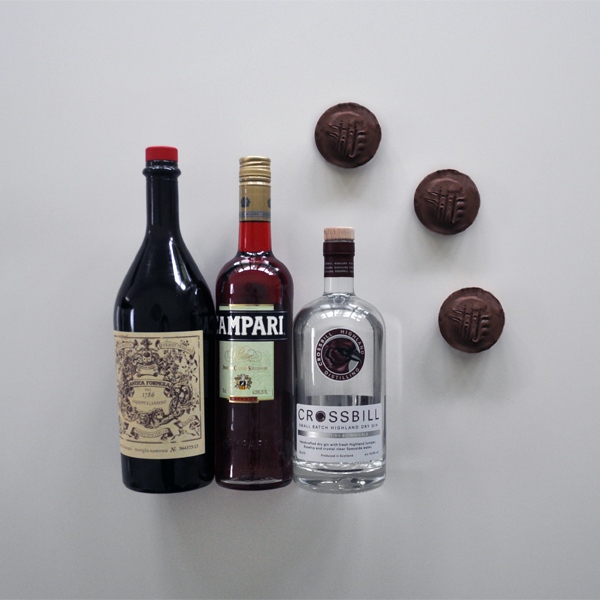
At some point, if you've worked in an office, you've had a "snack drawer". Don't even bother lying. We've all done it - and it's almost with 100% certainty that I can say you'll have had some Jaffa Cakes in there. Perhaps you've even eaten your way through one of those metre long packs. I've definitely not not done that too.
This adult version has a ground almond cake base, topped with a fully alcoholic Negroni jelly shot, covered in milk chocolate.
Caveat: I'd not recommend making then taking these to work. Unless you work at Sterling Cooper Draper Pryce of course.
Makes 12
Ingredients
For the base
- 150g ground almonds
- 4g baking powder
- 1 large egg
- 50g unsalted butter, melted then cooled
- 75g Agave nectar
- Pinch of salt
- The zest of 1/2 an orange
For the jelly (you'll have some left over)
- 5 leaves of gelatine
- 50g caster sugar
- The zest of 1/2 an orange
- 150g water
- 75g vermouth (recommended: Antica Formula)
- 75g Campari
- 75g gin
For the topping
- 250g milk chocolate
Equipment
- 12 hole cake tin
- Serrated knife
- Pastry cutter, of a visibly smaller diameter than your cake tin (to cut the jelly with)
- Thermometer
Before you begin, get the oven pre-heated to 180 degrees.
Make the jelly
Soak the gelatine leaves in cold water for 5 minutes. While that's happening, put the water, caster sugar and orange zest into a pan and heat until it reaches boiling point. Let it bubble for a minute or so, then take it off the heat to cool slightly. When the gelatine is ready, squeeze off the soaking water and drop into the hot syrup. Mix this together, then pour into a jug.
Measure the temperature; you want it to go below 78.5 degrees so you don't heat the alcohol too much. When it's there, pour in the vermouth, gin and Campari.
Take a baking dish that's at least 2cm tall, and line it with cling film to make it easier to remove later. Start pouring in the jelly mix; you want it to be just under 1/2 cm thickness. No need to be totally accurate, but make sure it's not too thin / thick or you'll get a disappointing result. Place this in the freezer to speed up the setting time.
Make the cakes
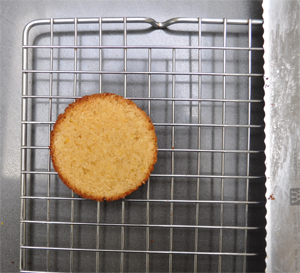 Place the ground almond, baking powder, orange zest and salt in a bowl. Mix thoroughly, then add the egg. Combine to a paste consistency. Add the butter, and combine again until everything is evenly spread - it won't be really smooth because to the ground almond.
Prepare the baking tin by buttering it. Place around 1 tablespoon of mix in each tin hole, then smoothen the tops as much as you can. We'll be cutting the tops off later.
Bake in your pre-heated oven for around 15 minutes, turning once, until the tops are golden.
When time's up, take out the tray and leave to cool for 10 minutes. Invert the cooled cakes onto a wire rack then carefully slice the tops off with a serrated knife. You want around 1/2cm for the cake.
To construct
 Place the sliced cakes back into your tin. This will help stop the chocolate running over the cake base, making them look a bit more like the real thing.
Take a pan of water and bring it to a simmer. Place a metal bowl over this to create a bain-marie, and add your milk chocolate to this. We're not tempering here - we're after a softer finish, so just melt the chocolate until it's liquid.
Finally, take your jelly out of the freezer. It should be set, and may have some ice crystals on. No problem. Cut discs with your pastry cutter, and place onto each cake as centrally as you can.
Working quickly, as your jelly will start to set it immediately, pour about 1 tablespoon of melted chocolate over each cake and gently rotate the tray to get an even finish. You'll need to repeat that with each cake. Use a fork to get that Jaffa Cake style criss-cross finish, then leave to set in the tray.
To release them, take a small palette knife, and heat it over your hob. Carefully scrape the edges of the set chocolate, then remove and enjoy.
Rhubarb & Custard
Custard filled tart topped with a light forced rhubarb & ginger mousse
Full disclosure: I don't like rhubarb. It's one of about 3 ingredients I've never been able to eat.
Sometimes though, I'll venture over to the dark side of the things I hate and try to find a way to love it like everyone else - and, for the first time, it worked; I've been converted to the joys of the manky pink celery stuff.
This recipe was inspired by my favourite chef, Raymond Blanc, and his new show about Kew Gardens. If you've not seen it, I'd recommend it. He made a rhubarb & custard dessert which looked delicious, and made me think "how bad can it really be?"
Makes 6 with mousse left over
Ingredients
For the rhubarb and ginger purée
- 400g forced rhubarb
- 20g piece of ginger
- 75g caster sugar
For the mousse
- 4 leaves of gelatine
- 60g liquid glucose
- 120g caster sugar
- 50g water
- 120g egg whites
- 350g whipping cream
For the pâte sucree
- 250g type 45 flour [Buy] (or just plain if you have it)
- 140g unsalted butter (softened)
- 1 large egg
- 1 large egg yolk
- 40g ground almonds
- 90g icing sugar
- 1tsp vanilla extract
For the crème patissière
- 250g whole milk
- 1tsp vanilla paste, powder or essence
- 3 large egg yolks
- 37g caster sugar
- 12g plain flour
- 10g cornflour
For the white chocolate spray
- 250g white chocolate coverture
- 100g cocoa butter or groundnut oil
- 1tsp red food colouring powder
For the rhubarb tuille
- 1 stick of rhubarb
- 2tbsp grenadine
- 100g water
- 20g caster sugar
To finish
- Spring flower petals
- Gold leaf
Equipment
- Silicone mat
- Stand mixer
- Thermometer
- Spray gun (I use the Wagner W180P)
- 6 inch diameter semi-sphere silicone mould (with 6 holes)
- 6 inch tart rings
Note: there's some freezing and setting time involved here, so either start in the morning or the day before you want to serve them
Rhubarb and ginger purée
Chop the rhubarb into chunks, discarding any woody ends. Slice the ginger, then place both in a pot and cover with the caster sugar. Place over a medium heat, and watch as the rhubarb's juice starts to come out. Cook for about 5 minutes, stirring occasionally, until the rhubarb has broken down. Let it cool slightly to avoid burning yourself, then blend with a stick blender in the pot until you get a fine purée. Sieve it and set aside to cool a little more while you prepare the mousse ingredients.
Mousse
Soak the gelatine in cold water for 5 minutes. When it's soft, squeeze out the water and mix it with the now slightly cooled purée (which should still be too hot to touch with your finger) from the first step. It won't set immediately, but carry on working quickly anyway.
Prepare to make the meringue - place egg whites into the bowl of your stand mixer with whisk attached. Put the caster sugar, liquid glucose and water in a heavy pot over a high heat and start to measure the temperature with your thermometer. You're looking to get to the magic 116 degrees centigrade - so, when you hit around 113, start your stand mixer up on the highest setting to whip the whites. When you reach 116, slowly pour the sugar syrup down the edge of the stand mixer bowl. Leave the mixer running at its highest speed until you get a thick Italian meringue.
Measure out your whipping cream, then whip until it leaves a trail on the surface of the cream.
Once the meringue is cool, pour in the purée and gently combine with a spatula, then do the same with the cream.
Take a 6 hole semi-sphere silicone mould, and spoon in the mousse. Try to make sure it coats the entire outer surface of each half sphere. When full, scrape the top of the mould with a spatula so that everything is level. Place the mould on a tray, and put into the freezer for at least 3 hours.
Rhubarb tuille
Pre-heat your oven to 100C.Raymond used a vegetable peeler to make thin strips of rhubarb, but mine wasn't having any of it. If you also have trouble, just use a sharp knife to slice the stick of rhubarb as wafer thin as you can. Make as many as you can just in case they snap or fail. Place the strips into a heatproof bowl.
Place the grenadine, water and sugar in a saucepan and heat gently until it reaches a simmer, then pour this over the rhubarb. Leave for 10 minutes until cool.
Place a silicone mat on a heavy tray, then lie each thin piece of rhubarb spread out over that. Place it in the oven - mine took about 30 minutes, yours could take less or more time. Keep an eye on them. Alternatively you could use a dehydrator if you have one.
When the slices seem quite hard, remove from the oven to cool. When they've come to room temperature, they should be solid and crisp. Place into a sealed container and reserve for later. Don't put them in the fridge though!
Crème patissière
Pour the milk into a saucepan, add the vanilla and place on a medium high heat. Place the egg yolks and sugar into a bowl and whisk until a pale yellow colour. Next, add the flour and cornflour to the eggs and whisk again until you have a really smooth paste.
As soon as the milk is just about to boil, remove from the heat. Place your egg bowl on a tea towel to stop it moving, then pour a tiny amount of the hot milk over the yolks while you're whisking to temper them. Add a bit more milk, and keep on whisking, then add the rest, whisk for a moment, then pour the mix back in the pan over a more gentle heat.
Keep your whisk going gently, and you'll see it thicken within 30 seconds. Keep mixing, making sure it doesn't catch on the bottom of the pan. When it's very thick (about 60 seconds) pour it into a bowl and leave to cool. When cold enough, cover with cling film and put in the fridge.
Make, bake and fill the tart cases
Attach a whisk to your stand mixer, and add the butter. Whip until the butter has been creamed, then add the vanilla extract, icing sugar, ground almond and eggs. When combined, tip about 1/3 of the flour in. It should be combined in a few seconds, so repeat with the next 1/3 and then the final amount of flour. Stop the mixer when the mixture looks combined and a bit like wet sand.Turn this out onto your work surface and press it all into a smooth ball. Place the ball on some cling film, then flatten slightly with the palm of your hand. Wrap it in the cling and place in the fridge for at least 2 hours.
When the pastry has rested, take your baking mat, place it on a tray, then the individual flan rings on top of that. Remove the pastry from the fridge and, working quickly, dust with icing sugar roll to a thickness of about 3mm. Try and make it as square as possible.
Cut the rolled pastry into 6 even pieces, then carefully - using an offset spatula, the rolling pin or carefully with your hands - lift, and unroll each piece over the rings. This is the part where disaster can strike, so try and start the unrolling with enough "edge" to cover the closest part to where you're standing. If it has worked, start pushing the dough into the edges of each ring, leaving any excess folded over the top. Don't trim it yet. If you find any cracks, just patch them with spare pieces of pastry or some of the edge overhang.
Turn your oven on to 170C.
To help stop shrinkage, freeze the tart cases instead of just putting them in the fridge. Leave the tray in there for about 30 minutes until nice and cold. When you're ready to blind bake, quickly remove the cases from the freezer and place some silver foil (matte side down) into into each one. Scrunch the foil down over the top edges of the cases so each one is completely covered in foil, then gently some baking beans into each one.
You need to add a bit of extra cooking time due to the frozen case, so bake for about 20 minutes. After this time it should look anaemic but be solid - so remove the foil and beans, then brush with a beaten egg and return to the oven for a further 5 minutes.
Remove and leave to cool for about 10 minutes, then use a sharp paring knife to trim the outer edge of each case. Carefully remove the rings, then brush out any pastry crumbs.
After they have completely cooled, take your crème patissière and spoon into each case. Use a spoon or palette knife to even the filling out. Place in the fridge to firm up.
Chocolate spray
Only start this when your mousse has completely set.To prepare, cut 6 small pieces of greaseproof paper, large enough to hold each semi-sphere, but not much larger than that (or the paper will fold up during the spraying process and ruin the finish). Unmould each sphere onto the pieces of paper, then return to the freezer.
Get a cardboard box ready - a 12" record box is ideal (just ask your local hipster for one), but any box large enough for you to clearly see what you're spraying while containing the mist will be fine.
Place a metal bowl over a pan of simmering water and place the chocolate coverture into that. When it has completely melted, remove from the heat and add the red colouring. If you're using cocoa butter, melt it in a pan then blend - a 1/3 at a time - with the chocolate. If you're using oil, just fold it into the warm chocolate mix 1/3 at a time.
You'll end up with a nicely liquid mix - so pour that into your Wagner or similar spray gun.
Working quickly, take one semi-sphere out of the freezer, and place it in the bottom of the box. Stand 30 to 50 cm away from it, and spray into the box as straight as you can - be aware that if you tip the spray gun too far forwards you'll end up with air bubbles getting into the tube and you'll start spraying lumps at the mousse. Not good. Make a half , then spray again. If it doesn't look completely covered, turn and spray again. When you're happy, quickly return it to the freezer. Repeat with the other 6 mousses.
To construct
Take the filled tart cases out of the fridge, and the frozen sprayed mousse from the freezer.Using an offset spatula, carefully slide under each mousse to release it from the paper then, wiping off any excess chocolate you've picked up, move it on top of the tart case. It should line up pretty much perfectly if you've used the mould sizes specified in the ingredients section.
Repeat this with the other cases and mousse semi-spheres.
If you're not ready to serve, place these in the fridge. When you're about an hour before serving, remove to allow the mousse to thaw out.
The gelatine in the mousse will hold it solid at room temperature, so you shouldn't have any issues with melting - but it's nicer if it's colder than room temperature.
When it has thawed a little, take a rhubarb tuille and push it into the side of the mousse. Decorate with a couple of petals and a bit of gold leaf. Repeat with the other desserts.
... then enjoy. Or not, if you hate rhubarb.
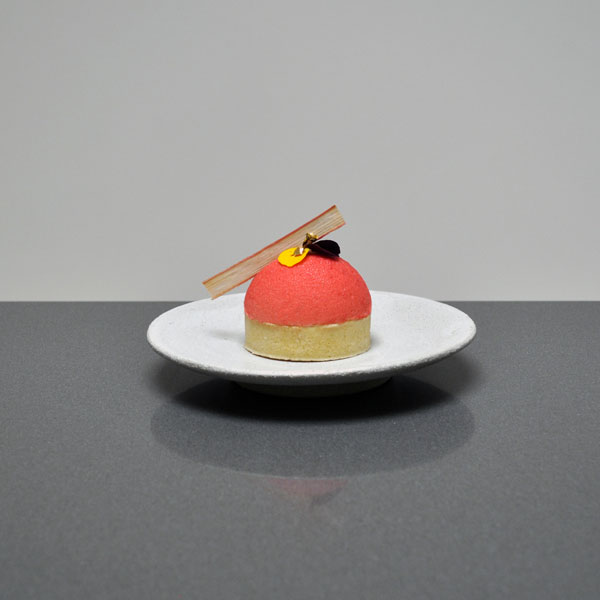
Calçots & Romesco Sauce
One of the most addictive sauces served with barbecued Calçots
We developed an addiction to romesco sauce & calçots at Barrafina Soho a few years back. Romesco is one of the most delicious things to come out of Catalonia; a balance of roasted peppers, nuts, olive oil and vinegar that is unbelievably addictive.
Calçots, a special Catalan kind-of-leek, not-onion scallion that only appears for a short window in the year, have eluded us at home for a long time.
Thankfully Brindisa are were selling them online.
Technically it's not quite romesco that's eaten at a calçotada, but it's pretty close. There are loads of variations, but my recipe is how I remember the sauce tasting the first time I had it - and I've been making it this way ever since.
Warning: anyone who eats it will be back for more. So hide it.
Makes a pot
Ingredients
For the romesco
- 2 Romano peppers
- 4 garlic cloves
- 16g hazelnuts (shell & skin removed)
- 24g almonds (blanched)
- 30g tomato puree
- A pinch of dried chilli flakes
- 1 slice of sourdough, crust removed
- 5g or a small bunch or parsley
- 2 tbsp red wine vinegar
- 100g olive oil (you may need a touch more or less)
- 1/2 tsp smoked paprika picante buy
- Salt to your own taste
For the calçots
- 4 calçots per person as a starter
Romesco sauce
Pre-heat your oven to 180 degrees C.
If you're going to barbecue the calçots and have it burning already, then roast your romano peppers on the grill until they're black all over. If not, and you have a gas hob, then use one of the rings to do it. You could also use a blow torch - but the barbecue is best if you can.
When they look nice and black, take them off the heat, place in a heatproof bowl and cover with cling film. Let them stand for 10 minutes to sweat.
Spread the hazelnuts and almonds over a tray and put in the preheated oven for 10 minutes.
 When 10 minutes are up, take the tray out of the oven and set aside. Place the peppers on a chopping board. Scrape off the blackened skin, slice the top off, then slice in half and remove the seeds. Chop each pepper into smaller chunks.
Heat a tablespoon of the olive oil in a pan over a medium-high heat, then slice your garlic thinly and add that to the pan along with the roasted peppers and a pinch of chilli flakes. Cook for about 2 minutes or until the garlic has softened, then throw in your sourdough and cook for another 5 minutes.
Pour this into your food processor, and add the tomato puree, vinegar, parsley, paprika, and a pinch of salt. Blend until roughly chopped. At this point, start pouring in the olive oil with the processor's blade running. I like a more chunky consistency that is wet but still has some nutty texture - the more traditional way is to have it more smooth. The remaining olive oil (around 95g) is about what I'd suggest, but ease back on it if you think it's getting too wet.
Try the romesco and season until you're happy with the flavour. Use it on the calçots below, or have it as a side with salad, cheese or cold meats. You'll start finding excuses to have it.
Will last up to 5 days if refrigerated.
Calçots
The traditional way is to cook them on open coals, then wrap in newspaper to steam for 15 minutes.
You can place your calçots on the grill of a hot barbecue rather than on the coals directly if you prefer (some flames are fine). Either way, cook for 10 minutes. Turn them once in a while to make sure they cook all over. When they look blackened, remove and either wrap in newspaper or put in a bowl an cover with cling film to help the insides steam for 10-15 minutes.
Alternatively, you can cook them on a tray covered with olive oil in your oven at 180 for about 15 minutes. They won't be as dark, but they'll be cooked through nicely.
When ready, peel off the outer blackened layer to find a soft onion centre. Dip in the romesco sauce and enjoy.

Lahmajun with an apple salad
An Armenian favourite, turned into a healthier protein-rich dinner
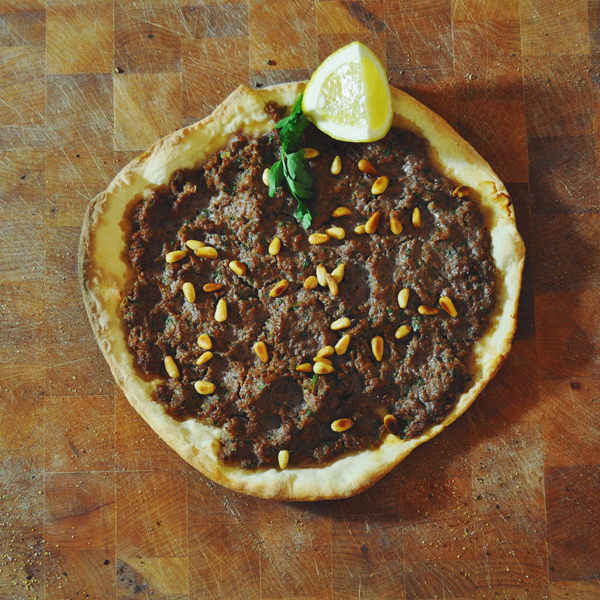
While not quite as exciting to post about, running or exercising well requires a certain diet. I've been pounding the streets of Mill Hill for over 20 years now, since the day I accidentally "auditioned" for the cross country team at school back in the 90s. For the last 10 years, the wife (who is also a runner) and I have stuck to a pretty simple set of rules - no alcohol during the week and eat healthy, lower calorie (but not low calorie) balanced food for exercise fuel Monday to Thursday ... then the weekend is ours to bathe in butter, bread and wine.
It's not about a super low cal diet for us. This suits a lot of people, but when you're out running for miles or working at high intensity in the gym it's simply not good for you to have zero fuel in the tank. You need some extra carbohydrates to power you if you're working hard, and protein to assist muscle gain and recovery.
This recipe is for a traditional Armenian dish, tweaked to be more healthy. My dad (one of those old school pure-blood Armenian types), says in his experience Lahmajun is made with lamb and fried onions. That sounds like a recipe for keeping our Kim Kardashian sized backsides up to standard Armenian XL size.
So, instead, I use beef fillet to keep things lean and bake the onions with the mince to cut another portion of oil out. Served with the apple salad, it makes a great dinner for days when you're exercising hard during the week.
Makes 4 Lahmajun / serves 4
470cal per portion
Ingredients
For the dough
- 120g warm water
- 3g active yeast
- 1 tsp olive oil
- 3g caster sugar
- 200g double zero (00) flour
- 2g diax
- 3g salt
For the topping
- 400g fillet steak, or another steak cut with all fat removed. Should be placed in the freezer for an hour to firm up
- 1 brown onion
- 20g fresh parsley (and some extra for garnish)
- 5g fresh mint
- 250g chopped, tinned tomato
- 1tbsp tomato puree
- 3g salt
- 1tsp pomegranate molasses
- 1 lemon
- 1g cinnamon
- 1g ground coriander
- 1g cumin seeds
- 2g all spice
- 20g pine nuts and an extra tsp cumin seeds for toasting
For the apple salad
- 1 eating apple (Braeburn)
- 20g fresh parsley
- 2tsp olive oil
- 1tsp pomegranate molasses
Equipment required
- Food processor
- Pizza stone or heavy tray
For the dough
Mix the water, olive oil, sugar and yeast in a jug and let it activate for 5 minutes. Mix the flour, diax and salt together then combine with the wet ingredients and knead (by hand or in a machine with dough hook) for 10 minutes.
Place the dough in a lightly floured bowl and cover with cling film. Keep in a warm place until doubled in size.
For the topping
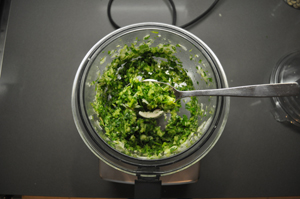
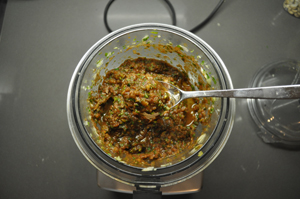
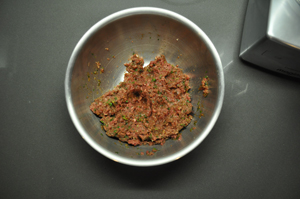 Freezing the meat makes it much easier to mince. Fillet can be soft to mince, so the low temperature allow it to pass through the blades without turning to mush. You can also used shop bought lean beef mince if you don't want to make your own.
Mince it, then grind a decent lot of pepper on top and set aside.
Take put your food processor. Slice an onion and remove the skin, then add that, the parsley and mint to the mixer bowl. Blend until roughly chopped - don't go too far, you don't want a puree. The photo here should give an indication.
Now weigh the spices and salt, then add to the onion mix with the tomato puree, canned tomato and pomegranate molasses. Blend again, being careful not to over puree it. Taste the mixture then add a squeeze of lemon juice to taste and more salt if required.
Leave this mix in the bowl of the processor for about 10 minutes - we want any of the excess liquid from both the onions and the tomato to come out. When you can see that has happened, use a spoon to hold the mixture back and carefully pour off the water into your sink.
Putting it together
Turn your oven on to 230c to pre heat, and put a big non stick pan over your hottest stove top burner or element. If you have 2 pizza stones, put them in the oven.
We left the food processor mix and beef separate so that the meat doesn't start to cook from the salt and lemon. When your oven is up to temperature and you're nearly ready to cook, combine the food processor mix with the mince. Don't overwork this - it should be quite loose. The photo here it what you should end up with.
Knock the dough back and split into 4 balls.
Flour the work surface and rolling pin, then roll out one ball to a round disc about 3mm thick. Place this into the scorching hot pan and centre it. Take 1/4 of the meat mixture and spread this on top. After 1 to 2 minutes, slide out the Lahmajun onto your work surface and repeat with the other three balls.
What we've done is seal the base and give it a crisp underside. Now all 4 are done, use your peel to slide them all onto the pizza stones on your oven. If you don't have stones, put a heavy tray into the oven to heat up instead.
Bake for 8 minutes.
While this is happening, finish the top and make the salad.
Core the apple but don't peel it. Roughly chop the parsley the dress with the olive oil and pomegranate molasses. Season the use your hands to toss the salad. Taste and adjust the seasoning if necessary.
Finally, heat a pan and toast the pine nuts and cumin until they start to smoke.
Put a tablespoon of this into the salad and mix. When the Lahmajun are finished, take them out and scatter the rest of the nuts over each one.
Place a quarter of lemon on each one, a sprig of parsley and serve with the salad immediately.
Passion fruit and Jasmine Tart
Delicious curd filling with a thick Italian meringue topping
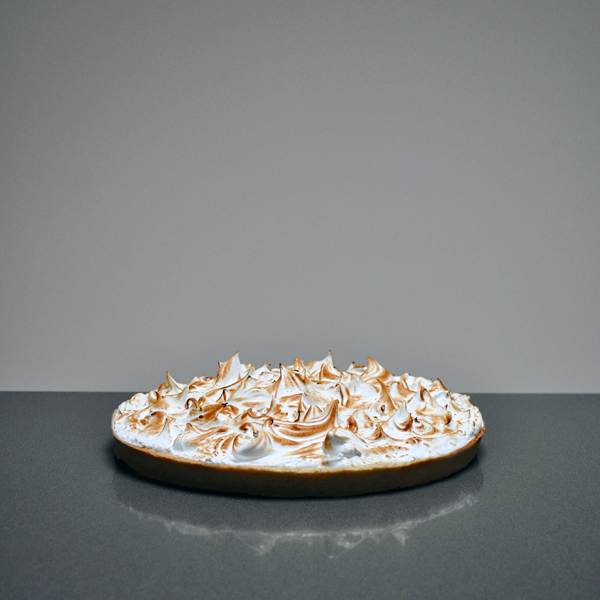
Sometimes I find my entire fridge is full of random bowls of leftover egg whites. I'm still not entirely sure where these come from, but I guess I'm either making a lot of ice cream or they are naturally multiplying in there. Eventually I need a purge, and this recipe is ideal.
The combination of passion fruit and jasmine tea is really delicious, but that toasted Italian meringue topping provides the killer blow. I say "serves 8" below, but it depends on how many of your guests are in pig mode (read: I ate most of the one pictured).
Ingredients (one pie, serves 8)
For the filling
- 150g Passion fruit juice (from 8 to 10 passion fruit, seeds sieved out)
- 3 large eggs
- 100g unsalted butter
- 210g caster sugar
- 15g Jasmine tea pearls [Buy]
For the tart case
- 250g type 45 flour [Buy] (or just plain if you don't have any)
- 140g unsalted butter (softened)
- 1 large egg
- 1 large egg yolk
- 40g ground almonds
- 90g icing sugar
- 1tsp vanilla extract
For the Italian meringue
- 200g egg whites
- 75g caster sugar (for the egg whites)
- 325g water
- 85g caster sugar (for the sugar syrup)
Equipment required
- 24 cm flan ring
- Stand mixer
- Thermometer
- 1 baking mat (Fibrelux, Silpat etc)
- 1 heavy tray
- Baking beans or equivalent
Make the curd
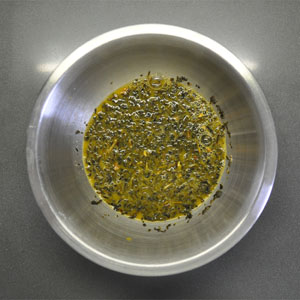
Next, measure your tea out, and get an empty bowl ready with another sieve over the top. Pour the juice into a small heavy bottomed pot over a low heat, and use a thermometer to get the temperature up to 85C. As soon as it hits, take it off the heat and stir in the jasmine pearls. Set a timer for 3 minutes.
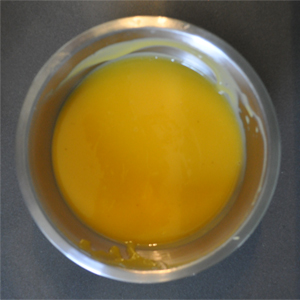
Now prepare a double boiler - bring water to a simmer in a pot, and place a clean bowl over the top. Pour in the brewed juice, sugar, butter and let them melt together, stirring occasionally. Beat the three eggs until they are homogeneous, then pour that into the juice. Make sure the water stays at a simmer or you'll get scrambled eggs.
Stir slowly until combined, then keep it on the low heat and stir every few minutes. Eventually - and that might be 10 or more minutes - the eggs will start to thicken up as they cook. When you reach a nice, thick texture, take it off the heat and strain it again into a clean bowl. Note that as it's hot, it will look more "liquid" than curd normally does. If you want to test the thickness, take a teaspoon out and leave it on the side for a few minutes; if it's thick enough you're done. Leave to cool, then cover with cling film and place in the fridge for a few hours to firm up.
Make, bake and fill the tart case
This is pâte sucrée, so be prepared for some falling-apart-madness.Attach a whisk to your stand mixer, and add the butter. Whip until the butter has been creamed, then add the vanilla extract, icing sugar, ground almond and eggs. When combined, tip about 1/3 of the flour in. It should be combined in a few seconds, so repeat with the next 1/3 and then the final amount of flour. Stop the mixer when the mixture looks combined and a bit like wet sand.
Turn this out onto your work surface and press it all into a smooth ball. Place the ball on some cling film, then flatten slightly with the palm of your hand. Wrap it in the cling and place in the fridge for at least 2 hours.
When the pastry has rested, take your baking mat and place it on a tray, then the flan ring on top of this. Remove the pastry from the fridge and, working really quickly, flour it and use a floured rolling pin, roll to a thickness of about 3mm. Dust it with flour again, then roll the pastry back over the rolling pin, lift, and unroll over the flan ring. This is the part where disaster can strike, so try and start the unrolling with enough "edge" to cover the closest part to where you're standing. If it has worked, start pushing the dough into the edges of the ring, leaving any excess folded over the top. Don't trim it yet. If you find any cracks, just patch them with spare pieces of pastry or some of the edge overhang.
Turn your oven on to 170C. To help stop shrinkage, freeze the tart case instead of just putting it in the fridge. Leave it in there for about 30 minutes until nice and cold. When you're ready to blind bake, quickly remove the case from the freezer and place some silver foil (matte side down) into it. You will probably need two pieces going in alternate directions to cover the whole ring. Scrunch it down over the top edges of the case so it's completely covered in foil, then gently pour in your baking beans.
You need to add a bit of extra cooking time due to the frozen case, so bake for about 20 minutes. After this time it should look anaemic but be solid - so remove the foil and beans, then brush with a beaten egg and return to the oven for a further 5 minutes. Now it should be golden.
Remove and leave to cool for about 10 minutes, then use a sharp paring knife to trim the outer edge. Carefully remove the ring, then brush out any pastry crumbs.
After it has completely cooled, take your curd and spoon it into the case. Use a spoon or palette knife to even the filling out. Cover with cling film, then place in the fridge to firm up again.
Italian meringue and putting it all together
This is the fun part. Place your 200g of egg whites into your stand mixer with the whisk attachment. Pour 325g of water into a heavy bottomed pot, add the 85g of sugar, and place over a high heat. While the syrup is boiling, whisk the whites until they are stiff. Reduce the speed, then shower in the sugar until combined.Use a thermometer to measure the temperature of the sugar - when it hits 118C, remove from the heat, whack the stand mixer up to full power and slowly trickle the syrup over the beaten egg whites. Leave this to whisk until completely cool, then place into a piping bag without a nozzle (you just want to get it onto the tart without disturbing the curd).
Remove the tart from the fridge. Gently pipe the meringue over the curd, making sure the centre has a bit more than the outside. When it's all in, use a wet palette knife to even out the mass into a small hill. Use a fork to gently "knick" the surface and create small curls - the more of these you have, the more surface area you're going to get toasted and the better it will taste.
When you're happy, grab the blow torch and toast the top. The smell is unbelievable.
Either serve straight away if you want the curd to be nice and runny, or place in the fridge for an hour or so to firm up. When I take a slice, I like to torch the sides again to make even more of that toasted flavour.
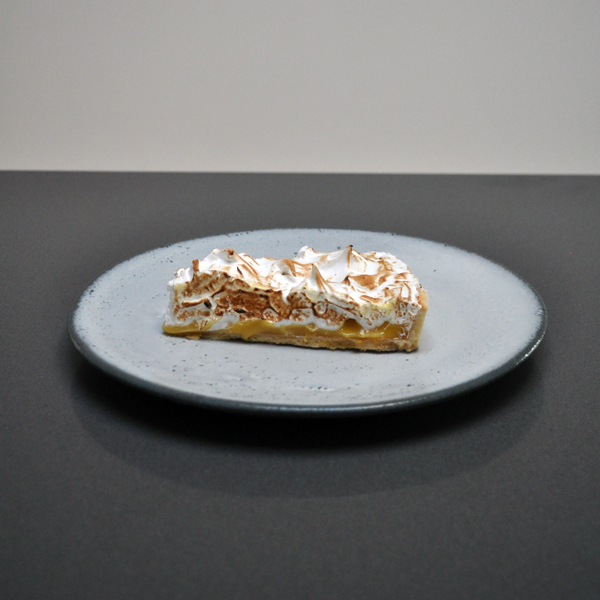
Jasmine Tea Macaron
Using tea from an old friend's new tea company

Last year I was invited to a tea tasting by Sammy, an old friend from junior school who I've known for 26 years. He moved to Hong Kong to teach many years ago, in the interim years married Jessi, and the pair of them travelled throughout Asia tasting and researching tea. They decided to start a company exporting the best teas they'd found - and this was the birth of Man Cha.
The Man Cha pearls are one of the best Jasmine teas the wife and I have ever tasted and, as soon as I did, I knew what needed to be done with it; a Jasmine Macaron.
Sam and Jessi's first venture is a series of pop-up market stalls to promote their new brand. They've asked me to make some of these macaron each week for the short period that the market stall is open, and this recipe has been tweaked a few times due to the extremely changeable weather we've been having recently. In the end, I opted for butter to stabilise the filling; it takes the edge off the white chocolate's sweetness, and brings the Jasmine flavour forward. I found the chocolate brand with the best flavour match to the tea was Callebaut, but it will work well with any.
Catch Mancha's last market appearances on Saturday 20th September at Netil Market (home of the legendary Bao bar and Lucky Chip van), then on the 21st at Backyard Market E1 near Brick Lane. Come down and grab a box or two for yourself, then try this recipe (and maybe save a bit for drinking!).
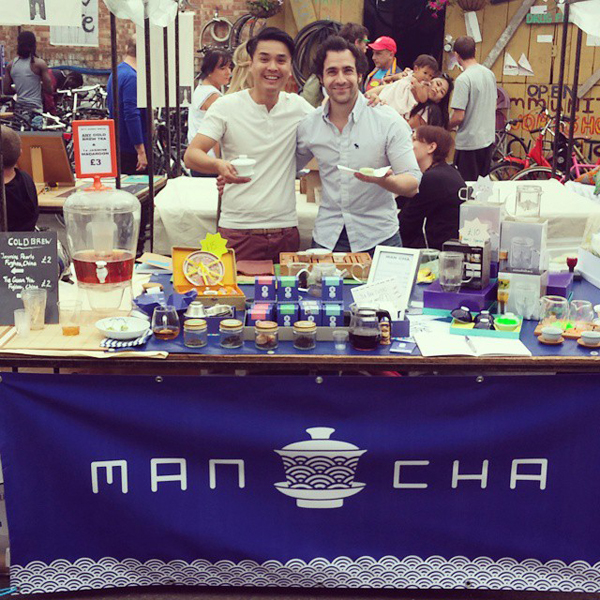
Ingredients (makes 12 to 15)
For the filling
- 170g Whipping cream
- 160g Callebaut's Finest Belgian White Chocolate (or equivalent) [Buy]
- 12.5g unsalted butter
- 12.5g Jasmine tea pearls
For the macaron shells
- 150g Ground almonds
- 150g Icing sugar
- 110g Egg whites
- 150g Caster sugar
- 37ml Water
- 2g Green powdered food colouring (Americolor) [Buy]
Equipment required
- Food processor
- Stand mixer
- Thermometer
- 2 baking mats (Fibrelux or Silpat if possible)
- 2 heavy trays
- 2 disposable piping bags and a 1cm nozzle
Jasmine Tea filling
Make the filling first, as it needs time to thicken. It's important to prepare ahead or you run the risk of over-infusing the tea. Weigh 12.5g of Jasmine tea and place in a bowl big enough to take that and the amount of cream. Pour 160g of whipping cream into a pot, and weigh 160g of white chocolate callets into a second bowl (or, if using bars, chop your chocolate finely). Place a sieve over the chocolate, set up a timer for 3 minutes, and place your thermometer into the pot of cream.
Now gently heat the cream; as soon as it reaches 85 degrees centigrade, immediately pour it over the jasmine tea and start the 3 minute timer. During the infusion time, agitate the tea with a spoon from time to time. When three minutes are up, immediately pour the infused cream into the sieve, letting it pour over the chocolate. Remove the sieve and let it sit like this for 30 seconds. Now add the softened butter and mix with a spatula to combine. If you have a stick blender, use it to blend any un-melted ingredients in the bowl, and make it as smooth as you can.
When you're happy with the consistency, pour the mix into a wide tray and cover the surface with cling film. Place in your freezer for 1 hour, then move to the fridge for at least 3 hours.
Macaron shells
This recipe uses the Italian meringue technique by Pierre Hermé to make the shells, with a few tweaks to get more consistent results at home.
Again start by preparing everything - have your baking mats on some heavy trays, get out the piping bag and place the nozzle inside. Measure out the 150g of caster sugar and 37ml of water into a small pot and place on your stove top with a thermometer inside. Measure out 55g of your egg whites into the bowl of a stand mixer, and connect the whisk attachment
Put the 150g of icing sugar in the bowl of a food processor, followed by the 150g of ground almonds (putting the sugar in first helps to stop it leaving the processor in a cloud of dust). Blend for a few minutes to make sure everything is as fine as possible. Tip the mix into a new bowl over your weighing scales (one big enough to fit this mix and the meringue later) and re-weigh to make sure you have exactly 300g of dry ingredients. Top up with a gram or two of icing sugar if necessary. Take the remaining 55g of egg white and place in a small bowl, then add about a 1/4 teaspoon of green food colouring (we're going for a subtle "green tea" look!) and mix. If you can't find the powder colour, paste is the next best thing. Avoid liquid food colouring if you can, as they tend to dilute the mix too much. Pour this mix on top of your dry ingredients and set next to the stand mixer.
Start to heat your sugar & water mix in the pot over a high heat. When it starts to bubble, give it a swirl in the pot to capture any sugar that hasn't made it into the syrup. Keep going until you hit 112 deg C. Turn on your stand mixer to a medium-high speed to get the whites whipping - remember not to go too mad with the speed at this point; you don't want stiff peaks nor soft ... somewhere in between is perfect. As the temperature of the sugar / water mix hits 118 deg C exactly, quickly remove from the heat, push up the mixer to high and slowly trickle hot syrup onto the whipping egg whites. Now leave the whites whipping until the cool completely. If you raise the whisk and the meringue drips off quickly, don't despair - you've probably not left it mixing long enough, so just keep going until it comes away on the whisk as a nice peak.
Take a spatula and transfer all of the Italian meringue you've just made into the bowl with the blended almond, sugar, egg white and colouring you prepared earlier. Fold with the spatula until you get the desired consistency - to me, this is the crucial point where things can go wrong, and it's really hard to actually explain or even take a photo of the correct consistency. The best way to describe it is to make a line with your spatula through the centre of the mix; if it folds slowly in on itself, taking about 15-20 seconds to nearly disappear (but never quite gets there) you've got it. If it's more liquid than that and just flies off the spatula, it's game over for you. Make sure you get right to the bottom of the bowl though, or you may leave unmixed colour or dry mix at the bottom.
When ready, hold the piping bag and fold the top of it over your hand. Use the spatula to transfer the mix inside, then twist the top (put a kitchen clip on it if you like - I've lost mix many times by wandering aimlessly around the kitchen, not realising batter is dripping out behind me) cut off the end and get ready to pipe. I always have a bit if kitchen roll ready to clean the nozzle if too much mix clogs around it. This helps you pipe more perfect circles.
On the baking mats (and I would advise the Silpat-style ones over silicone, and both of those over just using greaseproof/baking paper - much easier to get them off later) pipe a row of 3.5cm rounds, keeping your nozzle as straight as possible. Between each piping, I normally count "1000, 2000" and get a rhythm going. I'm not able to do that Parisienne "flick" where they just smash out a tray of 50 in one hit, so counting in my head generally helps to pipe more consistent sizes.
Keep about an inch between each round; you don't want to overcrowd the shells. Move to the next row, and pipe under the spaces you've left between the rounds on row 1. Carry on until you've filled the mat, then rap the baking tray on your work surface with relative force several times. This helps to settle the batter, reduce points, and is important not to forget.
Repeat with the other mat so you have two full sheets. Turn your oven on to 140 deg c, set the sheets aside in the kitchen for at least 30 minutes to form a skin. This part is just as important as the mixing - you need to make sure that, after 30 minutes, if you gently touch a piped macaron it won't feel wet or really even give too much. It's that skin that will help the foot develop in the oven.
After you are happy with the skin on the shells, it's time to bake. In a normal sized oven, you can get away with two sheets - the amount for this recipe. Any more, and too much steam will develop and everything will (probably) fail. I use granite baking stones and place my trays on top of these, which helps boost the heat from below. If you have a particularly powerful fan in your oven, watch out - sometimes it will blow the shells forward and you end up with a lop-sided result.
All ovens are different, but I tend to bake for 15 to 18 minutes. Place your trays into the oven, close the door, and set two timers - one for 15 minutes, the other for 3. When 3 minutes are up, briefly open the oven door to release some of the steam. At 6 minutes, you can turn the trays, then again at 12 minutes. When you reach 15 minutes, pull one of the trays out and touch a macaron to see if the foot has set. If it holds pretty still, they're done. If not, put them in for another 3 minutes. Often I'll turn off the oven at the 15 minute mark, open the door slightly and let them sit in there for a final 3 minutes. When cooked, pull them out, and slide the silicone mats onto your work surface. Let them cool before trying to remove.
Once you're happy the filling is set, start matching up pairs of macaron shells side by side. Spatula your filling into another piping bag with nozzle fitted, and pipe a good amount of filling into the centre of one half of each pair (approximately 1.5 tablespoons). Place the matching half on top and gently push down to squeeze the filling out to the edge. Repeat until all the macaron are assembled, then put them into an air tight container, and leave in the fridge for 24 hours. The fridge "rest" lets the filling seep into the shell and creates that traditional chewy texture.
When the rest time is up, remove from the fridge for about an hour and enjoy!
Apple Butter & Toffee Apple Macaron
The apple overload begins

Our fig and plum trees have had a bad year this year, but the alternating wet / hot weather has really suited apples and blackberries in the garden. Our Granny Smith tree is yet to be picked, but I've brought in the first crop of a strange Pippin hybrid. We don't actually know what variety of apple it is - not super sweet, but not sour like a Cider apple. In any case, we have loads - far too many to eat out of hand.

One of the best things to do with too many apples (my parents' are currently picking about 100 a day in their garden) is to make Apple Butter. This is a slight misnomer, as it doesn't contain any butter or dairy ingredients - it's named after its smooth texture.
Apple Butter's origin lies in the Netherlands, and transferred to America where it's still popular - but is rarely found here in the UK. It's a great way to get 3 to 4 weeks life out of apples that would otherwise be wasted.
Uses are far reaching - have it on toast, with or without cheese. As part of your cheese course instead of quince paste. Add it to cocktails or ice cream ... or use it as an ingredient to make something else; in this case, Toffee Apple Macarons.
The recipes for both are below - you can make the apple butter with (as is traditional) or without spices; here I've opted for without so that it's more flexible as a cooking ingredient.
Apple Butter
Ingredients
- 1kg apples
- 100ml water
- 140g to 160g caster sugar
- 1 tbsp lemon juice
If adding a spice mix
- 1 star anise
- 2 tsp ground cassia bark or cinnamon
- 1/2 tsp ground cloves
- 1/2 tsp ground ginger
Equipment required
- Slow cooker
- Sieve
- Hand blender or food processor
- 700ml sterilised jar (Kilner style if possible - to sterilise your jar, upturn it in an empty dishwasher and perform a hot cycle without soap or tablet)
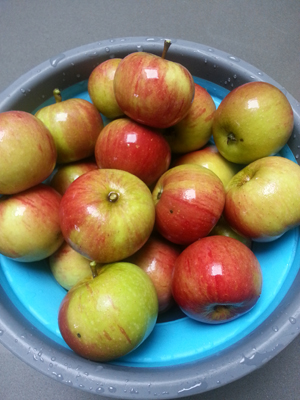
Wash the apples, then core but leave the skin on. Quarter them, and place in the bowl of your slow cooker with about 100ml of water. My slow cooker only has one setting (its primary use is for cooking rice) so just set it as high as it goes and close the lid. Cook the apples for 4 hours in total, stirring every 30 minutes to make sure nothing's catching and to help them break down.
By the end of the cooking time, the apples and their peel should be pretty much disintegrated into pulp. Transfer to a bowl, and use a hand blender to purée the apples as finely as you can. This may take 5 to 10 minutes. When happy, place your empty slow cooker bowl onto a weighing scale and zero it. Put a relatively fine sieve on top and pass your purée through the sieve into the slow cooker bowl (a bendable silicone bread scraper is useful here).
Weigh the purée - it should register somewhere between 700g and 800g. Now add the sugar - this is down to your taste preference, and also depends on how sweet your apples were to begin with. If they are a sweet variety, or you want a more tart butter, add 10g per 100g. Due to the slight sourness of our apples, I've gone for 20g for every 100g - so if you have 700g of puree, add 140g of sugar. It's personal preference; but the 20:100 ratio will give your butter a longer shelf life. Add the lemon juice (which also helps preserve the finished product) and, if using, stir in the spices.
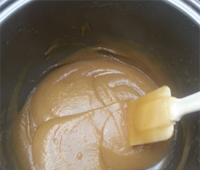
Put the slow cooker bowl back in the slow cooker, set as high as it goes again, close the lid and leave for a further hour - this time stirring every 15 minutes to prevent catching.
After the hour is over, transfer to a bowl to cool. If you've used star anise, don't forget to remove it now. Pour into your sterilised jar - from the 1kg of apples you're likely to fill a jar with a capacity of 700ml.
Store in the fridge - it should last 3 to 4 weeks.
Toffee Apple Macarons
Ingredients (makes 12)
For the macaron shells
- 150g Ground almonds
- 150g Icing sugar
- 110g Egg whites
- 150g Caster sugar
- 37ml Water
- 3g Green powdered food colouring (Americolor)
For the filling
- 100g Caster sugar
- 125g Unsalted butter
- 3 tbsp Apple butter
- Pinch of salt
Equipment required
- Food processor
- Stand mixer
- Thermometer
- 2 baking mats
- 2 heavy trays
- 2 disposable piping bags and 1cm nozzles
I use the Italian meringue technique by Pierre Hermé to make the shells - but everyone has their own tweaks to get consistent results at home.
Start by preparing everything - have your baking mats on some heavy trays, get out the piping bag and place the nozzle inside. Measure out the 150g of caster sugar and 37ml of water into a small pot and place on your stove top with a thermometer inside. Measure out 55g of your egg whites into the bowl of a stand mixer, and connect the whisk attachment
Now put the 150g of icing sugar in the bowl of a food processor, followed by the 150g of ground almonds (putting the sugar in first helps to stop it leaving the processor in a cloud of dust). Blend for a few minutes to make sure everything is as fine as possible. At this point, tip the mix into a new bowl (one big enough to fix this mix and the meringue later) and re-weigh to make sure you have exactly 300g of dry ingredients. Top up if necessary. Take the remaining 55g of egg white and place in a small bowl, then add the green food colouring and mix. If you can't find the powder colour, paste is the next best thing. Avoid liquid food colouring if you can, as they tend to dilute the mix too much. Pour this mix on top of your dry ingredients and set aside.
Start to heat your sugar / water mix in the pot over a high heat. Keep going until you hit around 112 deg C. Turn on your stand mixer to a medium high speed to get the whites whipping - remember not to go too mad with the speed at this point; you don't want stiff peaks nor soft ... somewhere in between is perfect. As the temperature of the sugar / water mix hits 118 deg C exactly, quickly remove from the heat, push up the mixer to high and slowly trickle the hot syrup onto the whipping egg whites in one smooth motion. Now leave the whites whipping until much cooler. If you raise the whisk and the meringue drips off quickly, don't despair - you've probably not left it mixing long enough, so just keep going until it comes away on the whisk and pretty much stays there.
Take a spatula and transfer all of the Italian meringue you've just made into the bowl with the dry ingredients you prepared earlier. Fold with the spatula until you get the desired consistency - to me, this is the crucial point where things can go wrong, and it's really hard to actually explain or even take a photo of the correct consistency. All I can say is that if you drop the mix from a spatula, and it doesn't re-absorb into the mix without trace in about 15-20 seconds, it needs more mixing. If it's more liquid than that, and just flies off the spatula, it's game over for you. Pierre describes it as "slightly runny cake dough". Make sure you get right to the bottom of the bowl though, or you may leave unmixed colour or ground almond at the bottom.
When ready, hold the piping bag and fold the top of it over your hand. Use the spatula to transfer the mix inside, then twist the top (put a kitchen clip on it if you like - I've lost mix many times by wandering aimlessly around the kitchen, not realising batter is dripping out behind me) cut off the end and get ready to pipe. I always have a bit if kitchen roll ready to clean the nozzle if too much mix clogs around it. This helps you pipe more perfect circles.
On the baking mats (and I would advise the Silpat-style ones over silicone, and both of those over just using greaseproof/baking paper - much easier to get them off later) pipe a row of 3.5cm rounds, keeping your nozzle as straight as possible. Keep about an inch between each round; you don't want to overcrowd the shells. Move to the next row, and pipe under the spaces you've left between the rounds on row 1. Carry on until you've filled the mat, then rap the baking tray on your work surface with relative force a couple of times. This helps to settle the batter, and is important not to forget. The French pros always do a little "whip" at the end of each pipe to stop the nipple effect (when a bit of the batter sticks up in the air), but in general I find these subside when you rap the trays. If not, you can use a wet finger to gently smoothen out any stray batter.
Repeat with the other mat so you have two full sheets. Turn your oven on to 140 deg c, set the sheets aside in the kitchen for 30 minutes to form a skin while you make the filling.
Weigh 25g of your unsalted butter onto a plate, put 3 tbsp of Apple Butter on a separate plate, and put both next to your stove top. Place the 100g of sugar into a heavy-bottomed pot. Never use a non-stick or black-coloured pot to make caramel! Use a medium heat to melt the sugar, and keep going until it becomes an amber colour with a hint of smoke emanating from the pot. As soon as it hits this point, immediately slide in the butter and use a spatula to constantly stir the caramel - it will bubble up, so be careful; sugar will burn you badly at this temperature. When the butter has been incorporated, drop in the Apple Butter and mix again. Pour the mix into a separate bowl and allow to cool.
Take the remaining 100g of butter, and put the beater attachment on your stand mixer. Beat the butter until it's completely smooth, which can take only 30 seconds on a high speed. Make sure you don't over-churn the butter though. When the caramel mix is cool, put the mixer on a medium low speed, and start to mix it into the butter a tablespoon at a time. You may not need all of the mix, or you may need the lot - as it blends in the mixer, look for a "whipped" consistency and taste it as you go to make sure you're happy with the flavour. When ready, transfer to another piping bag, twist or clip and place in the fridge to slightly firm up.
By now your oven should be hot, and the 30 minutes up. To test the shells, gently touch your finger on one; you should find that the skin has formed and won't leave batter on your finger. Place the trays in the oven, and set two timers going - one for 15 minutes, the other for 5. When 5 minutes are up, quickly open and close the oven door to release any steam build up. You'll be able to have a sneaky look at your macs at this point - you'll probably see the foot has already started to form. Don't leave it open long though, and re-set the timer for another 5 minutes. Repeat at the 10 minute mark then, after 15 minutes are over, test one of the macaron by seeing if it will come away from the baking mat. It won't just fall off, you need to slightly twist it. If there's any bend do it, leave it; they aren't ready. Carry on cooking for another 2 minutes and try again. You don't want to overcook your macaron, or you'll get a burnt colour and solid insides - so just repeat in 2 minute intervals until you can pull off one of the shells. When happy, remove from the oven. If you've got it slightly wrong, the shells will start to darken after about a minute out of the oven; this is caused by an undercooked inside - all is not lost; turn off the oven, and place the trays back inside with the door slightly open. This will gently cook the insides. Check them every minute - if all looks well, remove from the oven and allow to cool slightly on the mats.
What you're going for is a nice smooth base, raised foot and a soft slightly chewy inside. Obviously you can't check that last bit without eating one - though if you've piped an odd number of shells, you can always bite into one to test.
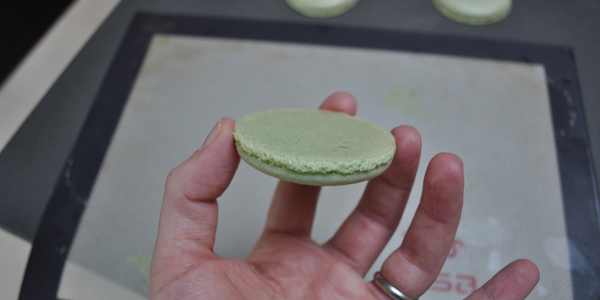
Peel each shell off and place on a cooling tray; if any get stuck, use a small spatula to slowly work around the foot, then under the shell to release it. If you're really good at piping, then all of the shells will be the same size. I never get it perfectly, so at this point will match up pairs of shells that are actually the exact same size. We're now ready to pipe - so take the filling out of the fridge and cut off the top of the bag. If the mix is too solid, leave until it's pipe-able. Squeeze a generous amount into the upturned centre of one of the shells, then place the other half your the pair on top, and press down gently until the filling starts to reach the sides. Repeat with all remaining shells and filling.
Now the really hard part - not eating them. Put the finished macaron into a box with a lid, and place into your fridge. After a few hours, they'll taste much better than when you first made them. Leave for at least 24 hours, and you'll get the best flavour and texture.
Honeymoon part 3: Saint-Émilion
... and Cannelés de Bordeaux
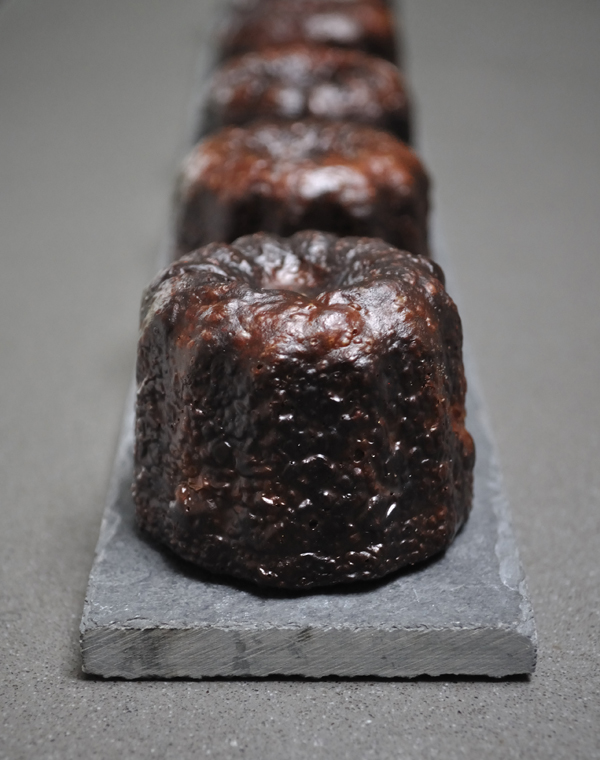
Most good things have to come to an end eventually, and the final part of our honeymoon took us from Lyon to the beautiful area of Saint-Émilion near Bordeaux. It's one of the oldest wine regions in France, dating back to when the Romans planted vines there in the 2nd century.
We stayed at an amazing guest house right in the middle of a vineyard, walked our way through the cellars of Château Guadet, and ate some fantastic food.

For the last part of this recipe mini-series, I thought I'd go with an appropriate favourite of mine - Cannelés de Bordeaux. I've been making these for a few years now, and there are two ways to go; one method will produce something delicious, the other something delicious and give you that traditional dark crust.
I must admit that I'd never eaten a real Cannelé from Bordeaux until we visited the area this year and, just like with Baba au Rhum, the French favour a younger, fruitier rum in their recipes. Still delicious, but I find the taste of a more spiced / sugar led rum such as Captain Morgan gives better results.
Ingredients (makes 32 large size Cannelés in 4 batches of 8)
For the mix
- 1L of whole fat milk
- 500g Icing Sugar
- 20ml Rum (Captain Morgan, Kraken or OVD are best)
- 200g Plain flour
- 100g Unsalted butter
- 3 Whole large eggs
- 5 Large egg yolks
- 2 Vanilla pods or 2 teaspoons of vanilla paste
For the baking
- 4 x 30g blocks of food-grade beeswax and 4 x 30g portions of unsalted butter or
- 120g unsalted butter
Special equipment
- 8 Copper mould, or a silicone equivalent
- An auto-funnel if you can get hold of one
Step 1: Make the mix
Put the milk into a large heavy-based saucepan with your vanilla, and bring to the boil over a medium heat. As soon as it hits boiling point, remove from the heat and slide in your butter to let it melt as the mixture cools.
In one bowl, lightly beat the eggs and egg yolks together. In a second bowl (one large enough to take the entire mix) gently sift your flour and icing sugar together, then put a tea towel underneath to help stop it from spinning around during mixing. Pour the eggs and rum into the sugar/flour mix and use a spatula to gently combine.
When your milk has cooled to the point where it feels just warm, start pouring this into the large bowl with the other ingredients, stirring with the spatula to combine as you pour. Try not to whisk the mix, but beat it enough so that there are no lumps.
Cover the bowl with cling film, and place in your fridge for at least 24 hours.
Step 2: Prepare the moulds
This recipe is for 4 batches of 8 - but if you have 16 moulds and two ovens, then you can scale it up. I'd not recommend baking more than 8 per oven though, as the initial cold of the moulds from the freezer and cooled mix will reduce the temperature too much.
As I say, there are two ways to go here. If you just want a delicious Cannelé with a decent crust, then you can get away with a silicone mould coated in butter. You might get a "white bottom" doing this, but the taste will still be great. If you'd prefer to travel down the traditional route, you'll have to get some beeswax and a set of copper moulds. I bought mine from a French website some years ago - the price has gone up since then, but they do drop under 8 Euros when on offer.
The first thing to do depends on your mould type. For silicone, you want the butter to coat more thickly - so place the moulds in the freezer. For copper, you want the opposite; so place them in an oven at 200° C on a pair of stacked baking trays.
In either case, the next thing is to clarify your butter. Take 120g of unsalted butter and gently melt it down completely in a small saucepan, then let it cool very slightly. Skim off the fat floating on the surface with a spoon, then either gently pour the liquid butter from the pan into a jug, stopping as soon as you see the solids in the base of the pan come to the edge - or, if you have a muslin cloth to hand, pour it through that into the jug instead. You want to clarify the butter so that it doesn't burn in the high heat of the oven later.
Now you have the butter done ...
For Silicone:
Remove your moulds from the freezer and, working quickly, pour the (still slightly warm) clarified butter into the moulds, turn to coat then invert onto a clean tray to let the butter drip out. When they look coated, place them back in the freezer again for at least 20 minutes.
For Copper:
Get a pan of water on the boil, and place a metal bowl on top (bain-marie). Weigh one stick of your beeswax (these are normally 30g to 34g) and then measure out an equal amount of clarified butter. Pour the measured butter and beeswax stick into the bowl on the heat, stirring occasionally to mix the wax and butter.
While this is happening, place a piece of greaseproof paper on your worktop to protect it (beeswax is very annoying to remove) then place a cooling rack on top of that. Place another cooling rack to the side and, when ready, put the bowl of beeswax mix on that, and take the moulds out of the oven.
Working as quickly as you can, hold one mould with an oven mitt and pour the beeswax mix almost to the top. Immediately pour this back out into the beeswax bowl, rotating as you do to ensure it coats. Quickly invert this over the cooling sheet to allow any excess to drip out. Repeat this with the other 7 moulds as quickly as you can - you may need to re-heat the beeswax.
When dry, the thickness of beeswax coating should be almost invisible, as shown in the image below - you'll only really notice it if you rub your finger on the inside of the mould. Too thick and you'll get a mouth-full of claggy beeswax. Too little and the crust will burn rather than become caramelised.
Once you're happy with the coating, place the moulds in the freezer for at least 20 minutes, and place the stacked baking sheets back in the oven.
Step 3: Baking
Pre-heat your oven to 200° C. If you've followed the copper instructions above, you should already have a pair of stacked baking trays in the oven - if not, do that while your oven heats up.
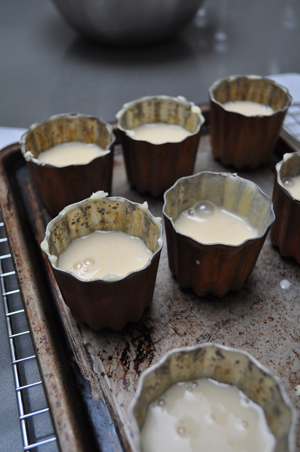
When you are ready to bake, take the mix from your fridge and gently stir with a spatula to combine any skin that may have developed on top. If you have an auto-funnel (and this really does make your life easier!) fill it up, or pour your mix into a jug and the moulds out of your freezer.
Fill each mould 2/3 of the way up, then take your stacked trays of the oven and put the moulds on top.
Bake for 40 approximately minutes in total - BUT the whole process requires that you keep an eye on the Cannelés.
For the first 20 minutes, open the oven door at 5 minute intervals; turn the tray to ensure even cooking and, most importantly, if they are puffing up past the top of the moulds you must remove the tray to the top of your oven for a minute to let them drop back. Stop the timer while doing this, and re-start when you put them back.
At the 20 minute mark, the shells should have stopped expanding and the crust started to form. Again, keep watch to ensure they don't burn (it's a fine line between dark crust and cremation).
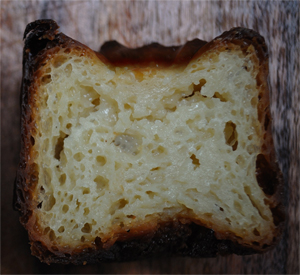
When you think they're done, you should see they've come away from the sides of the mould, and there is likely to be a little smoke in the oven.
Immediately invert the moulds onto a cooling rack (if you find "white bottoms" you can put them back in the mould, then back in the oven for another 5 minutes) and leave to cool for at least 30 minutes.
These really are one of my favourite pastries to eat, a kind of baked custard with a soft centre. Give it a try; every single person in your street will be knocking at your door asking what you're making.
Honeymoon part 2: Lyon
... and a Tarte aux Pralines

Lyon is a beautiful place - I actually enjoyed my visit there even more than Paris. I guess it was the relaxed atmosphere; it was supposed to be a holiday after all!
When we stepped off the train from a rainy (but warm) Paris, a wall of 33°C heat hit us. I was still wearing a leather jacket, and didn't take it off until we reached our apartment; I guess you can take the boy out of London ...
Our first outing was to a place that I'll remember for the rest of my life - to eat at, and meet with, the legendary Paul Bocuse. A lot of people complain that PB's flagship restaurant is stuck in the past - well yes, it's the epitome of classic French cuisine; but so what? That's exactly what we'd come for, and it was brilliant on every level. I can normally roll with the best of them in the gluttony stakes; but Paul Bocuse truly managed to finish me off. The words "here are the dessert trolleys - have whatever you want" should never be said to me.
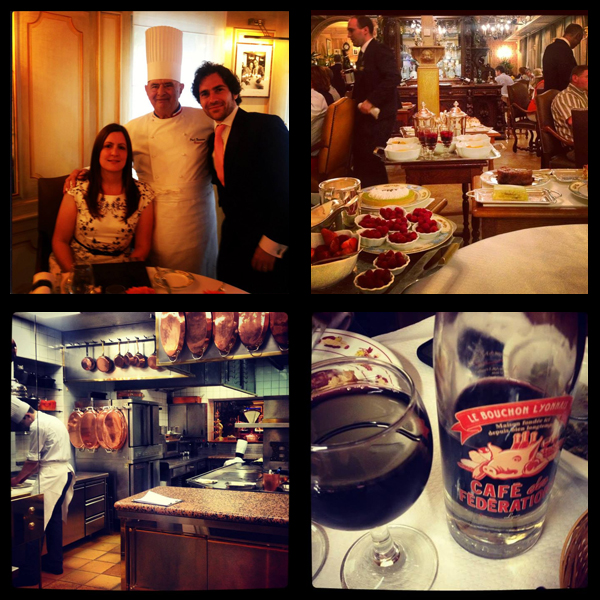
The next day, we visited Bernachon to try their signature President cake and Palet d’Or chocolates (likely the best chocolates I've ever eaten), then walked to Les Halles de Lyon Paul Bocuse for even further treats (and a spot with the famous Mrs. Sibilia).
That night, sadly our last in Lyon, we visited Le Café des Fédérations. On one hand it was the polar opposite of Bocuse; classic Bouchon food ... but in terms of enjoyment (and richness), it was almost as good.
While my sweet memories of Lyon will be the Palet d'Or and multiple Baba au Rhum, the recipe I've chosen for this part of the blog is probably the most classic Lyonnaise dessert of all; Tarte aux Pralines.
It's made of special red-sugar-coated almonds that you can pretty much only find in Lyon, melted and mixed with cream in a sweet pastry case. The recipe is simple so, if you can find them, grab a bag and give it a try.
Ingredients (makes 1 shallow 28cm tarte or a deeper 20cm one)
Sweet pastry case
- 250g Plain flour
- 75g Icing sugar
- 120g Unsalted butter
- 2 Large egg yolks
- 2 Tablespoons of cold water
- Pinch of salt
Filling
- 200g Lyon pink pralines
- 300g Double cream
Step 1: Make the case
Weigh out your butter and let it sit to come up to room temperature. Take the plain flour and gently mix with the icing sugar and salt on your work surface.
Make a well in the centre, and drop in the butter. Start to rub the butter into the flour/sugar mix with the tips of your fingers, gradually drawing in all the mix until you get a crumble-like texture.
When the butter is evenly distributed, make a well in the centre again and this time add the egg yolks and water. Mix with your fingertips again, drawing the mix in, and lightly pressing the ingredients together.
Try not to knead or heavily mix the ingredients, as you'll end up with pastry that shrinks when cooked. The point you should reach is when the mix looks yellow, but may not "come together" like a normal dough (in other words, it will be quite short).
Form into a ball, wrap in cling film and put in the fridge for 30 minutes to firm up.
When ready to prepare the case, take a sheet of cling film and lay it on your work surface. Take the pastry out of the fridge, unwrap and place in the centre of the cling. Use a rolling pin and roll out to a circular shape by rolling and quarter-turning the cling as you go. If you have a normal cling film, it will be about 30cm in width, so your pastry should come a touch over the edge. What we want is enough pastry to go up the sides of the flan ring, then very slightly over the top.
Line a baking tray (at least 30cm x 30cm) with a sheet of greaseproof paper. Take a 28 cm flan ring (don't use a tin; a flan ring produces much better results, especially on the base) and place this on the paper.
The next part is a bit tricky. Sometimes, if the pastry is still cold enough, you can just invert it with your hands or rolling pin and drop this onto the flan ring. Otherwise, you can take the flan ring, place it on the pastry and then invert the whole lot at once, placing it over the greaseproof paper.
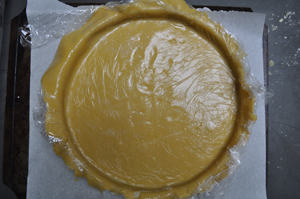
Either way, you should now hopefully be able to gently push the pastry into the base of the ring easily, as it's still coated in cling film. Push the pastry up the sides, and roll the little extra over the top so that it's outside the ring. Some people will trim the pastry with a rolling pin at this point; but I like to trim it after baking - just in case it has been slightly overworked and tries to shrink during cooking.
At this point, turn your oven to 170°C and put your baking stone in place (a pair of flat, stacked trays would also be fine if you don't have a stone). Remove the cling, prick the base of the case with a fork, and place this into the fridge for 30 minutes.
Step 2: Bake the case and make the filling
After 30 minutes have passed, take the case out of your fridge and carefully slide this onto your baking stone or trays in the oven (a baking peel makes this much easier). Remember to leave the greaseproof paper on the bottom!
This will take 25 minutes to bake; while you're waiting, make the filling.
Your pralines will come in a bag, and we need to crush them slightly - so batter them with your rolling pin. It's likely your bag will burst, so be careful.
When every praline has been smashed at least once, transfer to a heavy-bottomed pan and pour in the 300ml of double cream. Place this on a medium heat and place your thermometer in there too.
Gently stir the mix from time to time. When the temperature reaches 100°C, stir more constantly to get the red colour to come out of the sugar and blend with the cream. When the temperature reaches 104°C, remove from the heat and poor into a clean bowl.
This won't set too quickly, so leave it there until needed.
When your pastry case is cooked, remove from the oven and transfer to a wire rack to cool for 10 minutes. After it has cooled, use a small sharp paring knife to carefully make a straight edge on the pastry case. At this point, you should be able to gently spin the flan ring and carefully lift it off. There will probably be some pastry trimmings inside the case, and you'll want to get rid of these - so just use a pastry brush to get them to one side and flick out of the case (remember that the pastry is short, and therefore fragile - don't be too aggressive with it or the walls will collapse).
At this point you can pour your filling, which should still be relatively liquid, into the case. Spread evenly with the back of a spoon, then transfer to the fridge for 30 minutes.
Cut a slice, pour a coffee and get yourself ready for the sugar rush!
Honeymoon part 1: Paris
... and the Paris Brest

Laura and I got married back in April, and as June rolled around it was finally time to take our honeymoon.
The journey started on the 14th, and took us from London to Paris, where we spent 3 days before moving to Lyon. After 2 nights in Lyon we flew to St. Emilion for the final part of our journey.
It was an unforgettable experience, and I thought I'd take a memory from each leg of the trip and try to re-create it at home.
While in Paris, we set out to visit as many pâtisseries as we could. One of the places I really wanted to see was La Pâtisserie des Rêves. It's an amazing place, and it was pretty hard not to try and buy everything in sight.

One of PdR's most popular pastries is their version of a Paris Brest. This light choux bun, filled with praline cream, is unbelievably good. The Paris Brest was invented in 1891 to commemorate a cycle race of the same name (which is why it's the shape of a wheel), and was said to find favour with the competitors due to its high calorie content. It stuck out from the rest as it's not something we often see in England.
We bought a lot of food that day, but chose to sit in the Tuileries Garden and share the Paris Brest in 30 degree heat with an espresso. True the hype, it was delicious - and inspired me to be the Parisian pastry I'd write about in the first of 3 France-related blogs.
The recipe below does take a bit of effort, but the end result is worth it for a pastry you're unlikely to find outside France.
Ingredients (makes 5 to 6 individual pastries depending on how large you pipe them)
Crumble
- 55g Strong white flour
- 55g Golden caster sugar
- 45g Unsalted butter
- Pinch of salt
Choux
- 80g Strong white flour
- 20g Plain flour
- 65ml Water
- 65ml Whole milk
- 55g Unsalted butter
- 5g Caster sugar
- Pinch of salt
- 3 Large eggs
Praline paste
- 80g Shelled hazelnuts
- 45g Blanched almonds
- 100g Caster sugar
Crème pâtissière
- 350ml whole milk
- 1 tsp vanilla paste
- 75g Caster sugar
- 15g Plain flour
- 15g Cornflour
- 3 Large egg yolks
Praline cream
- 100g Unsalted butter at room temperature
Step 1: Crumble
The first thing to make is the crumble topping, which is going to sit on top of our choux. It's a really important step that traps the steam inside the choux, allowing for a much better "puff". It also adds texture to the top of our end pastry.
To make, simply blend all the ingredients in a food processor until you see a fine crumb texture. You really should use a processor for this stage, as you want to ensure a totally even distribution of ingredients throughout the mix. Lay a sheet of cling film out on your work surface, then pour the crumble on top and lay another sheet of cling on top of that. Take a rolling pin and gently roll the mix until it's 1 to 2 mm thick. Take this flattened mix, place on a tray and put it in your freezer for at least 45 minutes.
Step 2: Choux
This next step takes about 20 minutes, so make sure your crumble is nearly frozen before starting.
Set your oven to 180 degrees C, and place a shallow baking tray in the bottom. Fill your kettle and boil, then sift the two flours together and set aside.
Put the water, milk, sugar, salt and butter in a saucepan and heat until it reaches boiling point. Quickly take it off the heat, drop in your sifted flour, and quickly mix together with a wooden spoon until combined. Put this back on the heat, and cook - always stirring with the spoon - for about another 60 seconds. Tip this out into a bowl and leave for about 5 minutes to cool slightly.
When you're ready, take your 3 large eggs and crack them into a bowl. Beat together with a fork. This next step can be done by hand with the spoon, or you can put your choux base into the bowl of a stand mixer with the beater attachment. Pour in 1/3 of the beaten egg, and mix with the choux base. It's going to look like the mix splits almost immediately, but keep on going and that egg will eventually force its way into the flour mix! Repeat twice more so that all three eggs are combined.
A note about egg sizing at this point - this recipe calls for "3 large eggs" and often you'll see "4 medium eggs" in choux recipes. It's hard to judge, but I often find that there's some egg left over with 4 medium eggs. In any case, the key here is that the end choux should be of a dropping consistency - that is to say the mix will slowly drop from a spoon when picked up. You need to do this by eye - but 3 UK Large-size eggs does the trick for me.
Now you've made the paste, put a 1 cm piping nozzle into a disposable bag, and fill it with the choux. Take your frozen crumble out of the freezer, and find a cutter that's about 2cm diameter (bottle tops from drinks are quite a good size if you don't have anything else to hand). Cut 6 circles of crumble per Paris Brest - remember to peel off any cling film you might have cut out.
Take a baking tray, and either cover it with greaseproof paper or use a silicone mat if you have one. Pipe your first choux - it should be about 2.5cm wide and about the same height at the peak. What we're going for here is a hexagonal type shape, so the easiest thing to do in order to guide you is pipe another identical round, in a straight line, about 3 cm across from the first. That's the guide done, so now pipe the two upper parts of the hexagon to connect them, then the two lower parts. Now that you've piped the shape, take your crumble cut-outs and place one on the top of each choux round. Press them down very gently so that they all sit at approximately the same height. Repeat this process with your remaining choux paste and crumble pieces.
When ready to bake, put about a wine glass full of boiling water in the tray at the bottom of your oven, put the tray of choux in as well, and bake for 10 minutes. At the 10 minute mark, open the door of the oven briefly; the steam should mostly be dispersed at this point, and your choux risen. Close the door and bake for a further 10 minutes.
After the full 20 minutes has passed, take out the tray - the choux should easily come away from the silicone mat / greaseproof paper. Leave on a wire rack to completely cool. Leave the oven switched on for the next stage.
Step 3: Praline paste
Here in the UK, it's quite hard / costly to find praline paste. In any case, it's quicker to make your own out of things you might even have in your cupboard already. Take the hazelnuts and almonds, spreading them out on a tray. Place in a preheated oven at 180, and roast off for about 5 minutes. The amount of time you leave the nuts in your oven depends on how deep you want the flavour to be - less long for a less nutty praline, longer for stronger ... though obviously if you leave them in too long they'll burn, so keep an eye on them.
Once you've roasted the nuts, remove from the oven and spread out onto a silicone mat (or, again, greaseproof paper). Place the matt or paper onto a cooling rack so that it's not directly on your work surface.
Add the sugar to a heavy bottomed pan, and heat. We want a pretty deep amber colour caramel - so at the point you see the caramel start to smoke, it should be there. Pour the caramel over the nuts and leave to completely set.
Once cool, use a rolling pin to gently break up the caramel into smaller chunks. Take the whole lot and carefully put it into your food processor. When you blend it initially, it will just look like dust - but carry on blitzing, and eventually the oils will be released from the nuts, and the consistency will turn to something resembling butter. This is your praline paste; you'll probably need about half for this recipe. It will keep in the fridge for a week or so.
Step 4: Crème pâtissière
Crack the egg yolks into a bowl, and add the sugar. Whisk until the yolks turn a pale colour, then sift in the flour and whisk again. Heat the milk and vanilla paste in a heavy bottomed saucepan until it boils. Remove from the heat, then pour a little of the hot milk on the yolk mixture to temper it, whisking constantly. Continue to add more of the milk mixture, whisking all the time. Eventually you should have mixed all of the hot milk with the yolk mixture - now transfer the whole lot back into the pan and place over a medium heat. Use a wooden spoon to continually stir, making sure you get right to the bottom of the pan. Your custard should thicken very quickly - but keep cooking until it's totally smooth and thick (it should take about 60 seconds). When ready, pour the custard into a clean bowl and put some cling film over the surface to stop a skin forming. I find cling is better than the icing sugar / cornflour dusting method, but normally pull one corner away from the custard to let heat escape.
Step 5: Praline cream and assembly
Place the 100g of butter in a stand mixer with the beater attachment fitted, and whip on a high speed until soft. Reduce the speed, and add half of your praline paste, making sure it blends completely (you'll want to scrape down the bowl). Keep the mixer running, and mix in the crème pâtissière. When the whole thing is amalgamated, taste the cream to see if it needs more praline paste or more sugar and adjust accordingly. Once happy, place a 1cm piping nozzle into a disposable piping bag and add the praline cream to it. Place this in the fridge to firm up. While you wait for this, go back to your cooled choux shells and carefully cut them in half horizontally. You may find that some of the individual shells come away from eachother during this process - but don't worry; they will all stick back together when you pipe the praline cream into the hollow shells. When the cream is firm, pipe enough into each of the 6 shells to fill it and come out half as high again.
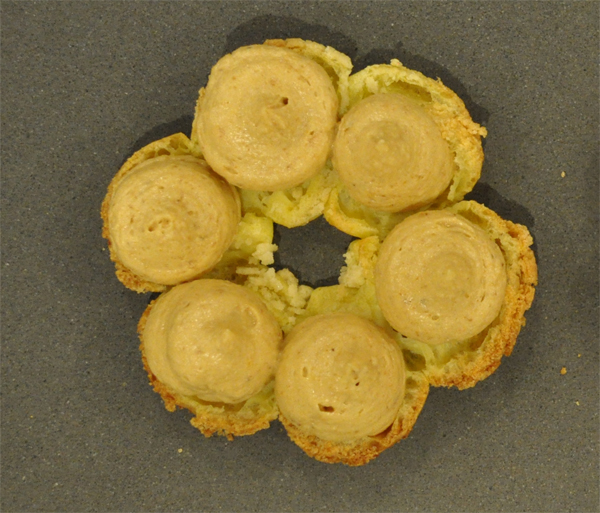
Carefully place the shells back on top of the cream and push down slightly to settle. If you're not serving straight away, place them back in the fridge.
When ready to serve, dust with icing sugar and enjoy.
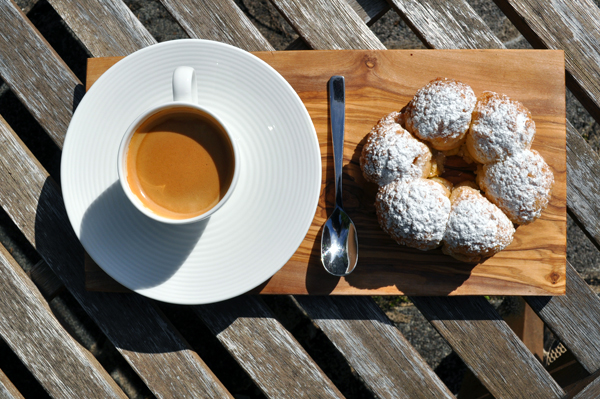
White loaf
The ultimate white toastie
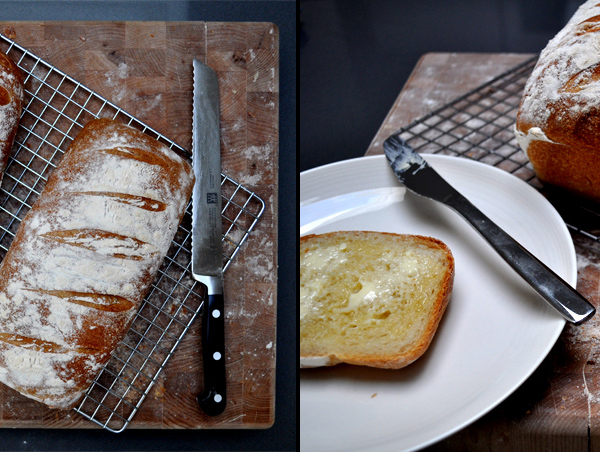
Bread; when in the oven, there's no other smell that beats it. Even a hardened coffee addict like me has to admit that.
There are an almost infinite amount of types, textures, techniques and flavours - but I thought this one, my regular and reliable white loaf, would be the most appropriate to open my blog with. It's a replacement for your standard white, is really simple to make, and actually has a pretty good shelf life for fresh bread.
This recipe has been refined over the last few years, and you can flip some of the ingredients if you want a partially brown or wholemeal bread ... but for me the quantities and technique outlined here make the ultimate white toastie.
Ingredients (makes one 800 - 900g loaf tin sized loaf)
- 500g Strong White flour
- 5g Diax Malt flour (I buy this from BakeryBits)
- 7g Instant Dried Yeast (or 17g Fresh Yeast)
- 65g of starter at 100% hydration (i.e. the amount of water in the starter is the same as of the amount of flour)
- 12g Fine Salt
- 1 tbsp Corn Oil
- 150ml tap-hot water
- 150ml fridge-cold milk
You're faced with two options; knead by hand or by machine. Of course it's true that hand kneaded bread gives more satisfaction, but if you're like me you'll hardly be able to see straight when you first get up in the morning. There are some breads that really need to be made by hand, but this loaf works perfectly in a stand mixer.
So; put the flours and salt in a mixer bowl and attach your bread hook. Mix the hot water and cold milk together to create a warm mix of liquid (which you should be able to touch with your finger - remember, yeast dies at around 60°C) and add your yeast to it. Leave for 5 - 10 of minutes, then pour this onto the flours. Drop in the starter and put the machine on a low speed. As soon as it starts to come together (about 20 seconds), pour in the corn oil and set a timer for 10 minutes. Rub your eyes and make an espresso.
After the kneading, pull the dough out of the bowl and shape into a round by curling your hands underneath the dough to create a smooth bubble. Add a little more corn oil to a clean bowl, cover with some cling film and leave to prove in a warm place for 1 hour.
At this point you'll already see a good increase in volume - so deflate the dough by pressing your fingertips all over. Re-shape into a round and put back in the covered bowl for another hour - then repeat once or twice more if you have time. After each rise you'll see your dough getting more and more active, probably with some small bubbles on the surface. The photos below show the end increase after each 60 minute deflate and rise.
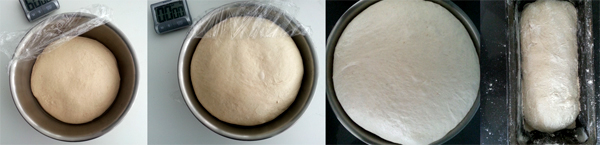
When your rise-deflation cycles are complete, add some flour to a loaf tin, deflate the dough one last time and press it out slightly. Flip the dough over, so the previously smooth part is on the bottom. Fold each side over into the middle to form a baton shape. Flip once more, tuck in the ends and place in your loaf tin. Lightly flour the surface and, with a plastic bag and leave for one final hour.
When there's 30 minutes left of the final prove, put your oven onto its highest setting and boil a kettle. If you have a baking stone, put this in the oven - along with a tray deep enough to hold about 500ml of water.
As the final hour of proving completes and your oven has fully pre-heated, slash the top of the loaf with diagonal cuts, and dust with some more flour. Make sure the water in your kettle is still near to boiling. Moving quickly, open the oven door and put your bread tin onto the shelf or stone, pour a good amount of boiling water from your kettle into the roasting tray and shut the door as soon as you can.
Set a timer for 10 minutes.
It's really important not re-open the oven for this period - the steam from the boiling water you've added is helping your loaf's moment of oven spring by slightly cooling the forming crust, making it supple for a little longer. This improves the flavour and texture of your crust by keeping the reactions going for as long as possible (read more about the Maillard reaction). The escaping Carbon Dioxide already in the dough, yeasts (giving off more CO² along with ethanol as they eat through sugar) and water (evaporating) inside the bread expand your dough push the bread's size to its full potential. Once the temperature of the dough gets high enough, the reactions stop and your initial crust is formed.
At this point, open the door and decide whether your bread is browning quickly or not. If it's pale, turn the oven to 190°C. If it's brown already, switch to 175°C. I generally find that 190°C does the trick in our oven.
Set a timer for 35 minutes.
When you hear the beep, check to see if the bread needs any more browning - 35 minutes is perfect for me, but you might need slightly more or less time. Remove from the oven then immediately remove from the loaf tin onto a cooling rack.
Give it a good 15 minutes, cut in and enjoy your hard work. Just make sure you leave enough for the rest of the week!