


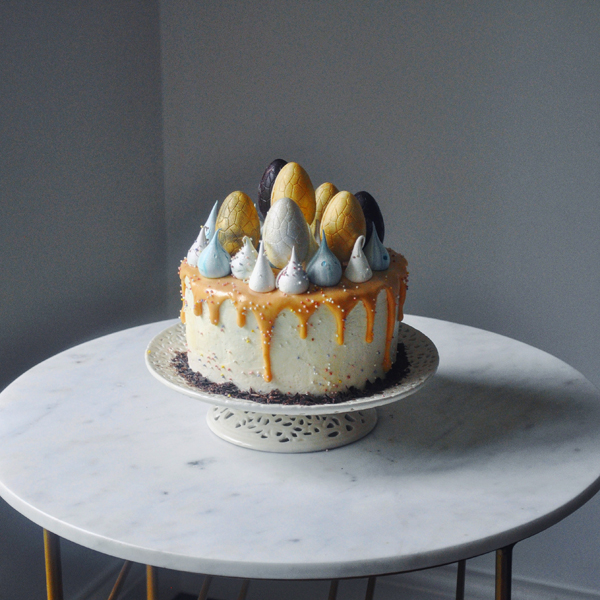
Easter Layer Cake 2017
Easter layer cake with mixed spice, almond buttercream, pistachio ganache and filled eggs


Making actual, proper cakes is something I don't do very often. You guys that do this day in day out are legendary; it's hard work!
A few weeks ago, I made a lemon version of this for Mother's day (are we really already at Easter?), so I thought I'd do it again with an Easter twist. I've provided a list of alternative ingredients at the bottom incase you want to make the lemon version instead.
Ingredients (Makes 1 individual cake, serving 8 people with lots of meringues left for the chef)
For the cakes (you'll need to make 2 and split them both)
- 350g Self-raising flour
- 350g Unsalted butter
- 350g Golden caster sugar
- 6 Whole large eggs
- 10g Baking powder (about 2 teaspoons)
- 10g Mixed spice (about 2 teaspoons)
For the white chocolate pistachio ganache
- 100g Shelled green pistachios or 2 tablespoons of pistachio butter
- 300g Whipping cream
- 300g White chocolate coverture (chips or callets if possible - this is what I'm using at the moment)
For the almond buttercream
- 120g Egg whites
- 200g Caster sugar
- 250g Unsalted butter
- 1 teaspoon of a strong almond extract
For the white chocolate drip ganache
- 150g Whipping cream
- 130g White chocolate coverture
- 20g Cocoa butter
- Paste or powder food colouring (I've used Wilton Ivory here)
For the meringues
- 75g egg whites
- 150g caster sugar
- Blue paste food colouring or any you feel like
Filled Eggs
For the tempered dark chocolate
- 250g Dark chocolate (at least 55% - this is what I've used here)
For the tempered white chocolate
- 250g White chocolate coverture
White chocolate passion fruit ganache filling
- 150g White chocolate coverture
- 150g Whipping cream
- 15g to 25g Passion fruit powder to your own taste (This one from Sous Chef is especially good)
Dark chocolate Manhattan ganache filling
- 150g Dark chocolate (at least 55%)
- 100g Whipping cream
- 30g Bourbon (I've used Four Roses Small Batch)
- 20g Sweet Vermouth (I've used Antica Formula)
- A few dashes of Angostura or other bitters
Other bits
- Gold and silver edible spray
- Dark rum for soaking into the cake layers
Equipment
- 18cm diameter, 8cm tall cake tin
- Plastic or other small egg mould
- Disposable piping bags and nozzles
- Silicone mat
- Stand mixer
- Sieve
- Stick blender
Make the cakes
Pre-heat your oven to 170C, and line two (or one if you have to do it twice in the same tin like me) with baking parchment. Spray the insides of your tin and parchment with spray oil, cake spray or lightly butter the surfaces.
Place the butter in your stand mixer with the sugar and cream until the butter is soft. Sieve in the flour and baking powder, then add the eggs and mixed spice. Mix for a few minutes until you get a nice smooth mixture.
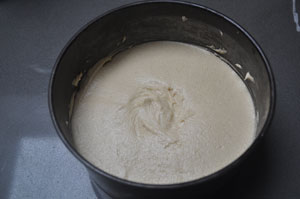
Pour half the mix into each cake tin, then level off with a spatula and bake for 35 to 40 minutes (until a chopstick inserted into the middle of the cake comes out clean).
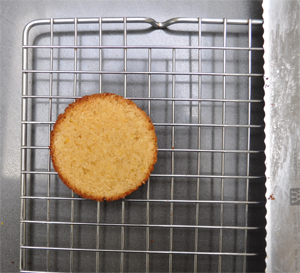
Remove from the oven, and let cool for 10 minutes; then remove from the tins onto a wire rack and leave to cool completely.
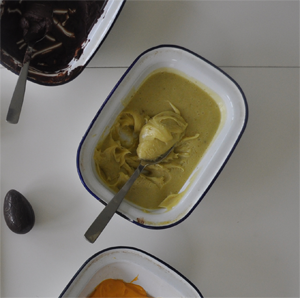
Make the pistachio ganache (for both inside the cakes and one of the filled eggs)
If you're using shop-bought pistachio butter, skip this first section.
Pre-heat your oven to 200C, then spread the pistachios out on a tray and toast for 10 minutes
Pour the nuts into a food processor, and blend for 10 minutes until the oils are released and the nuts turn into butter
Place the double cream in a heavy bottomed pot with around two tablespoons of the pistachio butter and mix with a spatula until combined.
Put the while chocolate into a heat-proof bowl (and chop if you're not using callets).
Heat the cream gently until it starts to bubble, then immediately pour over the white chocolate. Leave it for two or three minutes, then blend with your stick blender until all the white chocolate has melted. Finally, and it should still be warm at this point, add the unsalted butter and blend again.
Pour into a tray, cover with cling film and let set in the fridge for an hour.
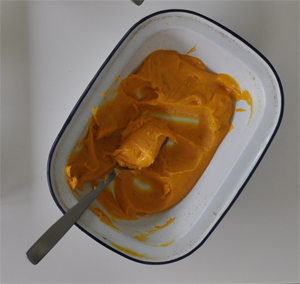
Make the passion fruit ganache (for inside one type of filled eggs)
Place the double cream in a heavy bottomed pot and add the passion fruit powder. Stir to combine (note - you can use fresh passion fruit juice here, but it's just not as intense. If you use it, reduce the amount of cream by the weight of juice used)
Put the white chocolate into a heat-proof bowl (and chop if you're not using callets).
Heat the cream gently until it starts to bubble, then immediately pour over the white chocolate. Leave it for two or three minutes, then blend with your stick blender until all the white chocolate has melted. Finally, and it should still be warm at this point, add the unsalted butter and blend again.
Pour into a tray, cover with cling film and let set in the fridge for an hour.
Make the Manhattan ganache (for inside one type of filled eggs)

Place the double cream in a heavy bottomed pot with the vermouth, bourbon and bitters. Stir to combine.
Put the dark chocolate into a heat-proof bowl (and chop if you're not using callets).
Heat the cream gently until it starts to bubble, then immediately pour over the dark chocolate. Leave it for two or three minutes, then blend with your stick blender until all the chocolate has melted. Finally, and it should still be warm at this point, add the unsalted butter and blend again.
Pour into a tray, cover with cling film and let set in the fridge for an hour.
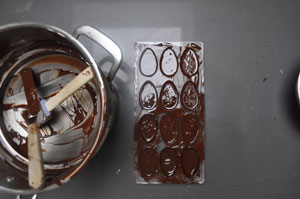
Temper and make the dark chocolate shells
Prepare a pot of water and place a heatproof bowl over the top. Weigh out your chocolate, then place two thirds into the heatproof bowl and reserve the rest.
Using a thermometer, heat and stir the chocolate until it reads between 45C and 50C.
Immediately remove from the heat, and mix in the remaining third of chocolate (chopped or callets) and stir vigorously until mixed. As you're doing this, take occasional temperature readings - when it hits 31 to 32C it's ready to use. If you dip below, very gently heat again over the bain marie - but don't exceed this temperature. If you're struggling to make the last third of the chocolate melt, use a stick blender to help.
When the chocolate is ready, pour it into the shell mould so that it fills them entirely - the amount given in this recipe is for the type of mould I'm using - you may need more or less.
This part all proper chocolatiers will want to collectively punch me in the face for - place your mould into the freezer for 60 seconds. This will help firm the outside of the chocolate shell.
When time is up, remove and pour the excess chocolate out, leaving a layer of around 5 or 6mm around the outside. Place back into the freezer for 5 minutes.
This time your chocolate should be completely solid - so scrape the edges of the mould with a sharp knife to release the shells (keep any shavings for decoration at the end of the cake), then flip the mould and tap hard on your work surface. If you've got a good temper (the chocolate, not your own demeanour) they should fall straight out. You may need to tap or drop the mould a few times to release them all. Reserve the shells for the next stage.
Temper and make the white chocolate shells
Follow exactly the same process above, except that you should wait until the temperature is 28 to 29C until pouring it into the mould.
Fill the shells
Remove the ganaches from the fridge, and spoon the Manhattan one into the dark shells. Smoothen with a spatula, but leave a little extra over the shell's edge. Press two halves together until some of the ganache leaks out, then take a paper towel and rub the excess off around the edge so that the shells stick together.
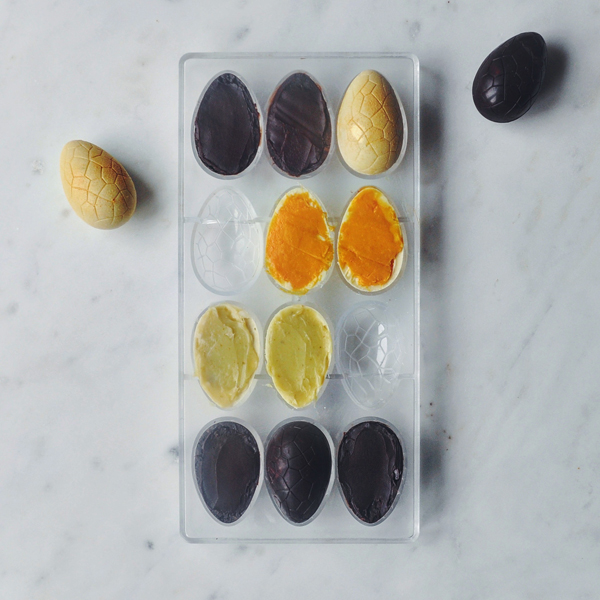
Repeat with the pistachio and passion fruit ganaches - you can mix and match these two between dark and white chocolate if you like; the Manhattan one only works well in the dark shells though!
Reserve the eggs in the fridge
Split and layer up the cake
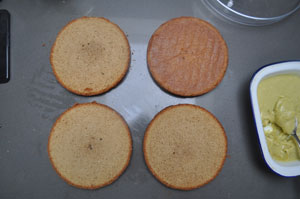
Take each of the two cakes, then cut the top off so that you have an even top and bottom. Split each of these in two, so you end up with 4 pieces of equal height.
Use the bottom of one cooked cake as the base, and the bottom of the other cooked cake as the top so you can really ensure a decent flat surface.
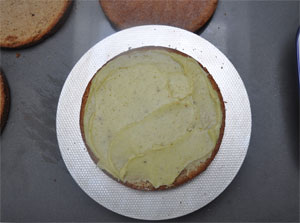
Place your first layer on a board or cake stand, then pour 3 tablespoons of dark rum over the surface as evenly as you can.
Spread around two tablespoons of the pistachio ganache over the cake, then level it up. Repeat with another two layers, then finally place the last layer over the top so you have a 4 layer cake with 3 layers of ganache sandwiched between. Place sin the fridge to firm up.
Make the meringues
This is the brilliant Meringue Girls technique, which gives a chewy and delicious result.
Heat your oven to 200C, then place the caster sugar into a try lined with baking paper for 7 minutes.
When time's up, reduce your oven 100C.
Place the egg whites in the bowl of your stand mixer and whisk until firm peaks form. Gradually shower in the heated sugar, then keep whisking until the meringue is glossy.
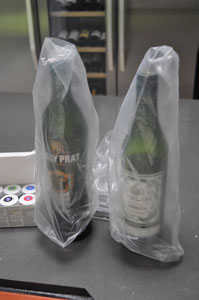
Prepare a tray with a silicone mat, and piping bag with the food colouring - you want to take your piping bag, then turn it inside out, except for a tiny bit where you'll put the piping nozzle. Place this over a tall bottle, then grab your food colouring paste and paint 4 evenly spaced vertical lines from the top to the bottom of the bag. Remove from the bottle, place your piping nozzle in, and invert back the other way.
Fill the piping bag with your meringue, then pat it down with your hands to both remove the excess air and also get the colouring going. Tie, fold or clip the top then cut open the end and push out the nozzle.
Pipe evenly spaced meringues onto the silicone mat, pulling upwards to get a taller meringue. Leave a centimetre or two between each one.
Place in the oven for around 40 minutes
Make the drip ganache
Do this first, as it needs to thicken to exactly the correct consistency, and that can take some time.
Place the cream in a heavy bottomed pot. Weigh the chocolate and cocoa butter into a heat-proof bowl.
Heat the cream until it's bubbling, then pour onto the chocolate. Leave to stand for 2 or 3 minutes, then mix with a spatula or blend with a stick blender. Drop in the paste - I've used Wilton's Ivory colour here. Once completely combined, place in the freezer to firm up.
This is the trickiest part of the recipe; if you've not left it long enough, the ganache will be too runny and simply drip off the cake leaving a mess. If it's too thick it won't drip at all. You want it to be relatively heavy, and closer to fully setting than being liquid. It can take a couple of hours in the freezer - so wait it out, but check regularly. Get on with the buttercream while you're waiting.
Make the buttercream and ice the base cake
Place a pot of water on your hob, and heat until simmering. Weigh the egg whites and sugar into a bowl, then place this over the simmering water. Immediately start to whisk - and I'd recommend a hand-held electric whisk at this point. Keep going until it whips to a stiff peak.
Transfer to your stand mixer bowl, and whisk again. While it's still hot, start dropping the butter in piece by piece until it's all gone. The heat will melt the butter, so it won't cream straight away - but give it 5 or 10 minutes at high speed and you'll end up with a smooth buttercream. Before you stop whisking, add the almond essence.
Finally, ice the cake by plastering the outside and top with buttercream, then placing back in the fridge for 20 minutes. When time's up, remove the cake from the fridge and you'll find the buttercream has firmed up slightly. Begin to smoothen the sides and top with a long spatula. If you've got one of those rotating cake stands, use that by placing the spatula up against the cake and spinning the base instead. You can keep dipping your spatula into warm water if you want to make it really smooth. The top is less important to get totally perfect, as the ganache will cover any minor imperfections.
Place back in the fridge until the drip ganache is ready.
Drip the ganache
When the ganache is just about moving when you spoon it, it's ready. Start to spoon small amounts near the edge; if it starts to drip down the cake all the way to the bottom, it's still not firm enough - so return to the freezer. If it starts to drip and stops somewhere down the buttercream, you're good.
Continue doing this all around the cake using more or less each time so the drips are different lengths.
When you've gone all the way around, use the remaining ganache to fill the top of the cake, then place in the fridge to solidify one last time
To serve
Place a toothpick into the bottom of each egg you're adding to the cake. If you've got / are using gold and silver edible spray, spray them at this stage. Stick 6 or 7 eggs on top at different heights.
Place some meringues around randomly, then finally throw over some hundreds and thousands.
If you kept any of the chocolate scrapings, place these around the bottom of the cake.
Hope you enjoy this one and Happy Easter!
Lemon variation
- Substitute the mixed spice for the zest of two lemons and the juice of half in the cake mix
- When layering, substitute the rum for gin mixed with lemon juice
- When making the buttercream, substitute the almond essence for more lemon zest and a 1/2 teaspoon of vanilla powder or extract
- Instead of the pistachio ganache between the cakes, make or buy lemon curd and spread between each layer. Here's my recipe from way back in post #2
- Instead of the filled eggs, make some lemon macarons filled with curd and whipped cream. Here's one receipe for the shells from post #19
- Substitute out the random colours for yellow!

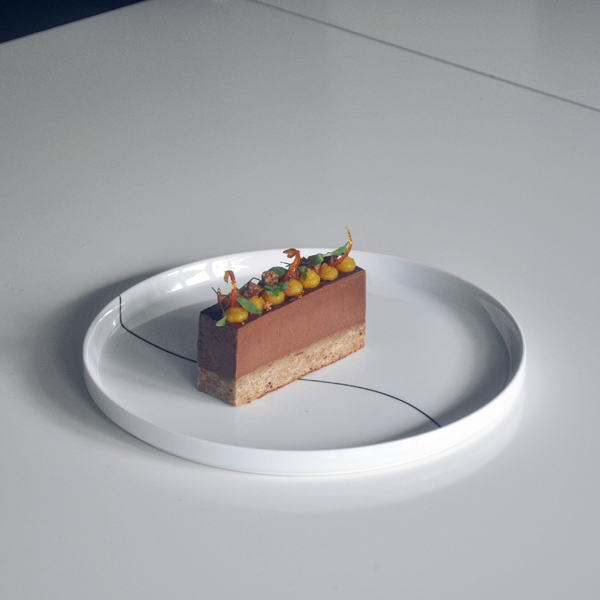
Vanilla
Inspired by the Philippe Conticini classic from LPDR
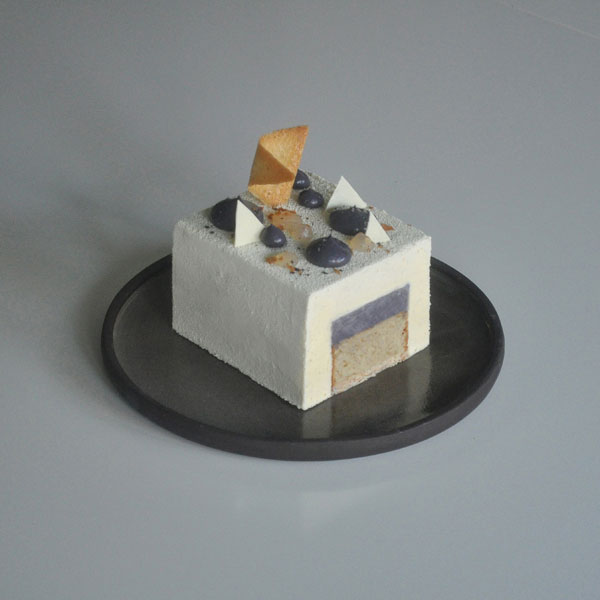
Grand Cru Vanille. Grand. Cru. Vanille.
If you've ever been to La Pâtisserie des Rêves in London or Paris you'll know what I mean. It's a completely unassuming cake, which you'd perhaps not look twice at given the treats under the cloches ... then you try it and you realise (as long as you actually like vanilla) that it's one of the greatest pieces of pâtisserie ever made. The real recipe, however, is notably absent from the LPDR book - probably because it's a closely guarded secret.
I've wanted to recreate it for years, and have commented many times to my Instagram buddy and pâtisserie genius Alvin about attempting it.
While re-creating it would be cool, I thought - you know, since LPDR's version is actually perfect - that wouldn't be wise as it would only cause disappointment. So, instead, I've re-imagined it. A bit.
I made this one for my mum's 72nd Birthday this week. The whole cake was polished off; good job the recipe makes two.
You can reduce the complexity by omitting the decorations if you prefer. My preference was to use a Silverwood adjustable cake tin for this (link in the ingredients section below) but you can easily adapt it if you have two 30cm tins that fit inside each other.
Ingredients (Makes 2 individual cakes, each serving 4 people. You'll also have left over salted tuilles and Feuilletine chocolate pieces to enjoy later)
For the Joconde layer
- 62g icing sugar
- 63g ground almonds
- 20g strong flour
- 80g whole eggs
- 14g unsalted butter
- 50g egg whites
- 15g caster sugar
- Optional - 100% proof vodka with a vanilla pod soaked inside for 2 weeks
For the Feuilletine layer
- 95g ground almonds
- 15g icing sugar
- 7g unsalted butter
- 60g white chocolate couverture
- 1/2 tsp fleur de sel
- 1 Vanilla pod
- 1/2 tsp Vanilla powder
- 35g feuilletine
For the black vanilla bavaroise
- 125g white chocolate couverture
- 125g full fat milk
- 30g egg yolks
- 15g caster sugar
- 190g whipping cream
- 3g gelatine (about 1 1/2 sheets)
- 1 tsp Vanilla powder
- 2 vanilla pods
- 1tsp black food colouring or activated charcoal
For the white vanilla bavaroise
- 250g white chocolate couverture
- 250g full fat milk
- 60g egg yolks
- 30g caster sugar
- 380g whipping cream
- 6g gelatine (about 1 1/2 sheets)
- 2 vanilla pods
For the white chocolate flocking
- 200g white chocolate couverture
- 140g cocoa butter
- 4 teaspoons of superwhite food whitener (optional)
For the fleur de sel tuiles (optional)
- 25g unsalted butter
- 40g egg white
- 55g caster sugar
- 25g double zero flour
- Pinch of vanilla powder
- Several pinches of fleur de sel
For the vanilla vodka fluid gel (optional)
- 110g soda water
- 25g caster sugar
- 15g vanilla vodka (I used 100% proof Stoli with a vanilla pod soaked inside for 2 weeks)
- 1/4 tsp vanilla powder
- 2g agar agar
To serve
- Vanilla powder
- Fleur de sel
- Feuilletine
Equipment required
- Cake frame with adjustable panels (Silverwood does a good one)
- Thermometer
- Piping bags and nozzles for plating
- Silicone mat
- Stand mixer
- Food processor
- Sieve
- Stick blender
- Spray gun
Make the Feuilletine layer
Put the ground almonds and icing sugar in your food processor and leave running until the oils of the nuts begin to be released and you get an almond paste. This will take around 10 minutes.Split and scrape out the seeds from the vanilla pod and put these, the split pod, vanilla powder, salt, butter and white chocolate into a heatproof bowl and melt over a simmering pot of water.
When completely melted, remove the pod and combine with the ground almond paste.
Fold in the feuilletine, then pour out onto some cling film. Cover with a second layer of cling, then push down with a rolling pin - it should be thick enough to roll out, but leave to cool a little if it's too soft.
Roll out to about 1/4 cm thick - it should be at least 30cm long, and 5 to 6 cm wide (see next section). Place in the fridge while you continue.
Make the Joconde
 Pre-heat your oven to 200°C.
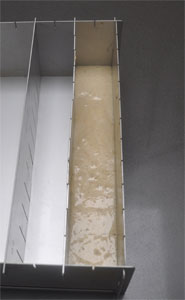
Prepare your tin - if you've got a silverwood, you want to set it so you have it set at 2 notches wide, as shown here to the right. If not, a tray tha'ts 5 to 6 cm wide by 30 cm long will do. Spray it with bake spray, and line the bottom with greaseproof paper.
Put the eggs, icing sugar, flour and ground almonds in the bowl of your stand mixer, and whip up with the whisk attachment for about 10 minutes.
While this is running, melt the butter then let it cool. After 10 minutes are up, slowly pour the butter into the running mixer.
Put the egg whites into a clean bowl, and whip until medium firm. Shower in the caster sugar, then whip to stiff peaks.
Gently fold the egg whites into the flour mix, then pour this into your tin.
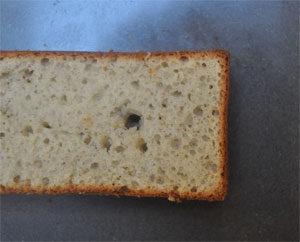
Bake for 15 minutes until golden and a skewer / chopstick comes out clean.
Leave to cool, then trim off the top so you end up with an exposed sponge. It should be 3 to 4cm in height after being cut. Flip it upside down, so the exposed sponge is on the bottom.
Remove the feuilletine layer from the fridge (still in the cling film), then put the joconde on top. Cut the feuilletine so that it matches the sponge as closely as possible - we'll be chopping the ends off later, so it's the sides that matter the most.
 Peel off the top layer of cling then place this back in your 5cm x 30cm baking tin with the cling film layer at the bottom so it's easier to remove later (get that right or you'll end up with cling inside your cake!).
Place the joconde on top, cut side down onto the feuilletine. If using the vanilla vodka, brush some on top of the sponge. Put this in your freezer.
Make the black vanilla bavaroise
Weigh your milk out into a heavy bottomed pan, then split and scrape the vanilla pods to get the seeds. Add both the seeds and pods to the milk along with the extra vanilla powder.Heat until it hits boiling point, then turn off your cooker hob ring and leave to infuse for 30 minutes.
When time's nearly up, start preparing the other ingredients. Soak your gelatine in cold water and set aside.
Weigh out the white chocolate into another bowl with a fine sieve on top, and again set aside.
In a 3rd bowl, place the egg yolks and whisk them with the caster sugar until they become pale. Finally, get your thermometer ready.
Remove the pods from the milk, then put over a medium heat until boiling again. Carefully temper the egg yolks by pouring a little milk over them while whisking. Continue to add more until all the milk has been combined with the yolks.
Pour this back into the pan and keep stirring with a wooden spoon. Read the temperature - raise it until the thermometer reads 82 degrees C then immediately pour through the sieve onto the chocolate. Let this sit for a few minutes, then squeeze out the gelatine and add to the mix. Use a stick blender to blend everything to ensure it's totally smooth.
 Start adding the black food colouring - my one turned out purple-ish (using Americolor powder) but that's probably because I didn't want to overdo it. Go as hard as you like.
When you're happy it's all blended, pass through a sieve once more into a clean bowl and set aside in the freezer for 10 minutes to firm up.
Remove from the freezer, and whip the cream until quite thick - enough to hold its shape for a few seconds if you drop some from a spoon. Fold the cream into the custard, and return to the freezer for another 10 minutes.
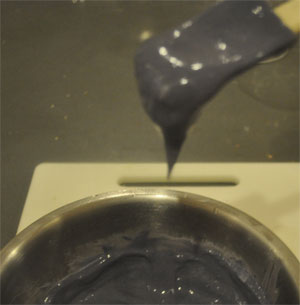
After time's up, the bavaroise should be quite thick - dropping consistency as shown to the right. If it's not thick enough, freeze for a bit longer.
If you're happy, pour it over the joconde to about 1cm in height (you'll have some left over for the top) and tap the frame to level it out. Place back in the freezer to completely firm up (at least an hour). Put the remaining bavaroise in a piping bag with a 1cm nozzle and reserve in the fridge.
Make the white vanilla bavaroise
This is the same method as above, but wait until the black layer has set before you start. While it may seem like a lot, you'll need it to cover everything.Weigh your milk out into a heavy bottomed pan, then split and scrape the vanilla pods to get the seeds. Add both the seeds and pods to the milk. No extra powder in this one.
Heat until it hits boiling point, then turn off your cooker hob ring and leave to infuse for 30 minutes.
When time's nearly up, start preparing the other ingredients. Soak your gelatine in cold water and set aside.
Weigh out the white chocolate into another bowl with a fine sieve on top, and again set aside.
In a 3rd bowl, place the egg yolks and whisk them with the caster sugar until they become pale. Finally, get your thermometer ready.
Remove the pods from the milk, then put over a medium heat until boiling again. Carefully temper the egg yolks by pouring a little milk over them while whisking. Continue to add more until all the milk has been combined with the yolks.
 Pour this back into the pan and keep stirring with a wooden spoon. Read the temperature - raise it until the thermometer reads 82 degrees C then immediately pour through the sieve onto the chocolate. Let this sit for a few minutes, then squeeze out the gelatine and add to the mix. Use a stick blender to blend everything to ensure it's totally smooth.
When you're happy it's all blended, pass through a sieve once more into a clean bowl and set aside in the freezer for 10 minutes to firm up.
Remove from the freezer, and whip the cream until quite thick - enough to hold its shape for a few seconds if you drop some from a spoon. Fold the cream into the custard, and return to the freezer for another 10 minutes.
After time's up, the bavaroise should be quite thick - dropping consistency as shown in the image of the black bavaroise above. If it's not thick enough, freeze for a bit longer.
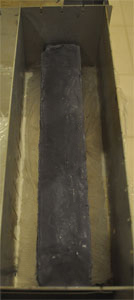
Next, if using the Silverwood cake tin, change the notches so you have 3 showing (i.e. 4 lanes wide). Move the frozen 3-layer cake to the centre as best you can (we'll trim it later anyway). Otherwise, put your frozen cake in the larger of your two tins. Line the sides of the tin with greaseproof paper, cling or acetate.
Pour the mix over the frozen cake, making sure it goes down each side, and tap the frame to level it out. Place back in the freezer to completely firm up (at least 2 hours this time).
Spray
Put the chocolate, cocoa butter and superwhite (if using) in a heatproof bowl and place over a simmering pot of water.When everything looks completely melted, blend with your stick blender just in case then pour into your spray gun.
Take out a big box - a 12-hole wine box is a good size, or one for 12" vinyl records (a sentence which sums up our household quite neatly) - and cut off top flap. Lay it down so you have flaps on the left, bottom and right. Place a chopping board in the box, then put a layer of greaseproof paper on top.
Remove the cake from the freezer. At this point, we need to cut the cake in half. You're welcome to keep it whole, but I found this to be much easier to spray.
If the sides are a bit wonky (mine were, as I'd used cling film and didn't get the cake dead-centre) use a very sharp knife to cut thin slides from each side to level things up.
If necessary, you can also use a blowtorch to slightly melt (heat for no more than 1/2 second) any side that isn't perfectly smooth. Once heated, use a right-angled spatula to smoothen. It should re-freeze within a couple of seconds.
If you're ready to spray, put your first cake in the box and turn on the gun. When flocking, I normally rotate the cake 3 times to make sure it has built up enough.
Repeat with the other cake, then return to the freezer to harden.
If you like, any remaining chocolate can be spread on a silicone mat to harden up. You can then use shards of it to decorate the cake later.
Make the tuiles (optional)
 Pre-heat your oven to 170°C.
Heat the butter in a pot, then remove from the hob and let it cool a little.
Place the egg whites and caster sugar in a bowl and whisk until combined. Add the vanilla powder and whisk again. Finally, sieve in the flour, and whisk until you get a paste. Pour in the cooled butter and make one final whisk to combine.
Place a silicone baking mat on a heavy tray.
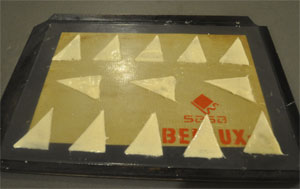
If you've got a tuile pattern mould, put it over the silicone mat. I don't - so I've made a triangle one by cutting one out of a piece of acetate.
Spoon a small amount of batter onto the mould or template, then use a pallete knife to smothen. They should be around 2mm thick. If you don't have a mould or template, just spoon some onto the mat and make a circle with the back of the spoon. Sprinkle each one with a small amount of fleur de sel.
Place in the oven for 7 minutes.
Get a rolling pin ready to bend the tuiles - or in my case, I had one of those U-shaped moulds. These produce a really good bend. In either case, remove the tray from the oven, and use a palette knife to release the tuiles. Place them carefully over the pin or in the U-shaped mould - the first ones will be quite pliable, but as you reach the end of the tray you might find them becoming brittle. Try to work as quickly as you can.
Leave to cool.
Make the fluid gel (optional)
Weigh the soda, sugar, vanilla powder and agar agar into a heavy bottomed pot. Heat until it boils, while whisking constantly.When it hits boiling point, remove from the heat and pour into a bowl. Leave it to cool slightly, then add the vodka.
It will set after around 30 minutes at room temperature. To make the gel, simply remove the set jelly, chop it and throw it in your blender for 5 minutes. The agar structure will break down, but remain viscous.
Slide into a piping bag with a 1/4cm nozzle.
Plating up
Take the sprayed cakes out of the freezer. On the first cake, using a sharp knife, slice off each end so that it exposes the layers within again.Pipe dots of the black custard in random sizes on top, followed by dots of fluid gel. Add one of the salted tuiles, sticking it into the cake gently. Crumble over some feuilletine, dust a tiny bit of vanilla powder over the top and add a few crystals of fleur de sel. Finally add your chocolate shards, if using.
Repeat with the second cake.
At this point you'll want to let it defrost a bit more at room temperature - due to everything being really soft, it won't take long. If your house is reasonably warm, it'll be done in 30 mins to an hour.
When you slice it, blowtorch or otherwise heat your knife firsts. Cut quite thin slices - about 1cm thick.
Enjoy all your hard work. Or, if it has all gone wrong, pop down to LPDR and buy a Grand Cru Vanille. It might just change your life.
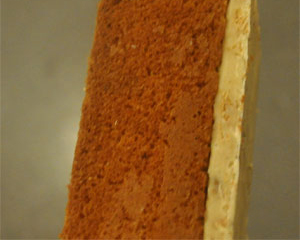
Chocolate, Date, Coriander & Tangerine delice
Chocolatey goodness with a dash of the unusual
We eat in restaurants quite a lot at the weekend, but with all the hype these days it's not often a place lives up to what people say.
The wife has been gushing about Le Bab for months now, normally telling me how good it is around 2 hours after eating a low carb, 300 calorie week day meal. Thanks.
Last week we went for dinner and I've got to say; their lamb kebab was the best I've ever eaten. That's coming from a half Armenian (national dish: kebab) and a mother who has been making amazing barbecues all my life (favourite: lamb kebab) - so I really mean this thing is spectacular.
Anyway, I digress. I've since tried to re-create it for burger night, but its heady mix of dried coriander and delicious date chutney gave me an idea for this ... dessert.
It might seem odd, but it really does work - obviously we've got the chocolate-orange thing going on with the tangerine, but the dates give the base cake a great texture and coriander acts as a kind of gingery lift.
Most of the stages are simple, but I've got my chemistry set out for the fluid gel. You can just use gelatine if you have it, but agar agar is quite widely available these days - so get some if you can and try this out.
Ingredients (Makes 1 block which you can slice as you wish - between 8 and 10 portions)
For the cake
- 170g Medjool dates
- 250g water
- 5g bicarbonate of soda
- 75g lightly salted butter
- 175g golden caster sugar
- 3 large eggs
- 220g self raising flour
- 10g ground coriander
For the delice
- 340g dark chocolate (at least 50%) [I used Callebaut in this]
- 2 large eggs
- 325g whipping cream
- 150g whole milk
For the candied tangerine peel
- Peel and juice from 2 tangerines
- 100g caster sugar
- 100g water
For the tangerine fluid gel
- The juice of the 2 tangerines
- 2g agar agar
To serve
- Micro coriander [I get mine from Growing Underground via FarmDrop]
- Reserved date cake
Equipment required
- 24cm x 14cm cake frame or similar sized tart case with a removable bottom
- Large brownie tray, 35cm x 24cm, to make the cake in
- Piping bag or squeezy bottle sfor the fluid gel
Make the cake
 Pre-heat your oven to 150°C.
Stone and chop your dates really roughly into small pieces.
Place the butter in your stand mixer bowl with the beater attached. Pour in the golden caster sugar and leave them to cream for about 5 minutes. Crack and drop in the three eggs, one at a time, with the beater still running on low speed. Sieve in the flour and mix again until everything is combined.
Next, add the ground coriander, and finally the chopped dates and water. Keep mixing; this lot will look ridiculously wet, but stay with me.
Prepare your brownie tin with some greaseproof paper (as you can see from the image, much care was taken here) - use some baking or 1cal spray to bind it to the tray, and some more to make sure the cake doesn't stick.
Pour the batter into this, then place in the oven for 50 minutes.
You'll end up with a very delicious, moist cake. You'll also have some spare bits to eat, and some more to make into crisp pieces for the top. Set this aside for a few minutes, then turn out onto a cooling rack and leave to cool completely.
Next, take your cake frame and prepare it with two overlapping sheets of cling film (i.e. one going horizontally, then another on top going vertically). Carefully cut the cake to fit the frame, and place it in - shiny / browned side at the bottom.
Make the delice
Place your eggs in a heatproof metal bowl and whisk until pale. Weigh out the chocolate - if you're not using callets, then chop it roughly. Set aside.Pour the milk and cream into a heavy based saucepan and heat until it's boiling. When it reaches temperature, carefully pour a small amount over the eggs to temper them and keep on whisking. Slowly pour more, whisking continuously, until you combine all of the heated milk/cream with the eggs.
Finally, drop in the chocolate and stir with a heatproof spatula until it's completely combined - this might take several minutes.
The delice is complete, but needs to cool to a more viscous consistency so you can pour it into the frame without it soaking too much into the cake beneath. Place it into your freezer for about 20 minutes.
When it's ready, pour over the cake in the frame, then place the lot in the freezer again for about 2 hours to firm up completely.
Make the fluid gel
Juice your tangerines and put the liquid into a heavy-based pot. Weigh the agar agar on a light-weight scale. Heat the juice until it's boiling, then drop in the agar powder and whisk really well.Let it boil for a minute or so, then remove from the heat and pour into a bowl to set.
This doesn't take long - really just as long as the boiling liquid takes to cool. You need it to be completely set though.
When it's ready, spoon the solidified juice out and chop it roughly. Place in a food processor and blend until it's like a really thick liquid.
Pour into a piping bag with a small tip, or a squeezy bottle and reserve in the fridge.
Make the candied tangerine peel
Place the sugar, juice and water in a heatproof pot. Slice the tangerine peel so it's very thin, then add to the pot too.Bring to the boil and heat vigorously until the sugar and juice becomes a syrup - take care not to burn it though. When done, remove from the heat, then spoon out the peel and lay it on some greaseproof paper to dry.
Plating up
Take some of the reserved date cake (if you've not eaten it all) and chop it into tiny pieces. Toast it in the oven on a very high heat for about 5 minutes.Get a really sharp knife ready and heat the blade with a blowtorch or gas hob if you can. If not, just run it under hot water (but dry it before using). Remove the delice from the freezer and unwrap it from the cling film. Place on a chopping board, then carefully trim all four sides.
Make slices along the delice until you get your desired portions - Mine were approximately 2.5cm wide.
Work quickly here, as this delice only stays upright while at fridge temperature - if you find it melting too quickly while chopping, put it back in the freezer. As you chop each slice you can always place them in the fridge while you continue cutting and plating.
Pipe 7 small dots of fluid gel on the top of the cake along one edge, then 6 dots on the other, alternating with the dots on the first row. Place one cube of toasted date cake between each pair of dots. Take three slices of peel and place one on each end, and a final in the middle. Lastly, carefully add a few micro coriander leaves on top. Crumble a few more of the toasted cake cubes up and sprinkle on top.
You can either serve immediately, or it will stay solid as long as it's in the fridge.
Okay, I'm hungry now. Le Bab anyone? ...
Give Me Some More
Chocolate, peanut, marshmallow. Who ate all the pies? Me, probably.
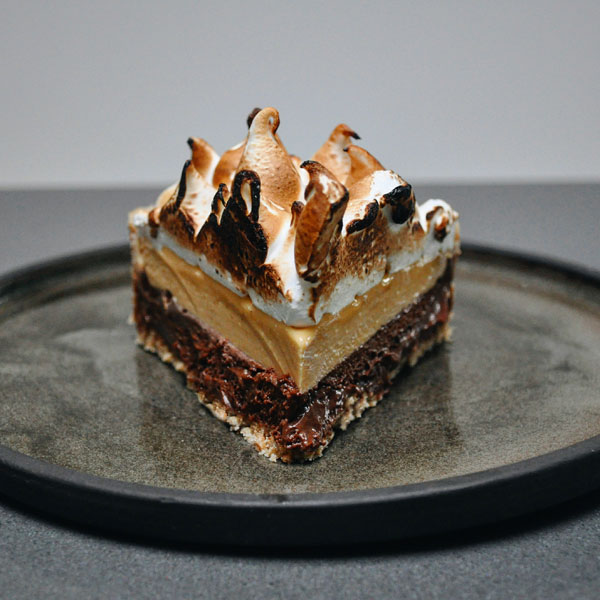
A month or so back, Chris aka All Things Meaty posted up an off-menu S'more cake he had in New York ... and it was the stuff of dreams.
I've been tweaking my double-butter peanut mousse recipe recently for an Opera cake, but thought I'd divert attention over to recreating the S'more cake this weekend. This recipe is the result. Since we don't have things like Graham Crackers or pudding cups over here, it's digestives and sabayon mousse instead.
Don't give too much of this to your kids, as this thing has sugar for days.
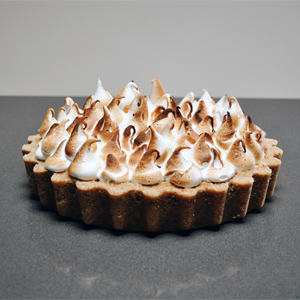
Ingredients (makes one pie)
For the crust
- 200g Digestive biscuits (1 small pack)
- 130g unsalted butter
- 100g caster sugar
For the chocolate sabayon
- 70g egg yolks
- 40g caster sugar
- 20g water
- 150g bittersweet chocolate (63%)
- 190g whipping cream
For the double-butter peanut sabayon
- 40g egg yolks (around 2 large egg yolks)
- 100g caster sugar
- 75g caster sugar
- 200g unsalted butter
- 65g smooth peanut butter
For the marshmallow topping
- 110g egg whites
- 300g caster sugar
- 75g water
- 4 leaves of gelatine
Equipment required
- 20 cm fluted flan case
- Stand mixer
- Thermometer
- Plastic piping bag and large piping head
- A serious sugar craving
Make the case
Melt your butter in a pan until liquid, then set aside. Take your flan tin and spray it with baking spray or 1cal oil spray.Weigh out your 200g of Digestive biscuits, then put them in a blender and whizz until powder-like. Pour the digestive crumbs into a bowl with the caster sugar, then pour over the melted butter. Use a spatula to blend the ingredients until fully combined and like wet sand.
Drop around half of the mix into your flan tin, then shake to level out. Now pour the rest around or near the edges so they can be built up. Press down on the base with the bottom of a mug or, if you have one, a small copper pot. Keep pushing the crust into the base and up the fluted sides of the tin to form a 1/2 cm thick layer by pressing down and rolling the mug or pot around the edges. If the mix starts to come over the top, put your finger level with the top of the tin as you press in order to keep it compact.
When you're happy things are looking solid, place on a tray and into your freezer while you carry on.
Make the chocolate sabayon layer
Attach a whisk to your stand mixer, and add the egg yolks to the bowl. Weigh out the caster sugar into a heavy bottomed pot, and place the water in there too.Heat the sugar over a high heat, and turn the mixer up to its highest setting. Regularly measure the sugar's temperature with your thermometer; as soon as it hits 121 degrees C, remove from the heat and carefully pour the hot liquid over the yolks that are being whipped in the mixer. Leave this running until it gets to room temperature.
While it's cooling, take another pan and fill it with hot water. Put this over a low heat, and place a bowl over the top to create a bain marie. Add the chocolate into the bowl and gently melt it, then set aside.
Finally, when your sabayon is almost cool, whip up the whipping cream to a ribbon stage - not stiff enough to hold a peak, but firm enough to show a trail when you lift the beaters up.
Fold the cooled sabayon into the whipped cream, then mix in a third of the chocolate until well combined. Fold in the last 2/3 of melted chocolate more gently.
Take the case out of the freezer, and pour the mousse in - you want it to come up about half way so you leave room for the peanut layer. If you have too much, just pour it into a bowl to scoff later.
Shake the case (don't tap it or you might break the base) to level out the mix, then put it back in the freezer.
Make the peanut sabayon layer
Re-run the fun.Attach a whisk to your stand mixer, and add the egg yolks to the bowl. Weigh out the caster sugar into a heavy bottomed pot, and place the water in there too.
Heat the sugar over a high heat, and turn the mixer up to its highest setting. Regularly measure the sugar's temperature with your thermometer; as soon as it hits 121 degrees C, remove from the heat and carefully pour the hot liquid over the yolks that are being whipped in the mixer. Leave this running until it gets to room temperature.
This is where it branches off from the chocolate layer. Pour out and reserve the sabayon. Clean the stand mixer bowl, attach a beater instead of a whisk, and whip up the unsalted butter on a high speed.
When the butter looks soft, reduce the speed and slowly (and over several additions), spoon the sabayon into the butter while still mixing.
Once combined, spoon in the peanut butter and whisk on high again until you have a really soft, thick mixture.
Remove the case from the freezer again - your chocolate layer should be set by now (around 30 minutes). Spoon over the peanut mousse and level out with a spatula. Put the case back in the freezer again.
Marshmallow topping and putting it all together
Soak the gelatine in some cold water and set aside.
Place the 100g of egg whites into your stand mixer with the whisk attachment fitted. Pour 75g of water into a heavy bottomed pot, add the 300g of sugar, and place over a high heat.
Use a thermometer to measure the temperature of the sugar - when it hits 115C, start to whip your egg whites. When it hits 118C, remove from the heat, squeeze the excess water out of the gelatine then (carefully, as it will bubble up) drop it into the syrup and mix with a wooden spoon or chopstick. Quickly trickle the hot syrup over the beaten egg whites. Leave this to whisk until completely cool.
While this is happening, prepare the piping bag - place the nozzle inside, then put it over a jug so it's easier to drop the marshmallow into - it'll be a sticky job!
Once the meringue has cooled, stop whisking and fill the piping bag. Try and remove any air bubbles from the bag by pressing the meringue down from the outside, then tie off or clip the bag.
Remove the pie from the freezer and snip the top off the piping bag to reveal the nozzle.
Start piping the mallows around the edge of the pie. Pull upwards to make them tall as you pipe each one. Once you've finished the complete circle, carry on with the next inner layer, and so on until the entire pie is covered. If you have any left, start piping a second layer over any gaps.
When you're happy, fire up your blow torch and burn the lot.
Let it defrost before eating - an hour or two at room temperature. The crust is quite delicate, and the mousse layers really light and soft - so you might want to cut slices before it comes up near room temperature. Torch the sliced sides before serving and enjoy responsibly.
It will keep for a number of days in the fridge. Unless you eat it.
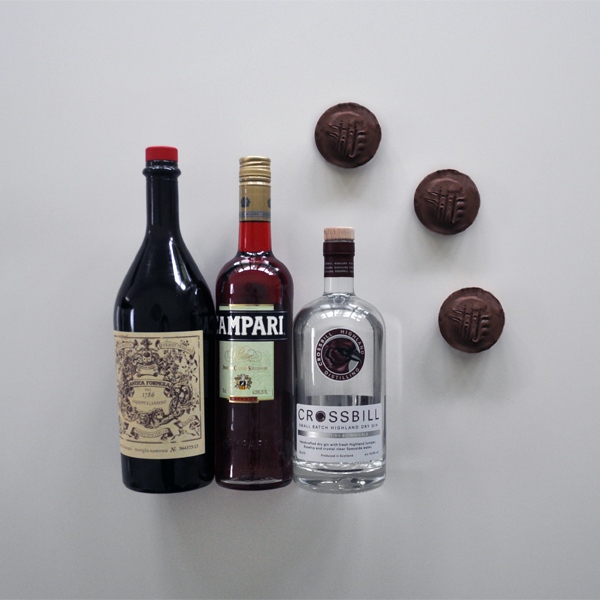
Naffa Cakes
Negroni inspired version of a classic treat
At some point, if you've worked in an office, you've had a "snack drawer". Don't even bother lying. We've all done it - and it's almost with 100% certainty that I can say you'll have had some Jaffa Cakes in there. Perhaps you've even eaten your way through one of those metre long packs. I've definitely not not done that too.
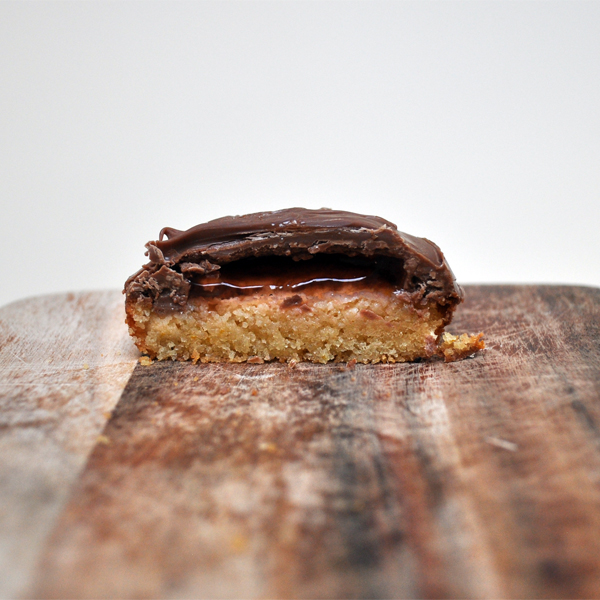
This adult version has a ground almond cake base, topped with a fully alcoholic Negroni jelly shot, covered in milk chocolate.
Caveat: I'd not recommend making then taking these to work. Unless you work at Sterling Cooper Draper Pryce of course.
Makes 12
Ingredients
For the base
- 150g ground almonds
- 4g baking powder
- 1 large egg
- 50g unsalted butter, melted then cooled
- 75g Agave nectar
- Pinch of salt
- The zest of 1/2 an orange
For the jelly (you'll have some left over)
- 5 leaves of gelatine
- 50g caster sugar
- The zest of 1/2 an orange
- 150g water
- 75g vermouth (recommended: Antica Formula)
- 75g Campari
- 75g gin
For the topping
- 250g milk chocolate
Equipment
- 12 hole cake tin
- Serrated knife
- Pastry cutter, of a visibly smaller diameter than your cake tin (to cut the jelly with)
- Thermometer
Before you begin, get the oven pre-heated to 180 degrees.
Make the jelly
Soak the gelatine leaves in cold water for 5 minutes. While that's happening, put the water, caster sugar and orange zest into a pan and heat until it reaches boiling point. Let it bubble for a minute or so, then take it off the heat to cool slightly. When the gelatine is ready, squeeze off the soaking water and drop into the hot syrup. Mix this together, then pour into a jug.
Measure the temperature; you want it to go below 78.5 degrees so you don't heat the alcohol too much. When it's there, pour in the vermouth, gin and Campari.
Take a baking dish that's at least 2cm tall, and line it with cling film to make it easier to remove later. Start pouring in the jelly mix; you want it to be just under 1/2 cm thickness. No need to be totally accurate, but make sure it's not too thin / thick or you'll get a disappointing result. Place this in the freezer to speed up the setting time.
Make the cakes
 Place the ground almond, baking powder, orange zest and salt in a bowl. Mix thoroughly, then add the egg. Combine to a paste consistency. Add the butter, and combine again until everything is evenly spread - it won't be really smooth because to the ground almond.
Prepare the baking tin by buttering it. Place around 1 tablespoon of mix in each tin hole, then smoothen the tops as much as you can. We'll be cutting the tops off later.
Bake in your pre-heated oven for around 15 minutes, turning once, until the tops are golden.
When time's up, take out the tray and leave to cool for 10 minutes. Invert the cooled cakes onto a wire rack then carefully slice the tops off with a serrated knife. You want around 1/2cm for the cake.
To construct
 Place the sliced cakes back into your tin. This will help stop the chocolate running over the cake base, making them look a bit more like the real thing.
Take a pan of water and bring it to a simmer. Place a metal bowl over this to create a bain-marie, and add your milk chocolate to this. We're not tempering here - we're after a softer finish, so just melt the chocolate until it's liquid.
Finally, take your jelly out of the freezer. It should be set, and may have some ice crystals on. No problem. Cut discs with your pastry cutter, and place onto each cake as centrally as you can.
Working quickly, as your jelly will start to set it immediately, pour about 1 tablespoon of melted chocolate over each cake and gently rotate the tray to get an even finish. You'll need to repeat that with each cake. Use a fork to get that Jaffa Cake style criss-cross finish, then leave to set in the tray.
To release them, take a small palette knife, and heat it over your hob. Carefully scrape the edges of the set chocolate, then remove and enjoy.
Lemon & Chocolate
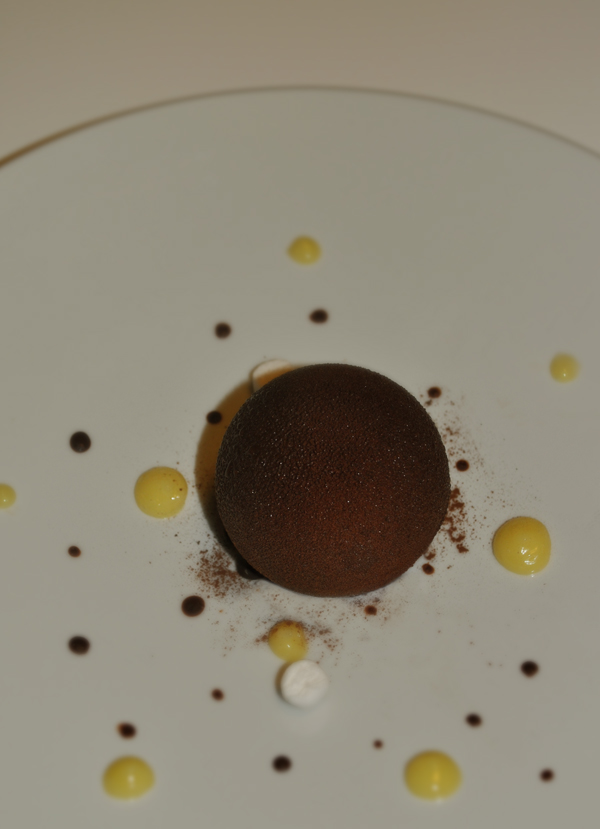
Panna cotta, lemon curd and dark chocolate spheres
It was my fiancée's hen do on Saturday night, so I was home alone and had big plans: ox cheek, slow cooked in red wine with barley, followed by sous vide hanger steak, bone marrow and chips. Unfortunately, I was stuck with a work-related problem, and decided to order take away instead. 40 minutes later, Domino's turn up with a particularly poor effort.
My evening was rescued by this dessert - which is pretty lengthy in process, but simple to make if you have some time to invest. The combination of lemon and dark chocolate is something that excites my palette a lot. I think the softer than usual panna cotta used here (partially down to the addition of vodka) surrounded by a crisp chocolate layer provides an interesting texture.
If you want to make things simpler you could fill ramekins with the panna cotta, layer over some curd, and pour over a thin layer of melted chocolate to get the same flavour. Here though I've formed the mix into a sphere, with the centre core being replaced by lemon curd. To do this you'll need a few special pieces of equipment - a silicone semi-sphere mould, a melon baller and a paint sprayer.
This recipe is for 4 complete desserts.
Lemon curd
Makes enough to freeze for the sphere's cores, some extra for plate dressing and left-overs for your toast
- 3 Large Eggs
- 100g Unsalted butter, cut into cubes
- 215g Caster sugar
- 3 Unwaxed Lemons (zest and juice)
Take two heatproof bowls, one slightly larger than the other, and put some ice & water in the larger of the two. Let the smaller bowl sit on this, and put a sieve on top. Combine the butter, sugar, lemon juice and zest in another bowl. Place this bowl over a pot of simmering water and stir until the butter and sugar have melted together.
Crack three eggs and whisk until fully combined. Add this to the heated lemon mixture while still on the heat, and stir very gently. Make sure the pot of water doesn't get too hot, or your eggs will scramble.
Continue to stir gently for about 10 minutes - at which point the curd will have thickened. Don't worry if it doesn't look thick enough - it won't be until it has cooled. The best way to describe it is as a thick pourable consistency. When it reaches this stage, take the curd off the heat and pour it through the sieve into the ice bath. It's not necessary to use an ice bath if you have the time to wait, but it allows us to move to the next stage more quickly.
Put some of your curd into a squeezy plastic bottle, the rest in a sealable sterilised container, and move them to the fridge.
Panna cotta
Makes enough to fill 8 semi-spheres
- 2 leaves of Gelatine
- 300ml Double Cream
- 75ml Whole Milk
- 110g Caster Sugar
- 1 Unwaxed Lemon (zest and juice)
- 70ml Vodka
- Special equipment: 7cm diameter half-sphere silicone mould (annoyingly these normally come in the 6 hole variety, so you'll need two)
Add the gelatine to a bowl of cold water and set aside, place your silicone moulds onto a baking tray of about the same size (to make it easier to carry when it's full of the mixture). Combine the cream, milk and sugar in a pot. Bring this to the boil and add the lemon and lemon zest. Whisk this in; when combined, remove from the heat and leave to cool enough so that you can just bear the heat if you put your finger into to the mixture.
Don't mis-judge this temperature; too hot and you'll stop the gelatine from setting, to cold and you'll end up with lumps of gelatine in the mix. When you think it's about right, take your gelatine, squeeze out the water, and combine with the hot lemon cream.
Once at room temperature, pour this into a jug (or auto funnel if you have one) and then fill the silicone molds. Try to fill to the top and burst any bubbles that appear with a fork. Slowly move these to a clear shelf in your freezer.
Construction and chocolate coating
- 250g 70% dark chocolate
- 75ml Groundnut oil
- Electric Paint Sprayer (I use a Wagner W180P; don't use it for spraying your fence before making this recipe though)
When the panna cotta is set enough that it barely moves (though isn't completely frozen), take a melon-baller and carefully scoop out a place for your lemon curd. Pipe or squeeze some of your curd into the hole, then use a palette knife to make sure it sits perfectly flat. Put this back in the freezer to harden compeltely - this may take another hour or two. When you're happy that they're frozen solid, place a sheet of greaseproof paper onto a circular plate (this becomes important later) and carefully unmould each panna cotta.
Work quickly, as the soft mixture begins to melt straight away - build 4 complete spheres by adding each half together and pressing very gently. Make sure there's at least 5cm distance between each one. Put them back in the freezer on the plate while you make the spray paint.
Take a pot of simmering water and place a bowl, containing the dark chocolate, over the top. Allow to melt, stirring occasionally. When ready, take off the heat, pour in the oil and stir to combine completely. Let this cool slightly (or you'll kill your spheres) then fill your sprayer with the mix.
Get a box big and tall enough to take the plate you've put your panna cottas on (a box where each side is the same size as a 12" vinyl record is perfect) and get ready for the fun part. Take the plate of panna cottas out of your freezer and put this in the box. Start the spray gun, and make sure it's at least 15cm away from the nearest sphere. Spray until you can't see any unpainted surface, then turn the plate and cover the next area. Continue until the spheres are covered in chocolate. Remember to try and go right to the bottom of each one, which can be a bit tricky. Try not to rotate the spray gun too much - if the inner pipe isn't fully submerged in the mix it will splatter the surface with random blobs of chocolate. Once you're happy, quickly put back in the freezer for at least 5 minutes to harden the chocolate.
Take the spheres out about 40 minutes from when you want to serve. After they've sat at room temperature for 40 minutes, the outer shell won't look frozen at all. I've served these above with dots of curd and chocolate spray, a few crumbled pieces of chocolate, some cocoa powder and a couple of lemon marshmallows.
Crack into those chocolate shells and enjoy the very soft centre with an espresso, cognac or dessert wine. It's just what every man needs when his wife-to-be is out getting hammered on Jägerbombs in Soho.
