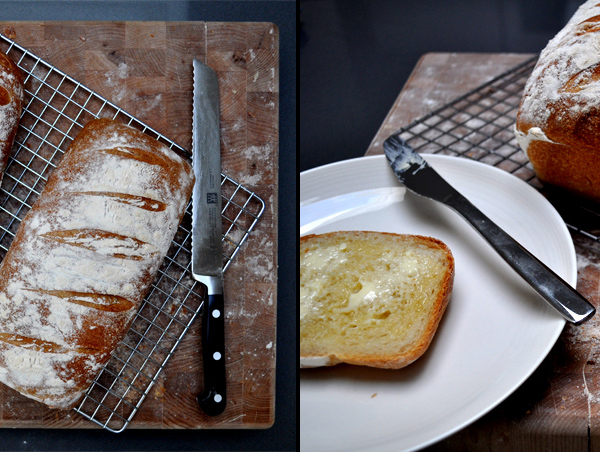
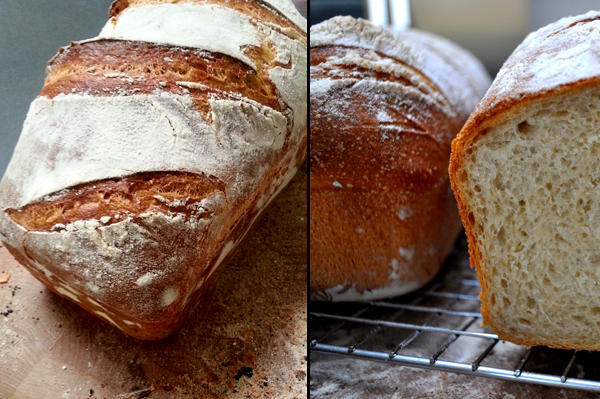
White loaf
The ultimate white toastie

Bread; when in the oven, there's no other smell that beats it. Even a hardened coffee addict like me has to admit that.
There are an almost infinite amount of types, textures, techniques and flavours - but I thought this one, my regular and reliable white loaf, would be the most appropriate to open my blog with. It's a replacement for your standard white, is really simple to make, and actually has a pretty good shelf life for fresh bread.
This recipe has been refined over the last few years, and you can flip some of the ingredients if you want a partially brown or wholemeal bread ... but for me the quantities and technique outlined here make the ultimate white toastie.
Ingredients (makes one 800 - 900g loaf tin sized loaf)
- 500g Strong White flour
- 5g Diax Malt flour (I buy this from BakeryBits)
- 7g Instant Dried Yeast (or 17g Fresh Yeast)
- 65g of starter at 100% hydration (i.e. the amount of water in the starter is the same as of the amount of flour)
- 12g Fine Salt
- 1 tbsp Corn Oil
- 150ml tap-hot water
- 150ml fridge-cold milk
You're faced with two options; knead by hand or by machine. Of course it's true that hand kneaded bread gives more satisfaction, but if you're like me you'll hardly be able to see straight when you first get up in the morning. There are some breads that really need to be made by hand, but this loaf works perfectly in a stand mixer.
So; put the flours and salt in a mixer bowl and attach your bread hook. Mix the hot water and cold milk together to create a warm mix of liquid (which you should be able to touch with your finger - remember, yeast dies at around 60°C) and add your yeast to it. Leave for 5 - 10 of minutes, then pour this onto the flours. Drop in the starter and put the machine on a low speed. As soon as it starts to come together (about 20 seconds), pour in the corn oil and set a timer for 10 minutes. Rub your eyes and make an espresso.
After the kneading, pull the dough out of the bowl and shape into a round by curling your hands underneath the dough to create a smooth bubble. Add a little more corn oil to a clean bowl, cover with some cling film and leave to prove in a warm place for 1 hour.
At this point you'll already see a good increase in volume - so deflate the dough by pressing your fingertips all over. Re-shape into a round and put back in the covered bowl for another hour - then repeat once or twice more if you have time. After each rise you'll see your dough getting more and more active, probably with some small bubbles on the surface. The photos below show the end increase after each 60 minute deflate and rise.

When your rise-deflation cycles are complete, add some flour to a loaf tin, deflate the dough one last time and press it out slightly. Flip the dough over, so the previously smooth part is on the bottom. Fold each side over into the middle to form a baton shape. Flip once more, tuck in the ends and place in your loaf tin. Lightly flour the surface and, with a plastic bag and leave for one final hour.
When there's 30 minutes left of the final prove, put your oven onto its highest setting and boil a kettle. If you have a baking stone, put this in the oven - along with a tray deep enough to hold about 500ml of water.
As the final hour of proving completes and your oven has fully pre-heated, slash the top of the loaf with diagonal cuts, and dust with some more flour. Make sure the water in your kettle is still near to boiling. Moving quickly, open the oven door and put your bread tin onto the shelf or stone, pour a good amount of boiling water from your kettle into the roasting tray and shut the door as soon as you can.
Set a timer for 10 minutes.
It's really important not re-open the oven for this period - the steam from the boiling water you've added is helping your loaf's moment of oven spring by slightly cooling the forming crust, making it supple for a little longer. This improves the flavour and texture of your crust by keeping the reactions going for as long as possible (read more about the Maillard reaction). The escaping Carbon Dioxide already in the dough, yeasts (giving off more CO² along with ethanol as they eat through sugar) and water (evaporating) inside the bread expand your dough push the bread's size to its full potential. Once the temperature of the dough gets high enough, the reactions stop and your initial crust is formed.
At this point, open the door and decide whether your bread is browning quickly or not. If it's pale, turn the oven to 190°C. If it's brown already, switch to 175°C. I generally find that 190°C does the trick in our oven.
Set a timer for 35 minutes.
When you hear the beep, check to see if the bread needs any more browning - 35 minutes is perfect for me, but you might need slightly more or less time. Remove from the oven then immediately remove from the loaf tin onto a cooling rack.
Give it a good 15 minutes, cut in and enjoy your hard work. Just make sure you leave enough for the rest of the week!

comments powered by Disqus


