


Jasmine Tea Macaron (2014)
Using tea from an old friend's new tea company


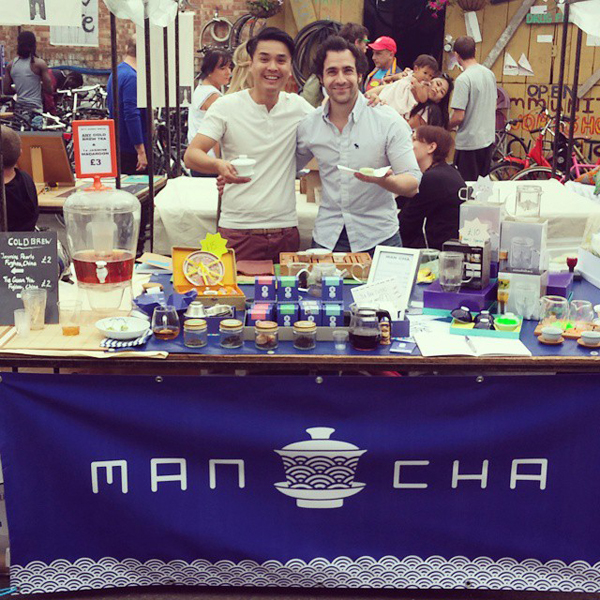
Last year I was invited to a tea tasting by Sammy, an old friend from junior school who I've known for 26 years. He moved to Hong Kong to teach many years ago, in the interim years married Jessi, and the pair of them travelled throughout Asia tasting and researching tea. They decided to start a company exporting the best teas they'd found - and this was the birth of Man Cha.
The Man Cha pearls are one of the best Jasmine teas the wife and I have ever tasted and, as soon as I did, I knew what needed to be done with it; a Jasmine Macaron.
Sam and Jessi's first venture is a series of pop-up market stalls to promote their new brand. They've asked me to make some of these macaron each week for the short period that the market stall is open, and this recipe has been tweaked a few times due to the extremely changeable weather we've been having recently. In the end, I opted for butter to stabilise the filling; it takes the edge off the white chocolate's sweetness, and brings the Jasmine flavour forward. I found the chocolate brand with the best flavour match to the tea was Callebaut, but it will work well with any.
Catch Mancha's last market appearances on Saturday 20th September at Netil Market (home of the legendary Bao bar and Lucky Chip van), then on the 21st at Backyard Market E1 near Brick Lane. Come down and grab a box or two for yourself, then try this recipe (and maybe save a bit for drinking!).
Ingredients (makes 12 to 15)
For the filling
- 170g Whipping cream
- 160g Callebaut's Finest Belgian White Chocolate (or equivalent) [Buy]
- 12.5g unsalted butter
- 12.5g Jasmine tea pearls
For the macaron shells
- 150g Ground almonds
- 150g Icing sugar
- 110g Egg whites
- 150g Caster sugar
- 37ml Water
- 2g Green powdered food colouring (Americolor) [Buy]
Equipment required
- Food processor
- Stand mixer
- Thermometer
- 2 baking mats (Fibrelux or Silpat if possible)
- 2 heavy trays
- 2 disposable piping bags and a 1cm nozzle
Jasmine Tea filling
Make the filling first, as it needs time to thicken. It's important to prepare ahead or you run the risk of over-infusing the tea. Weigh 12.5g of Jasmine tea and place in a bowl big enough to take that and the amount of cream. Pour 160g of whipping cream into a pot, and weigh 160g of white chocolate callets into a second bowl (or, if using bars, chop your chocolate finely). Place a sieve over the chocolate, set up a timer for 3 minutes, and place your thermometer into the pot of cream.
Now gently heat the cream; as soon as it reaches 85 degrees centigrade, immediately pour it over the jasmine tea and start the 3 minute timer. During the infusion time, agitate the tea with a spoon from time to time. When three minutes are up, immediately pour the infused cream into the sieve, letting it pour over the chocolate. Remove the sieve and let it sit like this for 30 seconds. Now add the softened butter and mix with a spatula to combine. If you have a stick blender, use it to blend any un-melted ingredients in the bowl, and make it as smooth as you can.
When you're happy with the consistency, pour the mix into a wide tray and cover the surface with cling film. Place in your freezer for 1 hour, then move to the fridge for at least 3 hours.
Macaron shells
This recipe uses the Italian meringue technique by Pierre Hermé to make the shells, with a few tweaks to get more consistent results at home.
Again start by preparing everything - have your baking mats on some heavy trays, get out the piping bag and place the nozzle inside. Measure out the 150g of caster sugar and 37ml of water into a small pot and place on your stove top with a thermometer inside. Measure out 55g of your egg whites into the bowl of a stand mixer, and connect the whisk attachment
Put the 150g of icing sugar in the bowl of a food processor, followed by the 150g of ground almonds (putting the sugar in first helps to stop it leaving the processor in a cloud of dust). Blend for a few minutes to make sure everything is as fine as possible. Tip the mix into a new bowl over your weighing scales (one big enough to fit this mix and the meringue later) and re-weigh to make sure you have exactly 300g of dry ingredients. Top up with a gram or two of icing sugar if necessary. Take the remaining 55g of egg white and place in a small bowl, then add about a 1/4 teaspoon of green food colouring (we're going for a subtle "green tea" look!) and mix. If you can't find the powder colour, paste is the next best thing. Avoid liquid food colouring if you can, as they tend to dilute the mix too much. Pour this mix on top of your dry ingredients and set next to the stand mixer.
Start to heat your sugar & water mix in the pot over a high heat. When it starts to bubble, give it a swirl in the pot to capture any sugar that hasn't made it into the syrup. Keep going until you hit 112 deg C. Turn on your stand mixer to a medium-high speed to get the whites whipping - remember not to go too mad with the speed at this point; you don't want stiff peaks nor soft ... somewhere in between is perfect. As the temperature of the sugar / water mix hits 118 deg C exactly, quickly remove from the heat, push up the mixer to high and slowly trickle hot syrup onto the whipping egg whites. Now leave the whites whipping until the cool completely. If you raise the whisk and the meringue drips off quickly, don't despair - you've probably not left it mixing long enough, so just keep going until it comes away on the whisk as a nice peak.
Take a spatula and transfer all of the Italian meringue you've just made into the bowl with the blended almond, sugar, egg white and colouring you prepared earlier. Fold with the spatula until you get the desired consistency - to me, this is the crucial point where things can go wrong, and it's really hard to actually explain or even take a photo of the correct consistency. The best way to describe it is to make a line with your spatula through the centre of the mix; if it folds slowly in on itself, taking about 15-20 seconds to nearly disappear (but never quite gets there) you've got it. If it's more liquid than that and just flies off the spatula, it's game over for you. Make sure you get right to the bottom of the bowl though, or you may leave unmixed colour or dry mix at the bottom.
When ready, hold the piping bag and fold the top of it over your hand. Use the spatula to transfer the mix inside, then twist the top (put a kitchen clip on it if you like - I've lost mix many times by wandering aimlessly around the kitchen, not realising batter is dripping out behind me) cut off the end and get ready to pipe. I always have a bit if kitchen roll ready to clean the nozzle if too much mix clogs around it. This helps you pipe more perfect circles.
On the baking mats (and I would advise the Silpat-style ones over silicone, and both of those over just using greaseproof/baking paper - much easier to get them off later) pipe a row of 3.5cm rounds, keeping your nozzle as straight as possible. Between each piping, I normally count "1000, 2000" and get a rhythm going. I'm not able to do that Parisienne "flick" where they just smash out a tray of 50 in one hit, so counting in my head generally helps to pipe more consistent sizes.
Keep about an inch between each round; you don't want to overcrowd the shells. Move to the next row, and pipe under the spaces you've left between the rounds on row 1. Carry on until you've filled the mat, then rap the baking tray on your work surface with relative force several times. This helps to settle the batter, reduce points, and is important not to forget.
Repeat with the other mat so you have two full sheets. Turn your oven on to 140 deg c, set the sheets aside in the kitchen for at least 30 minutes to form a skin. This part is just as important as the mixing - you need to make sure that, after 30 minutes, if you gently touch a piped macaron it won't feel wet or really even give too much. It's that skin that will help the foot develop in the oven.
After you are happy with the skin on the shells, it's time to bake. In a normal sized oven, you can get away with two sheets - the amount for this recipe. Any more, and too much steam will develop and everything will (probably) fail. I use granite baking stones and place my trays on top of these, which helps boost the heat from below. If you have a particularly powerful fan in your oven, watch out - sometimes it will blow the shells forward and you end up with a lop-sided result.
All ovens are different, but I tend to bake for 15 to 18 minutes. Place your trays into the oven, close the door, and set two timers - one for 15 minutes, the other for 3. When 3 minutes are up, briefly open the oven door to release some of the steam. At 6 minutes, you can turn the trays, then again at 12 minutes. When you reach 15 minutes, pull one of the trays out and touch a macaron to see if the foot has set. If it holds pretty still, they're done. If not, put them in for another 3 minutes. Often I'll turn off the oven at the 15 minute mark, open the door slightly and let them sit in there for a final 3 minutes. When cooked, pull them out, and slide the silicone mats onto your work surface. Let them cool before trying to remove.
Once you're happy the filling is set, start matching up pairs of macaron shells side by side. Spatula your filling into another piping bag with nozzle fitted, and pipe a good amount of filling into the centre of one half of each pair (approximately 1.5 tablespoons). Place the matching half on top and gently push down to squeeze the filling out to the edge. Repeat until all the macaron are assembled, then put them into an air tight container, and leave in the fridge for 24 hours. The fridge "rest" lets the filling seep into the shell and creates that traditional chewy texture.
When the rest time is up, remove from the fridge for about an hour and enjoy!

