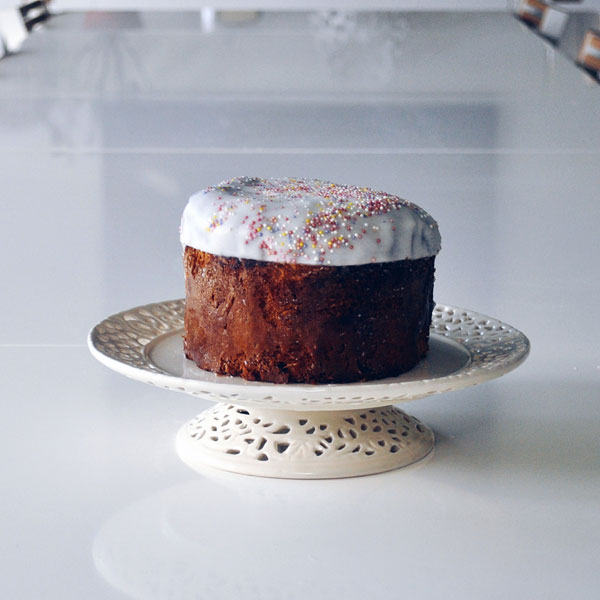
Kulich
Traditional Orthodox Easter cake

One of the best things about Easter is being in the kitchen - and this recipe will keep you in there for a few hours!
Kulich - it's a traditional sweet bread made from a natural yeast starter, eaten at Easter time in lots of Orthodox countries in Europe.
The technique below is an off-shot of my Italian Panettone recipe, which is a bit of a killer to get right (even after 10 attempts). It's worth it though, so I hope you'll give it a try.
Makes 2 individual cakes
Ingredients
For the sponge
- 230g double zero flour (Marino "Soffiata" or Shipton Mill's Cibata)
- 126g water
- 1g Osmotolerant yeast (Saf Gold)
- 55g caster sugar
- 37g egg yolk
- 4g diastatic malt flour
- 55g unsalted butter
- 57g white starter at 100% hydration
For the final mix
- 55g double zero flour (Marino "Soffiata" or Shipton Mill's Cibata)
- 3g salt
- 17g egg yolk
- 45g water
- 10g dark rum
- 15g sour cream
- 55g caster sugar
- 84g unsalted butter
- 12g honey
- 84g raisins
- 4 cardamom pods, crushed and seeds removed
For the eggwash
- 1 large egg
- 2 tablespoons of milk
For the icing
- 500g icing sugar
- 1 teaspoon of almond essence
- Warm water as required
- Hundreds and thousands
Equipment
- Panettone cases
- Stand mixer
A couple of days before you want to bake, feed your starter to get it to maximum activity.
Mix the sponge
Mix all the sponge ingredients together in a bowl so that they are just combined. Cover with cling film, then leave to proof for 12 hours at 25℃. If you have a proofing box, that will really help regulate the temperature.
Mix the final dough
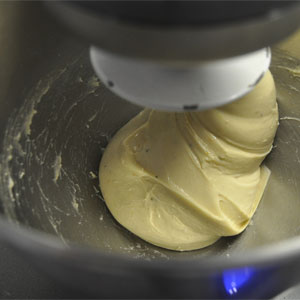
Start by placing the sponge in the bowl of your stand mixer and attach the dough hook. Add the flour, salt, egg yolk and 1/2 of the water. Turn your mixer to a slow speed for a few seconds until combined, then push up to a medium speed and mix for a further 5 minutes.
Next, add the sugar in 4 increments while the mixer is running with a 2 minute gap between each addition.
By now the dough has been mixing for 13 to 14 minutes. Change the speed to low, and add the butter a few pieces at a time. If your butter is a bit cold, just squeeze each piece with your fingers before dropping in. Continue mixing until all the butter has been incorporated.
 Mix the remaining water with the honey, rum and sour cream, then combine with the dough - again while the motor is still running.
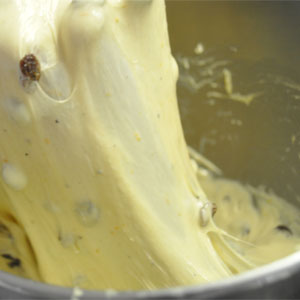
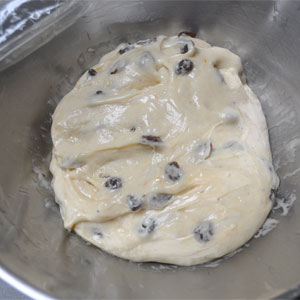
Finally, add the raisins and the cardamom and let them distribute evenly for a few seconds.
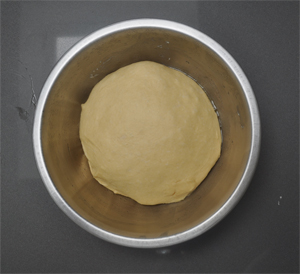
At this point you should have an extremely soft dough - stop the mixer to check it; you should be able to pull the dough back and get a window-pane effect as shown in the picture to the right.
If the dough hasn't quite developed, knead for a few minutes more until it cleanly pulls away from the sides of the bowl. Finally, transfer the dough to an oiled bowl and cover with cling film.
Bulk fermentation & bake
 Place your bowl in a warm place, 33 to 36℃ centigrade is good. Again, a proofing box comes in handy to regulate the temperature.
Let the dough rise for 20 minutes, then perform 10 stretch and folds on the dough while in the bowl. Cover it again then repeat this a second time after another 20 minutes have passed.
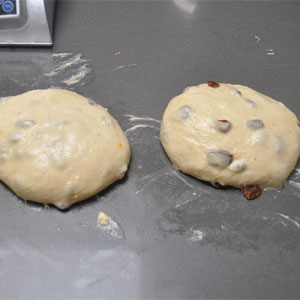 After another 20 minutes, perform the final 10 stretch and folds. Weigh the dough, and split into two equal amounts. Shape each piece into a tight ball, cover with oiled cling and leave on your work surface for another 20 minutes.
 Next, prepare your panettone cases by cutting 4 holes in each one, then placing a skewer or chopstick through each pair of holes.
Place one piece of the dough in each case, then put them back into a warm place again. This time, leave for about 4 hours so that the dough reaches near the top of each case. We're not making Panattone here, and we don't want a massively rounded top - so don't take it too far. The dough does rise slowly, so you need a bit of patience; once it's nearly there pre-heat your oven to 175℃. If you've got a baking stone, put it in to pre-heat as well.
The risen dough is really soft at this point, so gently eggwash the tops of each one. Finally, transfer to the oven and bake for 35 minutes.
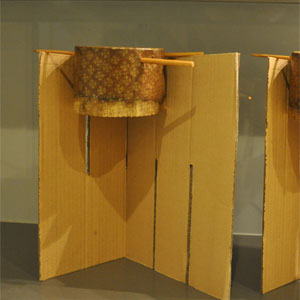
While the cakes are baking, and while trying not to sound like you're undertaking a science experiment or being an executioner; prepare your hanging apparatus. You can use two broom handles over the back of two chairs - but my preferred method is to use two pieces of cardboard from wine / alcohol packaging, the kind that slot together. If you make a right angle with these, that should just about give you enough room hang the cakes.
When the 35 minutes are up, remove the cakes from the oven and immediately invert them. Balance the chopsticks or skewers over the cardboard or your broom handles so that they hare hanging upside down. Leave to cool completely - a few hours or overnight
Decorate
Mix the icing sugar with the almond essence and water. Take it to a pouring consistency - thin enough to pour, but thick enough to set.
Now that the cakes have cooled you've got two choices for icing - do what I've done, which is to ice the top and then remove the paper so that you get a clean line or, the more traditional way, remove the paper case, then let the icing drip down the sides of the cake.
Sprinkle over some hundreds and thousands before the icing sets completely. You're supposed to have it blessed by a priest before eating; but if you don't have one of those handy, then just cut and serve.
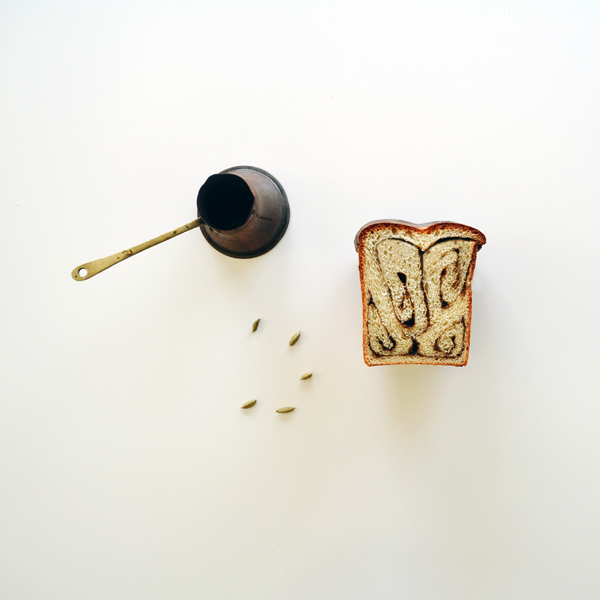
Arabic Coffee & Cardamom Brioche
Simple recipe for a great breakfast loaf
I'll always prefer espresso to any other type or method of coffee preparation, but Arabic coffee always brings back childhood memories of Sunday mornings.
All the Middle Eastern countries have their own claim to the way this type of coffee is prepared - in my house it was always the Armenian way; coffee, water, cardamom and sugar in the pot stirred then heated and risen twice.
This recipe combines the sweet coffee flavour with a rich brioche - best served lightly toasted to bring out the smell at breakfast time.
Makes 1 loaf
Ingredients
For the dough
- 400g strong white flour
- 7g dried yeast
- 10g salt
- 90g whole milk
- 100g unsalted butter
- 3 large eggs
- 30g caster sugar
For the filling
- 6 heaped teaspoons of finely ground Arabic-style coffee
- 30g caster sugar
- 10 cardamom pods
- 25g unsalted butter
For the glaze
- 1 large egg yolk
- 10g whole milk
Equipment
- Arabic coffee pot
- Muslin cloth
- Large loaf tin (3lb)
Start both the dough and filling the day before you want to make the bread.
Make the dough
 While I generally like to do things the traditional hand-made way, brioche is not the world's most fun thing to work with - so, place your dough hook on your stand mixer, and combine everything except the butter. Heat the butter very gently in a pot so that it melts almost completely, then let it cool slightly. Combine this with the rest of the ingredients, and turn your stand mixer to its lowest speed setting. Leave to knead for 10 minutes, then remove to a bowl, cover with cling film and put in your fridge for at least 7 or up to 24 hours.
Make the filling
You'll need to prepare 3 servings of coffee. Gently crush your cardamom pods to release the seeds within, then discard the dry outer shell.
Place a bowl large enough to hold 3 coffees next to your stovetop. Place two heaped teaspoons of coffee into your pot, followed by 10g of sugar. Fill the pot approximately 1/3 up with water and place on a medium-high heat. Don't take your eye off it or you'll get a volcano of coffee all over your kitchen.
As the coffee rises up the pot, pour half into the bowl then return to the heat for a moment. This will then bubble up again; so then pour the rest into the bowl.
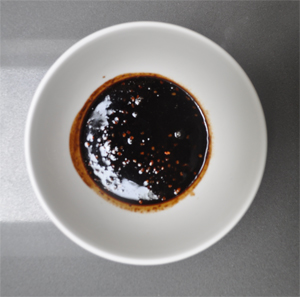
Repeat this process twice more with the rest of the coffee and sugar. When you're done, take a sieve and place it over a jug. Put your muslin cloth over that, and carefully pour the coffee through in order to take out the grounds. Don't squeeze too hard as Arabic coffee is very finely ground, and some might make it through.
Next, place the cardamom seeds into the filtered coffee and whisk in the butter while it's still reasonably hot. Leave it out to cool and infuse, then cover in cling film and place in the fridge.
The rise
 After your dough and filling are suitably cooled, take them out of the fridge and lightly dust a work surface with flour. Roll out the dough into a reasonably square shape approximately twice the length of your loaf tin, making sure you add a bit more flour underneath if it starts to stick.
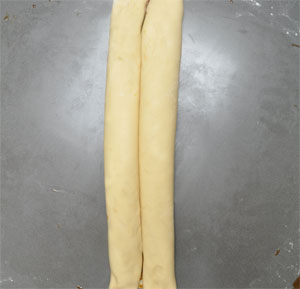
Spoon over the cooled filling, then use a flat spatula to try and spread it over the dough evenly. Next, start to roll one side in on itself, and keep rolling until you reach half way across your dough. Repeat with the other side so you end up with the two rolls meeting in the middle.
Butter your loaf tin, then gently cut the whole double-roll in half length ways so that you end up with two pairs of rolls. Place one set with the seam upwards in the bottom of the loaf tin, then invert the other so the smoother side is on top.
Leave this to rise for 3 or 4 hours, pre-heating your oven to 200 degrees C after about an hour.
After it has proved, make your egg wash by whisking the yolk and milk, then paint the top of your loaf and place it in the oven for 10 minutes. After 10 minutes are up, reduce the temperature to 180 degrees C and bake for a further 30 minutes. If your top looks too brown, cover in silver foil to stop it burning.
Once done, remove from the tin and let it cool for at least 15 minutes. Cut it, toast it, butter it and generally be happy.
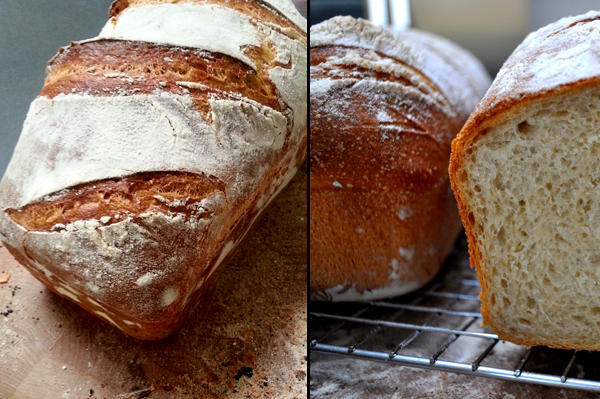
White loaf
The ultimate white toastie
Bread; when in the oven, there's no other smell that beats it. Even a hardened coffee addict like me has to admit that.
There are an almost infinite amount of types, textures, techniques and flavours - but I thought this one, my regular and reliable white loaf, would be the most appropriate to open my blog with. It's a replacement for your standard white, is really simple to make, and actually has a pretty good shelf life for fresh bread.
This recipe has been refined over the last few years, and you can flip some of the ingredients if you want a partially brown or wholemeal bread ... but for me the quantities and technique outlined here make the ultimate white toastie.
Ingredients (makes one 800 - 900g loaf tin sized loaf)
- 500g Strong White flour
- 5g Diax Malt flour (I buy this from BakeryBits)
- 7g Instant Dried Yeast (or 17g Fresh Yeast)
- 65g of starter at 100% hydration (i.e. the amount of water in the starter is the same as of the amount of flour)
- 12g Fine Salt
- 1 tbsp Corn Oil
- 150ml tap-hot water
- 150ml fridge-cold milk
You're faced with two options; knead by hand or by machine. Of course it's true that hand kneaded bread gives more satisfaction, but if you're like me you'll hardly be able to see straight when you first get up in the morning. There are some breads that really need to be made by hand, but this loaf works perfectly in a stand mixer.
So; put the flours and salt in a mixer bowl and attach your bread hook. Mix the hot water and cold milk together to create a warm mix of liquid (which you should be able to touch with your finger - remember, yeast dies at around 60°C) and add your yeast to it. Leave for 5 - 10 of minutes, then pour this onto the flours. Drop in the starter and put the machine on a low speed. As soon as it starts to come together (about 20 seconds), pour in the corn oil and set a timer for 10 minutes. Rub your eyes and make an espresso.
After the kneading, pull the dough out of the bowl and shape into a round by curling your hands underneath the dough to create a smooth bubble. Add a little more corn oil to a clean bowl, cover with some cling film and leave to prove in a warm place for 1 hour.
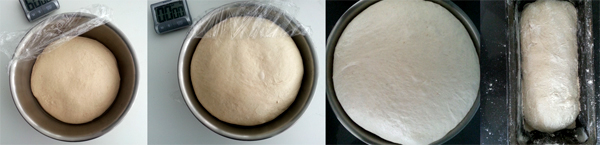
At this point you'll already see a good increase in volume - so deflate the dough by pressing your fingertips all over. Re-shape into a round and put back in the covered bowl for another hour - then repeat once or twice more if you have time. After each rise you'll see your dough getting more and more active, probably with some small bubbles on the surface. The photos below show the end increase after each 60 minute deflate and rise.
When your rise-deflation cycles are complete, add some flour to a loaf tin, deflate the dough one last time and press it out slightly. Flip the dough over, so the previously smooth part is on the bottom. Fold each side over into the middle to form a baton shape. Flip once more, tuck in the ends and place in your loaf tin. Lightly flour the surface and, with a plastic bag and leave for one final hour.
When there's 30 minutes left of the final prove, put your oven onto its highest setting and boil a kettle. If you have a baking stone, put this in the oven - along with a tray deep enough to hold about 500ml of water.
As the final hour of proving completes and your oven has fully pre-heated, slash the top of the loaf with diagonal cuts, and dust with some more flour. Make sure the water in your kettle is still near to boiling. Moving quickly, open the oven door and put your bread tin onto the shelf or stone, pour a good amount of boiling water from your kettle into the roasting tray and shut the door as soon as you can.
Set a timer for 10 minutes.
It's really important not re-open the oven for this period - the steam from the boiling water you've added is helping your loaf's moment of oven spring by slightly cooling the forming crust, making it supple for a little longer. This improves the flavour and texture of your crust by keeping the reactions going for as long as possible (read more about the Maillard reaction). The escaping Carbon Dioxide already in the dough, yeasts (giving off more CO² along with ethanol as they eat through sugar) and water (evaporating) inside the bread expand your dough push the bread's size to its full potential. Once the temperature of the dough gets high enough, the reactions stop and your initial crust is formed.
At this point, open the door and decide whether your bread is browning quickly or not. If it's pale, turn the oven to 190°C. If it's brown already, switch to 175°C. I generally find that 190°C does the trick in our oven.
Set a timer for 35 minutes.
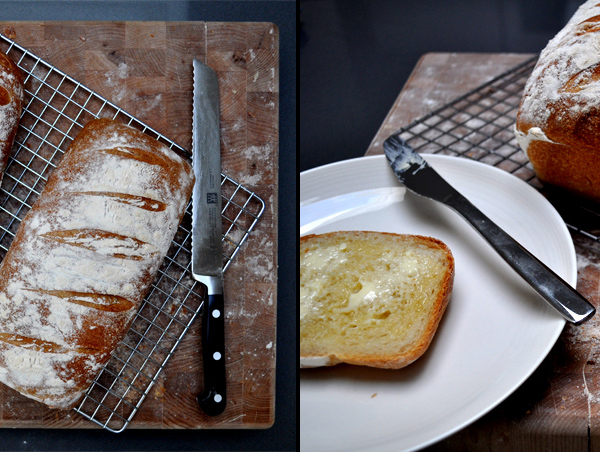
When you hear the beep, check to see if the bread needs any more browning - 35 minutes is perfect for me, but you might need slightly more or less time. Remove from the oven then immediately remove from the loaf tin onto a cooling rack.
Give it a good 15 minutes, cut in and enjoy your hard work. Just make sure you leave enough for the rest of the week!