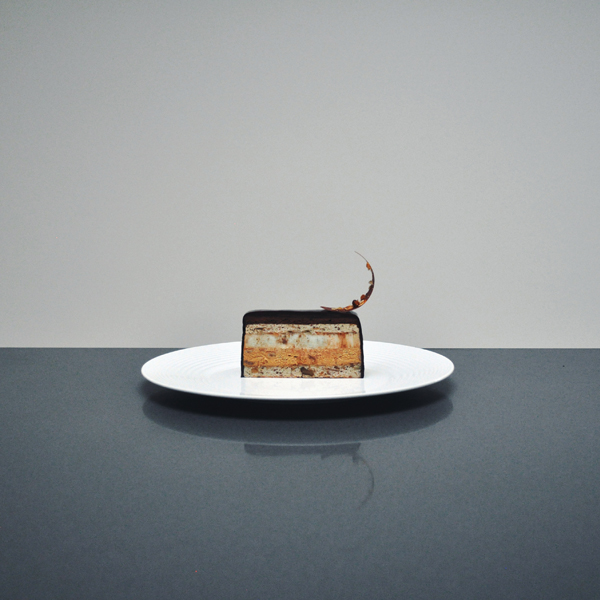
Meshgengouz-ish
A kind of Armenian Nutmeg cake

Armenia is famous for a few things - invention of the spinning concrete truck, Cher, Andre Agassi, Gary Kasparov, and that lady with the massive arse (all of us Armenians have one).
Desserts, however, are not something our cuisine is famous for. One of the most well known is the Armenian Nutmeg Cake - Meshgengouz Gargantag. It's a cake rich in nutmeg, sugar and walnuts that's great with a coffee.
I wanted to make something along these lines - so here it is; layers of walnut dacquoise, salted caramel walnut mousse, a set nutmeg custard and a dark espresso ganache.
Makes 1 cake
Ingredients
For the two layers of walnut dacquoise
- 70g walnuts, roughly chopped
- 130g ground almonds
- 60g flaked almonds
- 120g icing sugar
- 25g cornflour
- 40g caster sugar
- 140g egg whites
For the salted caramel & walnut mousse
- 30g walnuts, roughly chopped
- 85g caster sugar
- 30g water
- 2.5 sheets of gelatine
- 360g whipping cream
- 1/4 teaspoon of sea salt
For the set nutmeg custard
- 1 whole nutmeg
- 240g whole milk
- 40g caster sugar
- 20g cornflour
- 2 large egg yolks
- 2.5 sheets of gelatine
- 100g whipping cream
For the espresso ganache
- 100g dark chocolate, at least 70% cocoa solids
- 90g whipping cream
- 10g freshly brewed espresso
- 15g butter
For the chocolate glacage (recipe from William Curley's book)
- 18g of sheet gelatine
- 235ml water
- 300g caster sugar
- 100g cocoa powder
- 170g whipping cream
For the chocolate tuiles
- 150g bittersweet chocolate, at least 70% cocoa solids
- Any remaining nuts from the processes above
Assembly
- Coffee liquor (e.g. Illy)
Equipment
- Stand mixer
- Thermometer
- Some form of tall mould - a straight sided loaf tin would work, or cake frames if you're being flash
- Silicone mat
- Acetate cut into small triangles about 4 cm long and 2cm wide
- A U-shaped metal bouche mould (for the decorations)
This recipe takes a bit of patience. Okay, a lot - so start making it at least a day before. You'll be freezing the cake several times, so you can work on and off over several days.
Make the dacquoise
Heat your oven to 230 degrees C (fan), and take out two baking trays. Spread the whole nuts on one, then spread out the ground almonds on the other. Bake for 5 minutes until they get a bit of colour. Turn the oven down to 180 degrees C. Remove the whole nuts and crush them with a rolling pin, or a very brief whizz in a food processor - you want them to remain partially whole.
Take another tray, and lay a silicone mat on top - one that is about twice the size of your end cake. Pour the crushed nuts onto here and spread them out evenly.
Put the ground nuts in a bowl, then gently combine with the icing sugar and corn flour.
Place your egg whites in a stand mixer, and whip on high speed to a soft peak. Keep it running, and gradually pour in the caster sugar until you get a stiff meringue. Fold this meringue into the dry ground nuts until it has completely combined, then spread this out over the top of the roasted nuts in the tray. You want to end up with a thickness of around 1/2 a centimetre. Use a flat spatula to make the top as smooth as you can.
Bake for around 20 minutes, then remove and leave to cool.
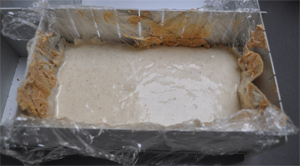
Assembly step 1: Line your cake tin with a double or triple layer of cling film - this will stop leaks later on. Measure your tin or cake frame with a ruler or measuring tape. Cut two pieces of cooled dacquoise the same size as this, then put one in the bottom of the frame, and the other in an air-tight container for later.
Make the salted caramel & walnut mousse
 Take the gelatine sheets and place in a bowl of cold water to soften. Weigh out the whipping cream and salt.
Put the caster sugar and water in a heavy bottomed saucepan - preferably a stainless steel one so you can see the sugar changing colour. Heat this until it boils, then watch it turn to an amber colour - don't let it go too far. When it reaches the smoke point, carefully throw in the salt, and slowly pour in the cream with one hand while mixing with a wooden spoon. It will bubble considerably, so just do it bit by bit.
Once these have all been mixed, take off the heat and pour into a tray or bowl. Let it cool slightly, then mix in the gelatine. It should dissolve after a few stirs, but if not use a hand blender to make the magic happen. Pour through a sieve into another container, then put in the fridge for about an hour (or freezer for 15 minutes)
When the caramel is cold, Whip the cream to soft peaks - just enough to hold its shape; don't bring it to that "churned" consistency. Take the caramel, and place it in your stand mixer (fitted with the whisk attachment). Whip it up until it's the consistency of butter.
Fold the cream into the caramel, then fold the walnuts in.
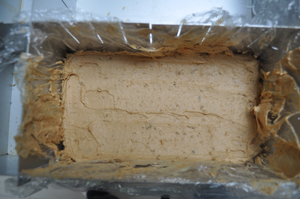
Assembly step 2: Take a some of your coffee liquor and pour into a small bowl. Dip a pastry brush into this, then lightly brush the dacquoise. Pour the caramel over the dacquoise layer, and make smooth with a flat spatula. Place the tin or frame in the freezer to make it completely hard.
Make the nutmeg custard
 This is a more liquid layer, so make sure your mousse has completely frozen before making it.
Take the gelatine sheets and place in a bowl of cold water to soften. Place the milk and caster sugar in a saucepan, then put the egg yolks and cornflour in a metal bowl. Whisk the yolks until they start to turn yellow and the cornflour has completely combined.
Heat the milk and sugar until they just hit the boil, then pour a little over the eggs to temper them, mixing with a wooden spoon or whisk as you go. Pour more and more of the hot milk into the bowl until everything has combined. Pour this back into the saucepan and immediately begin to stir or whisk - the cornflour will start to work within about 20 seconds.
Once the custard has thickened, take off the heat and pass it through a sieve into another bowl. Grate one whole nutmeg (I know, but trust me!) into the custard, then stir to combine.
Take the gelatine out of the water and add to the custard while it's still warm. Once combined, leave the custard to cool to nearly room temperature (5 - 10 minutes) then again whisk the cream to soft peaks. Fold the cooled custard into the cream.
Assembly step 3: Pour the custard over the mousse layer, and tap to distribute evenly. Place the tin or frame back in the freezer to make it completely hard.
Make the espresso ganache
Again, wait until the custard layer is completely hard before starting this step
Place the chocolate and butter in a heat-proof bowl, and the cream in a saucepan. Heat the cream until it just hits the boil, then pour over the chocolate & butter and leave to settle for 30 seconds. Use a wooden spoon to stir the mixture together or, my preferred method, use a hand blender to do it so you can make sure everything is well combined.
Let the ganache cool slightly so that it's less liquid, but still pliable
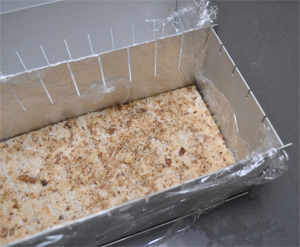
Assembly step 4: Take your reserved dacquoise layer and place this on top of the frozen custard. Again brush with some of your coffee liquor. Pour or spoon over the ganache and smoothen with a flat spatula. This is your final layer, so try to make it as smooth as you can. Place the tin or frame back in the freezer to make it completely hard.
Make the glacageNote: This is William Curley's recipe from his Couture Chocolate book. It's probably my favourite patisserie-related book, and has taught me a hell of a lot - so please go and buy it if you've not got a copy yet!
Put the gelatine sheets in a bowl of cold water. It's a lot of gelatine, but you need it.
Place the water and caster sugar in a saucepan, and heat until it boils - keep it rolling for 3 minutes.
Next, pour in both the cocoa powder and cream, then continue to boil for another 5 mintues. Don't keep the heat up to the max or it will bubble over the pan - keep an eye on it and reduce the heat if it gets too active.
 When time's up, take it off the heat. If the cocoa looks a bit claggy, use the hand blender again to make it smooth. Squeeze the water off the gelatine, then add it to the chocolate cream and stir.
Pour through a sieve into a jug, and place a thermometer in it. Let it cool to about 25 degrees C or as close as you can get - this can take up to an hour. If it sets completely, you can melt it again over a very gentle heat - but if you watch it and your cake is frozen you should be able to use it as soon as it's down to that temperature.
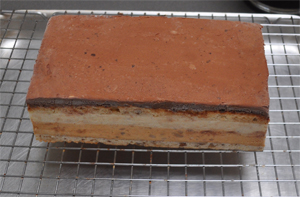
 Assembly step 5: Take the cake out of the freezer and unmould it from the tin or frame.
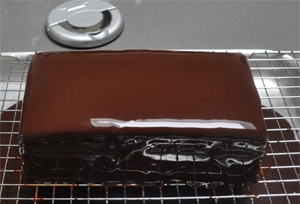
Pull off the cling film and then trim the edges so that you get as close to a clean rectangle as possible. Put the cake on a cooling rack that you've set over a clean tray. Pour the cooled glacage over the frozen cake - do it relatively slowly, but not too slowly as it will start to set over the frozen cake. Keep pouring all over, ensuring you have covered every part. I use a ladle to help with that - just scoop some up from the jug and pour over the naked bits. Place the whole thing, tray and all, in the fridge (note: not freezer) for one hour to set.
Make the chocolate tuilesPlace a metal bowl over a simmering pan of water. Put 100g of the chocolate into the bowl, and keep stirring with your thermometer.
When it reaches 47 degrees C, add the remaining 50g and remove from the heat.
Stir vigorously until it's all combined. Stop when you reach 31 to 32 degrees C. Take out the trusty hand blender if it has trouble melting.
If you need to raise it back to 31 degrees C, put it back on the bain marie briefly.
Place your acetate triangles on a silicone mat, then spoon over a small amount of the tempered chocolate. Smoothen with a spatula until it's covered and you can't see through onto the mat any longer
When you're done, clean the spatula then carefully remove each triangle onto a second clean mat and sprinkle with any of the nuts you have left
Leave this to set slightly - it needs to still be pliable, but not liquid. Carefully lift them again, and this time place into the bottom of a U-shaped bouche mould so that they curl up at the bottom. Let them dry completely before peeling off the acetate.
Assembly step 6: When the glacage has set, slice the cake with a hot knife. It's quite soft, even straight out of the fridge - so a blast in the freezer will help you not squash it as you cut. A piece 1.5 to 2cm thick would be a good portion. Top with a chocolate tuile and serve immediately.
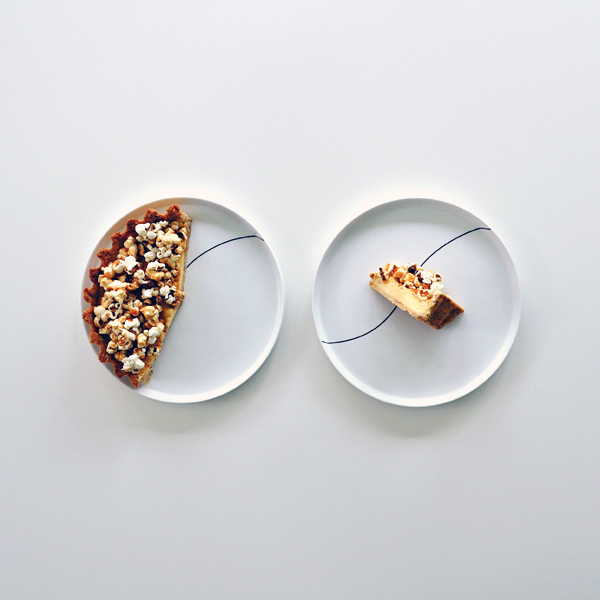
Salt/Sweet Popcorn Custard Tart
Popcorn flavoured custard in a popcorn pastry shell
One of my closest friends, his fiancée and their kid(s) are moving to Singapore next month, so I created this recipe - inspired by their love of American flavours - to bake them something for their going away present.
I wanted to get as much popcorn flavour in as possible, so there's toasted & ground popcorn in the pastry, the custard is infused with popcorn, and the topping ... well that's actually popcorn.
Makes 1 tart
Ingredients
For the fresh popcorn
- 110g popcorn kernels
- 3tbsp rape seed oil
For the pastry
- 10g popped corn from the above
- 215g type 55 flour or equivalent
- 3g fine sea salt
- 75g caster sugar
- 150g unsalted butter, cold from the fridge, chopped into cubes
- 1 whole large egg
- 1 large egg yolk
- Icing sugar for dusting the work surface
For the custard
- Approximately 1/2 the popped popcorn from the above
- 600g whipping cream (we only need 500g, but this includes some extra in case of popcorn absorption)
- 8 large egg yolks
- 75g caster sugar
For the topping
- All remaining popcorn
- 40g sugar
- 3g fine sea salt
- 15g unsalted butter
Equipment
- 7 inch tart case
- Baking beans
Pre-heat your oven to 220 degrees C.
Make the popcorn
The most fun part, and you'll see everyone in the house suddenly appear at the cooker. Heat 3 tablespoons of rape seed oil in a reasonably large lidded pan. When it's hot, throw in the popcorn kernels and immediately put the lid on. Shake every 20 seconds or so to make sure they don't stick. The popcorn will do its thing - as soon as the popping stops, tip into a bowl and set aside.
Make the pastry
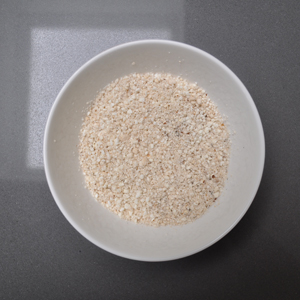
Take 20g of the fresh popcorn and spread evenly on a baking tray. Place in your pre-heated oven and toast for around 5 minutes. It should have a slightly brown colour, but nothing more than that - so keep an eye on it.
When it's done, tip into the bowl of your food processor and blitz until it's a fine powder. You'll probably get some random un-popped kernels in there, so try to get those out before adding to the pastry.
Weigh out 10g of the ground popcorn into a bowl, then add the flour, salt and sugar. Stir it around with your hands to ensure it's all uniformly mixed. Add in the cold cubes of butter, then rub everything together by hand until you get the texture of breadcrumbs.
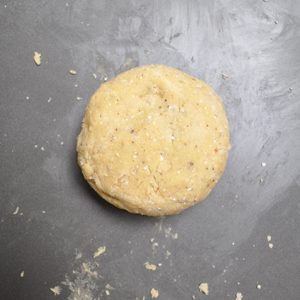
Next, briefly whisk the egg and egg yolk to combine, then pour this into the flour mixture and start to bring it all together by hand. Tip it out onto your work surface then, trying not to overwork it, gently push together until you get a smooth ball of pastry. Press down into a dish shape then wrap in cling film and refrigerate for an hour.
When the pastry has rested, prepare your tart tin by rubbing it lightly with butter (if you have Bake Easy spray that would also do the trick). Unwrap and dust your work surface with icing sugar, then carefully roll out the pastry until it's about 4mm thick. Fold this over your tart case and press into the corners as carefully as you can. Roll any excess over the top but don't cut it off.
This pastry is a kind of Pâte brisée, and can be quite hard to work with because of its high butter content and the fact that your corn won't absorb as much of the egg's moisture as the flour. Try not to create cracks - but if you do, just use some of the extra pastry to fill them in.
Place your tart case on a tray in the freezer for an hour, and turn the oven down to 170 degrees C.
Make the custard
While the pastry is freezing, you can now infuse the cream with the popcorn. Pour 500ml of whipping cream into a heavy bottomed pan and heat until it just comes to the boil. Remove from the heat, then transfer to a mixing bowl. Add approximately 1/2 of the popcorn from the first stage, then use a spoon to mix it with the hot cream. Place cling film over the top and leave to steep for about 45 minutes.
When the time is up, strain the popcorn from the cream using a fine sieve, and push down with a spoon to extract as much liquid from the popcorn as you can. Weigh the cream again, top it back up to 500ml, then pour back into the heavy saucepan.
Place the egg yolks in another bowl with the sugar and move back to the pastry case.
Blind bake the case
After the case has chilled, take some silver foil and tightly cover the inside of the case, pushing it into the corners, up the sides, over the top and around the outside edges (matte side down). Fill the case with baking beans, then place in the oven for 20 minutes.
At this point the pastry, being so buttery, will have fallen off around the top of the case and you should be left with a clean edge at the top. Very carefully remove the beans & foil, then return the case to the oven for a further 10 minutes.
Remove the case from the oven, then turn it down to 130 degrees C for the final stage.
Baking the custard
Whisk the egg yolks and sugar until pale yellow, then heat the infused cream to the boil again. Pour a small amount onto the egg yolks while whisking in order to temper the eggs, then slowly add the rest of the cream.
Pour the mix through another sieve into a pouring jug, then place the pastry case back into the oven shelf. Next, pour the infused custard into the case and bake for 35 minutes until just set.
Make the topping
With the tart baked, remove from the oven and allow to cool to room temperature. Remove the tart case.
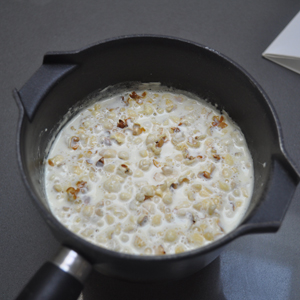
In a heavy pot, heat the 40g of caster sugar until it starts to become a caramel colour (just before the smoke point). Carefully add the salt, then the butter, and whisk until it stops bubbling. Pour this over the remaining popcorn and use a spoon to quickly mix before the caramel sets.
Place the now slightly hot popcorn onto the top of the cooled tart - the heat will allow it to sink in slightly and keep its place. As you pull the popcorn from the bowl, you'll also get some pulled sugar - so just randomly throw that over the top too.
Devour at room temperature. You'll need a really sharp knife to crack through the caramel!
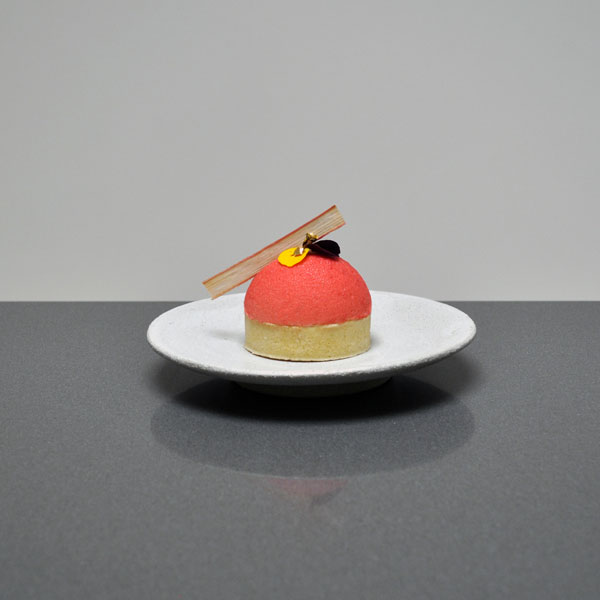
Rhubarb & Custard
Custard filled tart topped with a light forced rhubarb & ginger mousse
Full disclosure: I don't like rhubarb. It's one of about 3 ingredients I've never been able to eat.
Sometimes though, I'll venture over to the dark side of the things I hate and try to find a way to love it like everyone else - and, for the first time, it worked; I've been converted to the joys of the manky pink celery stuff.
This recipe was inspired by my favourite chef, Raymond Blanc, and his new show about Kew Gardens. If you've not seen it, I'd recommend it. He made a rhubarb & custard dessert which looked delicious, and made me think "how bad can it really be?"
Makes 6 with mousse left over
Ingredients
For the rhubarb and ginger purée
- 400g forced rhubarb
- 20g piece of ginger
- 75g caster sugar
For the mousse
- 4 leaves of gelatine
- 60g liquid glucose
- 120g caster sugar
- 50g water
- 120g egg whites
- 350g whipping cream
For the pâte sucree
- 250g type 45 flour [Buy] (or just plain if you have it)
- 140g unsalted butter (softened)
- 1 large egg
- 1 large egg yolk
- 40g ground almonds
- 90g icing sugar
- 1tsp vanilla extract
For the crème patissière
- 250g whole milk
- 1tsp vanilla paste, powder or essence
- 3 large egg yolks
- 37g caster sugar
- 12g plain flour
- 10g cornflour
For the white chocolate spray
- 250g white chocolate coverture
- 100g cocoa butter or groundnut oil
- 1tsp red food colouring powder
For the rhubarb tuille
- 1 stick of rhubarb
- 2tbsp grenadine
- 100g water
- 20g caster sugar
To finish
- Spring flower petals
- Gold leaf
Equipment
- Silicone mat
- Stand mixer
- Thermometer
- Spray gun (I use the Wagner W180P)
- 6 inch diameter semi-sphere silicone mould (with 6 holes)
- 6 inch tart rings
Note: there's some freezing and setting time involved here, so either start in the morning or the day before you want to serve them
Rhubarb and ginger purée
Chop the rhubarb into chunks, discarding any woody ends. Slice the ginger, then place both in a pot and cover with the caster sugar. Place over a medium heat, and watch as the rhubarb's juice starts to come out. Cook for about 5 minutes, stirring occasionally, until the rhubarb has broken down. Let it cool slightly to avoid burning yourself, then blend with a stick blender in the pot until you get a fine purée. Sieve it and set aside to cool a little more while you prepare the mousse ingredients.
Mousse
Soak the gelatine in cold water for 5 minutes. When it's soft, squeeze out the water and mix it with the now slightly cooled purée (which should still be too hot to touch with your finger) from the first step. It won't set immediately, but carry on working quickly anyway.
Prepare to make the meringue - place egg whites into the bowl of your stand mixer with whisk attached. Put the caster sugar, liquid glucose and water in a heavy pot over a high heat and start to measure the temperature with your thermometer. You're looking to get to the magic 116 degrees centigrade - so, when you hit around 113, start your stand mixer up on the highest setting to whip the whites. When you reach 116, slowly pour the sugar syrup down the edge of the stand mixer bowl. Leave the mixer running at its highest speed until you get a thick Italian meringue.
Measure out your whipping cream, then whip until it leaves a trail on the surface of the cream.
Once the meringue is cool, pour in the purée and gently combine with a spatula, then do the same with the cream.
Take a 6 hole semi-sphere silicone mould, and spoon in the mousse. Try to make sure it coats the entire outer surface of each half sphere. When full, scrape the top of the mould with a spatula so that everything is level. Place the mould on a tray, and put into the freezer for at least 3 hours.
Rhubarb tuille
Pre-heat your oven to 100C.Raymond used a vegetable peeler to make thin strips of rhubarb, but mine wasn't having any of it. If you also have trouble, just use a sharp knife to slice the stick of rhubarb as wafer thin as you can. Make as many as you can just in case they snap or fail. Place the strips into a heatproof bowl.
Place the grenadine, water and sugar in a saucepan and heat gently until it reaches a simmer, then pour this over the rhubarb. Leave for 10 minutes until cool.
Place a silicone mat on a heavy tray, then lie each thin piece of rhubarb spread out over that. Place it in the oven - mine took about 30 minutes, yours could take less or more time. Keep an eye on them. Alternatively you could use a dehydrator if you have one.
When the slices seem quite hard, remove from the oven to cool. When they've come to room temperature, they should be solid and crisp. Place into a sealed container and reserve for later. Don't put them in the fridge though!
Crème patissière
Pour the milk into a saucepan, add the vanilla and place on a medium high heat. Place the egg yolks and sugar into a bowl and whisk until a pale yellow colour. Next, add the flour and cornflour to the eggs and whisk again until you have a really smooth paste.
As soon as the milk is just about to boil, remove from the heat. Place your egg bowl on a tea towel to stop it moving, then pour a tiny amount of the hot milk over the yolks while you're whisking to temper them. Add a bit more milk, and keep on whisking, then add the rest, whisk for a moment, then pour the mix back in the pan over a more gentle heat.
Keep your whisk going gently, and you'll see it thicken within 30 seconds. Keep mixing, making sure it doesn't catch on the bottom of the pan. When it's very thick (about 60 seconds) pour it into a bowl and leave to cool. When cold enough, cover with cling film and put in the fridge.
Make, bake and fill the tart cases
Attach a whisk to your stand mixer, and add the butter. Whip until the butter has been creamed, then add the vanilla extract, icing sugar, ground almond and eggs. When combined, tip about 1/3 of the flour in. It should be combined in a few seconds, so repeat with the next 1/3 and then the final amount of flour. Stop the mixer when the mixture looks combined and a bit like wet sand.Turn this out onto your work surface and press it all into a smooth ball. Place the ball on some cling film, then flatten slightly with the palm of your hand. Wrap it in the cling and place in the fridge for at least 2 hours.
When the pastry has rested, take your baking mat, place it on a tray, then the individual flan rings on top of that. Remove the pastry from the fridge and, working quickly, dust with icing sugar roll to a thickness of about 3mm. Try and make it as square as possible.
Cut the rolled pastry into 6 even pieces, then carefully - using an offset spatula, the rolling pin or carefully with your hands - lift, and unroll each piece over the rings. This is the part where disaster can strike, so try and start the unrolling with enough "edge" to cover the closest part to where you're standing. If it has worked, start pushing the dough into the edges of each ring, leaving any excess folded over the top. Don't trim it yet. If you find any cracks, just patch them with spare pieces of pastry or some of the edge overhang.
Turn your oven on to 170C.
To help stop shrinkage, freeze the tart cases instead of just putting them in the fridge. Leave the tray in there for about 30 minutes until nice and cold. When you're ready to blind bake, quickly remove the cases from the freezer and place some silver foil (matte side down) into into each one. Scrunch the foil down over the top edges of the cases so each one is completely covered in foil, then gently some baking beans into each one.
You need to add a bit of extra cooking time due to the frozen case, so bake for about 20 minutes. After this time it should look anaemic but be solid - so remove the foil and beans, then brush with a beaten egg and return to the oven for a further 5 minutes.
Remove and leave to cool for about 10 minutes, then use a sharp paring knife to trim the outer edge of each case. Carefully remove the rings, then brush out any pastry crumbs.
After they have completely cooled, take your crème patissière and spoon into each case. Use a spoon or palette knife to even the filling out. Place in the fridge to firm up.
Chocolate spray
Only start this when your mousse has completely set.To prepare, cut 6 small pieces of greaseproof paper, large enough to hold each semi-sphere, but not much larger than that (or the paper will fold up during the spraying process and ruin the finish). Unmould each sphere onto the pieces of paper, then return to the freezer.
Get a cardboard box ready - a 12" record box is ideal (just ask your local hipster for one), but any box large enough for you to clearly see what you're spraying while containing the mist will be fine.
Place a metal bowl over a pan of simmering water and place the chocolate coverture into that. When it has completely melted, remove from the heat and add the red colouring. If you're using cocoa butter, melt it in a pan then blend - a 1/3 at a time - with the chocolate. If you're using oil, just fold it into the warm chocolate mix 1/3 at a time.
You'll end up with a nicely liquid mix - so pour that into your Wagner or similar spray gun.
Working quickly, take one semi-sphere out of the freezer, and place it in the bottom of the box. Stand 30 to 50 cm away from it, and spray into the box as straight as you can - be aware that if you tip the spray gun too far forwards you'll end up with air bubbles getting into the tube and you'll start spraying lumps at the mousse. Not good. Make a half , then spray again. If it doesn't look completely covered, turn and spray again. When you're happy, quickly return it to the freezer. Repeat with the other 6 mousses.
To construct
Take the filled tart cases out of the fridge, and the frozen sprayed mousse from the freezer.Using an offset spatula, carefully slide under each mousse to release it from the paper then, wiping off any excess chocolate you've picked up, move it on top of the tart case. It should line up pretty much perfectly if you've used the mould sizes specified in the ingredients section.
Repeat this with the other cases and mousse semi-spheres.
If you're not ready to serve, place these in the fridge. When you're about an hour before serving, remove to allow the mousse to thaw out.
The gelatine in the mousse will hold it solid at room temperature, so you shouldn't have any issues with melting - but it's nicer if it's colder than room temperature.
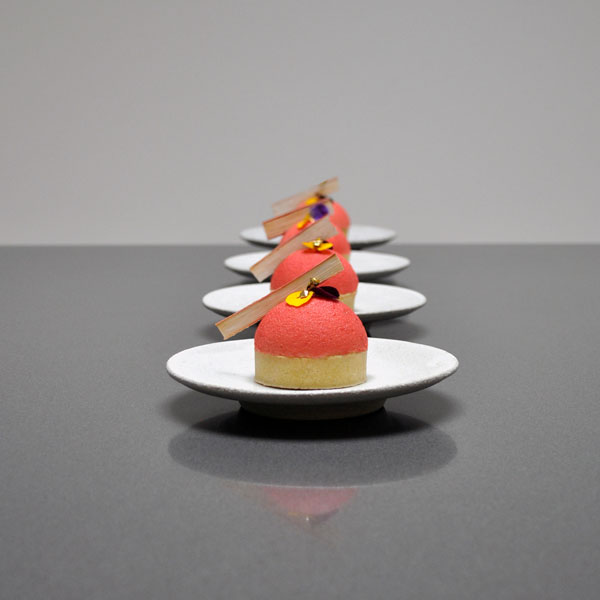
When it has thawed a little, take a rhubarb tuille and push it into the side of the mousse. Decorate with a couple of petals and a bit of gold leaf. Repeat with the other desserts.
... then enjoy. Or not, if you hate rhubarb.